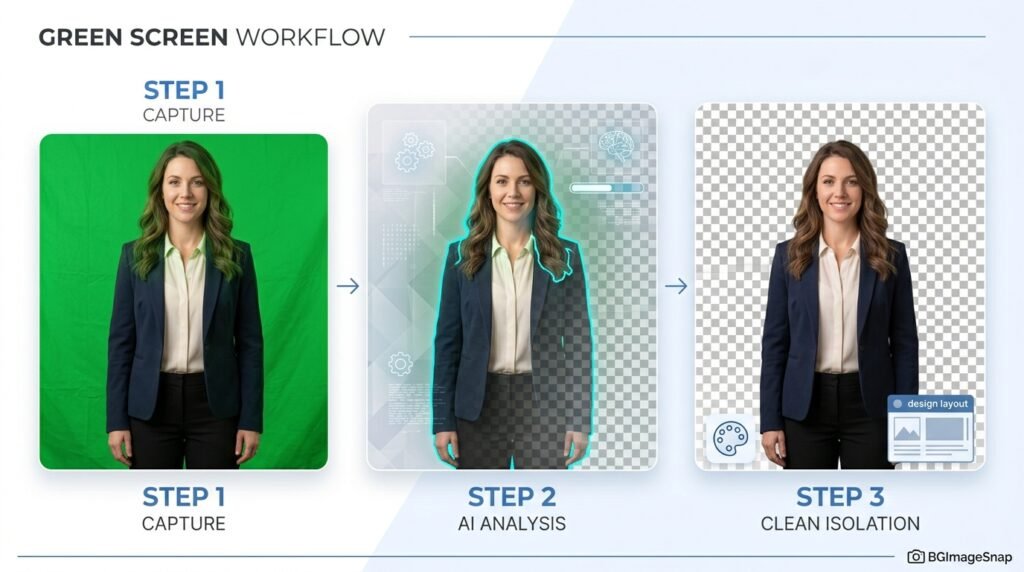
A green screen makes it possible to place a person product animal or other subject into almost any environment. It is widely used in video production, photography, gaming, social media content advertising, presentations and online marketing. But after recording or taking a photo against a green background you still need to separate the subject from that background.That is where a green screen remover becomes useful.A green screen remover is a tool or editing technique that removes a green background while keeping the main subject visible. Depending on the tool you can replace the green area with another image a different color a video or a transparent background.
Traditional chroma key editing can require professional software and careful adjustments. Modern AI powered background removal tools can make the process considerably easier especially for people who want quick results without learning complicated editing software.
This guide explains what a green screen remover is how it works how to remove green backgrounds from images what causes poor results and how to get cleaner edges and more professional looking results.
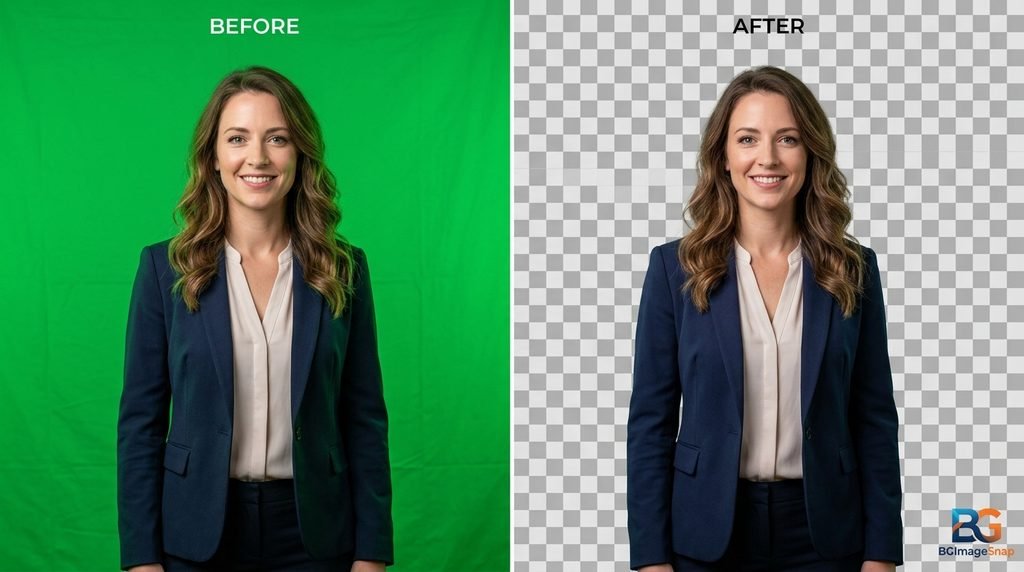
What Is a Green Screen Remover?
A green screen remover is an image or video editing tool designed to separate a foreground subject from a green background. The traditional method is called chroma keying. It identifies a specific color usually bright green and makes that color transparent. Editors can then place a new background behind the subject. For example, imagine a photograph of a football player standing in front of a green screen. A green screen remover can isolate the player and remove the green background. The player can then be placed inside a stadium on a promotional poster or over a graphic design.
The same technique can be used for:
- Product photography
- YouTube thumbnails
- Social media graphics
- Sports posters
- Gaming content
- Online advertisements
- Educational videos
- Presentations
- E commerce product images
- Profile pictures
- Creative photography
Modern tools can also use artificial intelligence to identify the subject automatically instead of relying entirely on a specific green color.
What Makes Green Useful for Background Removal?
Green is commonly used because it is significantly different from most natural skin tones and many objects people normally record. A strong contrast between the subject and background makes it easier for editing software to determine what should stay and what should disappear. However green screens are not automatically perfect. Shadows wrinkles uneven lighting reflections and green color spilling onto the subject can make removal more difficult.
How Does a Green Screen Remover Work?
There are two primary approaches: chroma key removal and AI powered background removal.
Chroma Key Removal
Chroma keying works by detecting a selected color range.The editor chooses green as the key color. The software then examines the image and removes pixels that fall within the selected green range.
Editors can adjust settings such as:
- Color tolerance
- Similarity
- Edge softness
- Spill suppression
- Transparency
- Feathering
The advantage is control. An experienced editor can fine tune the result very precisely. The disadvantage is that manual adjustment can take time particularly when the green background contains different shades or when the subject has complicated edges.
AI Background Removal
AI powered tools approach the problem differently. Instead of simply asking “Which pixels are green?” an AI system attempts to determine which parts of an image belong to the foreground subject and which belong to the background.
This can be especially helpful when the image contains:
- Hair
- Fur
- Small objects
- Irregular shapes
- Clothing
- Transparent areas
- Shadows
For many everyday editing tasks an AI background remover can be faster than traditional chroma key software.
Green Screen Removal vs. AI Background Removal
Although these terms are sometimes used interchangeably they are not exactly the same. A green screen remover is specifically associated with removing a green background generally using chroma key technology or AI. An AI background remover can remove many types of backgrounds including white, gray, outdoor, indoor, textured and complex backgrounds. For example, if you have a product photographed against a green screen either method may work well. But if your product was photographed in a room with furniture behind it an AI background remover may be more appropriate because there is no single background color to target.
Which Method Should You Choose?
Choose chroma key removal when:
- Your background is consistently green.
- You are editing video.
- You need precise color control.
- You already use professional editing software.
Choose AI background removal when:
- You want a fast workflow.
- You are editing individual images.
- You do not have professional editing experience.
- Your background is not perfectly uniform.
- You want automatic subject detection.
For many casual users AI is the easiest starting point.
How to Remove a Green Screen From an Image
Removing a green background can be a simple process when the original image is well prepared.
Step 1: Choose a Good Image
Start with the highest quality image available. A high resolution original gives the remover more visual information to work with. Avoid repeatedly compressed images because compression can create artifacts around the subject. If possible, use an image with clear separation between the subject and the green background.
Step 2: Upload the Image
Open your preferred green screen or background removal tool and upload the image. Many online tools support common image formats such as JPG, JPEG, and PNG.
Step 3: Remove the Green Background
If the tool offers automatic background removal allow it to detect the subject. For chroma key tools select the green background color and adjust the tolerance until most of the green disappears without damaging the subject.
Step 4: Inspect the Edges
Do not immediately download the result.
Zoom in and inspect areas where problems are common:
- Hair
- Fingers
- Clothing edges
- Shoes
- Ears
- Product corners
- Thin objects
If green pixels remain use additional cleanup tools if available.
Step 5: Replace or Keep the Background Transparent
Once the green screen has been removed you can choose what happens next.
You can:
- Keep a transparent background.
- Add a new photograph.
- Add a solid color.
- Add a gradient.
- Place the subject over a video.
- Create a promotional graphic.
PNG is generally useful when you need to preserve transparency.
Step 6: Download and Review
Export the final image at the highest suitable quality. Open the downloaded file independently to make sure transparency edges and image quality look correct.
How to Get Better Green Screen Removal Results
The quality of the final result depends heavily on the original image.
Use Even Lighting
Lighting is one of the most important parts of green screen photography. An unevenly illuminated background can contain several shades of green. This makes chroma key removal more difficult. Try to illuminate the background evenly and avoid strong shadows.
Keep the Subject Away From the Green Screen
When possible create some distance between the subject and the background. This can reduce green light reflecting onto the subject. That unwanted green reflection is commonly called green spill or color spill. Green spill is particularly noticeable around hair shoulders and reflective objects.
Avoid Green Clothing
If your subject wears green clothing against a green screen the software may struggle to distinguish the clothing from the background. This is one of the classic problems with chroma key editing. If green clothing is unavoidable an AI based tool or manual masking may provide better results.
Use High Resolution Images
Higher resolution files generally preserve more detail around important edges. This matters particularly when the subject has curly hair, fur, thin wires or small accessories.
Avoid Heavy Compression
JPEG compression can introduce blocky artifacts and color changes. If you are shooting specifically for background removal retain the original file whenever possible.
Common Green Screen Removal Problems
Even a good green screen remover can produce imperfect results.
Green Halo Around the Subject
A green outline around the subject is one of the most common problems. It usually happens because green light reflects from the background onto the subject.
Solution: Increase the distance between the subject and green screen during shooting. During editing use spill suppression or edge refinement.
Hair Looks Jagged
Hair is difficult because individual strands can be extremely fine. A simple color based remover may accidentally remove hair or leave green pixels between strands.
Solution: Use edge refinement, AI segmentation or a dedicated hair selection feature when available.
Parts of the Subject Disappear
If clothing or an object contains colors similar to the green screen the remover may incorrectly classify those areas as background.
Solution: Reduce the color tolerance or manually restore the affected area using a mask or brush.
Shadows Remain
Shadows on the green screen may contain dark green or gray areas that are not removed completely.
Solution: Use more even lighting when capturing the original image or refine the mask during editing.
Background Looks Gray or Dirty
This can happen when the green screen is poorly lit, wrinkled or contaminated with other colors. AI removal can sometimes handle these situations better than basic chroma keying.
Best Uses for a Green Screen Remover
A green screen remover is useful across many industries and creative workflows.
Sports Content
Sports creators can isolate athletes from green screen footage and place them into dramatic stadium environments.
For example, a football player photographed in front of green can be placed on a professional match day graphic.
Basketball, cricket, soccer, tennis and other sports can use the same approach for:
- Player posters
- Match previews
- Social media graphics
- Tournament promotions
- Thumbnail designs
- Player announcements
E Commerce
Online sellers can remove colored backgrounds from product photos and create consistent product images. A transparent product image can then be placed on a clean website background or promotional banner.
Social Media
Creators can remove themselves from a green screen and add:
- Trending backgrounds
- Travel locations
- News screenshots
- Educational graphics
- Product advertisements
- Creative effects
This makes green screen content particularly popular on short form video platforms.
YouTube
YouTubers can use green screen removal for thumbnails, intros, tutorials, commentary videos and reaction content. A creator might photograph themselves against green and then place their cutout over a screenshot or custom designed background.
Marketing and Advertising
Businesses can isolate products, employees, presenters or models and reuse them across different marketing campaigns. This can save time when the same subject needs to appear in several designs.
Practical Examples
Example 1: Removing a Green Background From a Product
Suppose an online store photographs a pair of headphones against a green background. After removing the background the headphones can be exported as a transparent PNG and placed on a white product page. The same cutout could also be used in an Instagram advertisement without photographing the product again.
Example 2: Creating a Sports Poster
Imagine a cricket player photographed in front of green. The background can be removed and the player’s cutout can be placed over a stadium image with team colors match information and promotional text. The result can become a social media post match announcement or promotional poster.
Example 3: Creating a Video Thumbnail
A creator records themselves against a green screen. After removing the background the creator can be placed beside a large headline or another image. This makes the subject visually stand out and can create a stronger thumbnail composition.
Green Screen Remover: What Should You Look For?
Not every tool provides the same quality.
When choosing a green screen remover consider these features:
Automatic detection: Useful for quick editing.
Transparent PNG export: Important if you want to reuse the cutout elsewhere.
Edge refinement: Helpful for hair, fur and complicated shapes.
Manual editing: Useful when automatic removal makes mistakes.
High resolution output: Important for professional designs.
Batch processing: Valuable when working with many images.
Privacy considerations: Check how uploaded images are handled particularly when working with sensitive or private photographs.
A tool should not only remove the background but also preserve the subject’s natural edges.
Frequently Asked Questions
1. What is a green screen remover?
A green screen remover is a tool or editing method that removes a green background from an image or video while keeping the foreground subject. It can use chroma key technology, AI, or a combination of both.
2. Can I remove a green screen from a photo online?
Yes. Online background removal tools can process many images without requiring traditional desktop editing software. The typical workflow is to upload an image remove the background refine the result if necessary and download the finished file.
3. Can a green screen remover create a transparent background?
Yes. If the tool supports transparency and exports the result as PNG the green background can be replaced with transparent pixels. This allows the subject to be placed over another image or design.
4. Why is there still green around my subject?
Green edges usually occur because of green spill, poor lighting, low image quality or inaccurate edge detection. Better lighting and more distance from the green screen can reduce the problem.
5. Is AI better than traditional chroma key?
It depends on the image. Chroma key gives editors detailed control over a consistent green background while AI can be easier for automatic subject detection and complicated backgrounds. For simple green screen images both approaches can work well.
6. Can I remove green backgrounds from videos?
Yes. Green screen video removal is commonly performed using chroma key tools in video editing applications. Some modern AI powered video editors can also detect and remove backgrounds automatically.
7. What image format should I use after removing the green screen?
PNG is often the best choice when you need a transparent background because it supports transparency. JPG is useful when you want a normal image with a solid background.
8. How can I get cleaner edges after removing green?
Use a high resolution original, even lighting, sufficient distance between the subject and green screen and edge refinement or spill suppression tools. Always inspect hair, clothing, fingers and other detailed areas before exporting.
- How to Remove a Background From an Image
- How to Fix a Blurry Photo
- Baby Passport Photo
- How to Remove Shadow From Photo
Conclusion
A green screen remover can turn a simple green screen photograph or video into a flexible creative asset. Traditional chroma key technology provides detailed control over color selection while modern AI powered background removal can simplify the process for users who want fast results.The best results start before editing. Use even lighting keep the subject away from the green screen avoid green clothing when possible and capture the highest quality image available. After removing the background carefully inspect hair, clothing, fingers, product edges and other detailed areas. For sports creators e commerce businesses, YouTubers, social media managers photographers and marketers removing a green background can make the same subject reusable across many different designs.