Zoomquilt Explained The Essential 7 Step Guide to Stunning Zooming Images

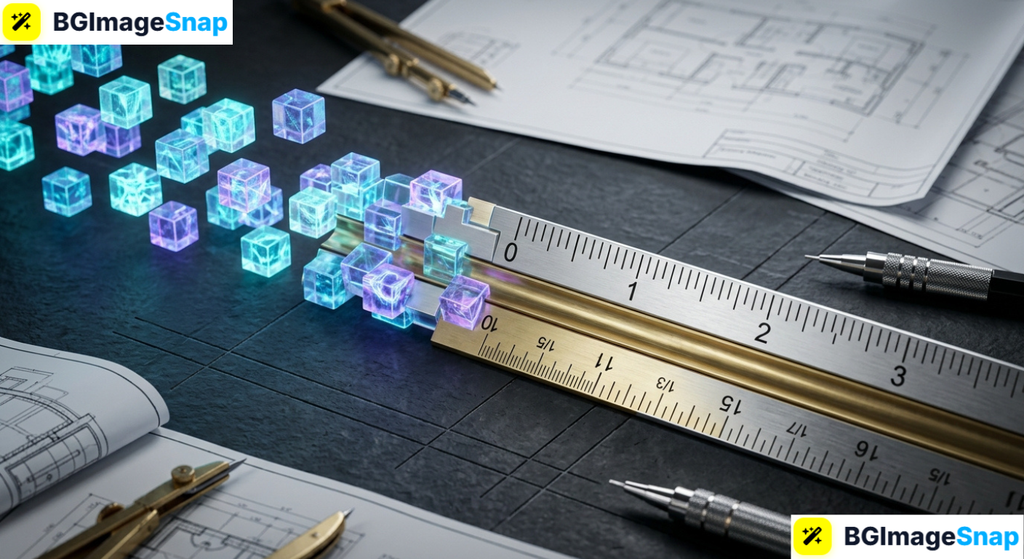
 Zoomquilt diagram showing four stacked image layers with arrows showing zoom progression from landscape to close detail

Introduction

You see them everywhere. Those mesmerizing images that seem to go deeper and deeper, revealing hidden worlds inside a single frame. They pull you in. They make you stop scrolling. You wonder how they work. But when you search for answers, you find broken links, outdated tutorials, or explanations so complex they might as well be in another language.

You want to understand the technology. You want to create one yourself. This guide answers both needs. Zoomquilt is a method and concept for creating images that reveal increasing levels of detail through interactive zoom. It transforms static pictures into immersive visual experiences. Whether you are an artist, a marketer, a teacher, or a curious creator, understanding how Zoomquilt works gives you a powerful tool for engagement.

In this guide, you will learn what Zoomquilt actually means, how zooming image technology works, the different types you can create, a clear step-by-step process to build your own, common mistakes to avoid, and practical tips for professional results.

No fluff. No confusion. Just practical knowledge you can apply immediately.

Quick Answer: What Is Zoomquilt?

Zoomquilt is the practice and technology behind creating images that display progressively deeper layers of visual detail when a user zooms in. Rather than showing one flat image, a Zoomquilt presentation reveals nested scenes, textures, or data within a single interactive frame.

Key takeaways:

  • Zoomquilt creates a deep zoom effect using layered image tiles
  • It is used for art, education, data visualization, and marketing
  • You can build one using image editing software and web-based viewers
  • Quality depends on resolution, layer organization, and smooth transition design
  • It works best when each layer offers meaningful new information

What Is Zoomquilt?

Zoomquilt refers to a visual technique where an image contains nested layers that become visible as the viewer zooms deeper. Unlike a standard zoom that simply enlarges pixels, a true Zoomquilt experience reveals entirely new compositions within each level.

The concept draws from deep zoom technology. Early implementations used massive high-resolution images broken into small tiles. As the viewer zoomed, the software loaded only the tiles needed for the current view, making the experience fast and smooth.

In practical use today, Zoomquilt describes both the artistic result and the method. Artists create layered composites. Designers build interactive presentations. Educators use them to show microscopic details or vast landscapes from a single entry point.

The core idea is simple. One image holds many worlds. The viewer chooses how deep to go.

How Does Zoomquilt Work?

Understanding how Zoomquilt works requires breaking it into two parts: the image structure and the viewing mechanism.

The image structure is composed of multiple layers. Each layer is a complete image at a specific scale. The top layer might show a forest. The next layer reveals individual trees. The next shows bark texture. The deepest layer might display cellular patterns or abstract art embedded within.

The viewing mechanism handles the transition. When a user clicks or scrolls to zoom, the viewer does not simply magnify the top layer. Instead, it fades or blends into the next layer. This creates the illusion of traveling deeper into the image rather than just closer to it.

Technically, this requires high-resolution source files. Each layer must maintain clarity at its intended display size. If a layer is meant to be viewed at full screen, it needs enough pixels to fill that space without blurring.

Modern implementations often use web libraries or specialized software that manages tile loading and smooth transitions. The user does not need to understand the code to appreciate or create the effect, but knowing the mechanics helps you plan your design.

Types of Zooming Images

Not every zooming image is a Zoomquilt. There are distinct categories with different purposes. Simple Scale Zoom: The image gets larger. Pixels stretch or sharpen based on settings. There are no hidden layers. This is common in e-commerce product viewers. Deep Zoom: Similar to Zoomquilt but focused purely on resolution. You start with one massive image and zoom to see fine detail. No artistic layer replacement happens.

Layered Zoomquilt: This is the true form. Each zoom level reveals a new artistic or informational layer. The transition is part of the experience. It combines storytelling with interaction. Parallax Zoom: As you zoom, different layers move at different speeds. This creates depth through motion rather than replacement. It is often used in digital art and gaming backgrounds. Choosing the right type depends on your goal. If you want to show hidden details, use layered Zoomquilt. If you want to display high-resolution photography, use deep zoom. If you want dynamic motion, consider parallax.

How to Create a Zooming Image: A 7-Step Process

Building your own Zoomquilt does not require expert programming skills. It requires careful planning, quality images, and the right workflow.

Step 1: Define Your Concept
Decide what story or detail progression you want. A nature scene going from landscape to leaf? A city view diving into street art? Your concept determines the number of layers.

Step 2: Gather High-Resolution Source Images
Each layer needs sufficient resolution. If your deepest layer will display at full width, calculate the pixel dimensions needed. For a 1920 pixel wide display, your deepest layer should be at least that wide.

Step 3: Design Your Layers
Create each layer as a separate image file. Keep them organized. Name them clearly. Layer one is the entry point. Layer five is the deepest view.

Step 4: Combine and Blend
Use image editing software to build composite previews. Check how each layer looks when scaled. Ensure colors and lighting feel connected, even when content changes.

Step 5: Export in Proper Format
Save master files in a lossless format like PNG or TIFF for editing. For web use, create optimized versions. Do not invent compression ratios. Test file sizes manually.

Step 6: Build the Interactive Viewer
Upload your layers to a web-based deep zoom viewer or embed them in a website using standard libraries. Ensure the transition speed feels natural, not jarring.

Step 7: Test Across Devices
Check your Zoomquilt on desktop, tablet, and mobile. Load times vary. If layers are too large, mobile users will experience delays.

Tools for Building Zooming Images

Several categories of tools help create Zoomquilt presentations. Understanding what each offers helps you choose wisely.

Tool TypePurposeBest ForConsideration
Image EditorsLayer creation and compositingArtists and designersRequires manual layer management
Deep Zoom ViewersTile loading and smooth navigationWeb presentationNeeds high-resolution source files
Online GeneratorsQuick interactive exportsBeginners and quick projectsLimited customization options
Custom Web LibrariesFull control over transitionsDevelopers and advanced usersRequires coding knowledge

When selecting a tool, consider your audience. A marketing team may prefer an online generator for speed. An artist may prefer full manual control through editing software.

Common Mistakes to Avoid

Creating a Zoomquilt seems straightforward, but common errors reduce the impact.

Using Low-Resolution Deep Layers: The deepest layer often gets overlooked. If it is blurry, the entire experience feels cheap. Always verify resolution at every level. Ignoring Transition Design: A sudden jump breaks immersion. Plan how layers blend. Even a simple fade improves the experience significantly.

Overloading with Too Many Layers: More is not always better. Three to five meaningful layers usually work best. Beyond that, users may lose interest or become confused. Neglecting Mobile Performance: Large image files load slowly on mobile networks. Test file sizes. If a layer takes more than a few seconds to appear, users will abandon the interaction. Skipping the Concept Phase: Jumping straight to image creation leads to disjointed results. A strong concept makes the technology feel purposeful, not just flashy.

Best Tips for Professional Zoomquilt Results

Quality comes from attention to detail. These practices separate amateur attempts from professional experiences. Keep Each Layer Meaningful: Every zoom level should reveal something worth seeing. Do not fill layers with noise or repetition. Use Consistent Lighting: Even when content changes, maintain similar lighting direction and color temperature. This creates subconscious continuity. Optimize File Sizes: Large files improve quality but hurt performance. Find the balance. Use compression tools that preserve visual detail. Design for the First Impression: The entry layer must be compelling. If it does not grab attention, users will never zoom deeper. Test with Real Users: Watch someone interact with your Zoomquilt for the first time. Notice where they hesitate or stop. Adjust based on behavior, not assumption.

FAQ: Common Questions About Zoomquilt

What is the difference between Zoomquilt and a simple zoom?

A simple zoom enlarges the same image. Zoomquilt reveals new visual layers, creating a journey rather than just magnification.

Can I create a Zoomquilt without coding skills?

Yes. Many online tools and image editors allow you to build layered compositions and export interactive viewers without writing code.

How many layers should a Zoomquilt have?

Most effective examples use between three and seven layers. The exact number depends on your concept, but each layer must add value.

Does Zoomquilt work on all devices?

It works best on devices with good processing and stable internet. Very old phones may experience slow loading if files are too large.

What resolution do I need for deep layers?

Deep layers should match or exceed the display resolution where they will be viewed. For standard displays, 1920 pixels wide is a common minimum.

Can I use Zoomquilt for commercial marketing?

Yes. Interactive images often increase engagement time and can improve conversion when used strategically in presentations or landing pages.

Is there a standard file format for Zoomquilt layers?

No single standard exists. Most creators use high-quality PNG or TIFF for editing and optimized JPG or WebP for final delivery.

How long does it take to create a Zoomquilt?

A simple three-layer project may take a few hours. A complex artistic piece can take days or weeks depending on detail and testing.

Conclusion

Zoomquilt transforms a single image into an experience. It combines art, technology, and storytelling into one interactive frame. You do not need to be a programmer or a professional photographer to create one. You need a clear concept, quality source images, careful layer planning, and a willingness to test and refine. The technology behind deep zoom and layered images is accessible. The creative potential is unlimited. Start with one layer. Add depth. Reveal something hidden. That is the essence of Zoomquilt.

What Is DPI in Images A Clear Practical Guide for Photographers Designers and Printers

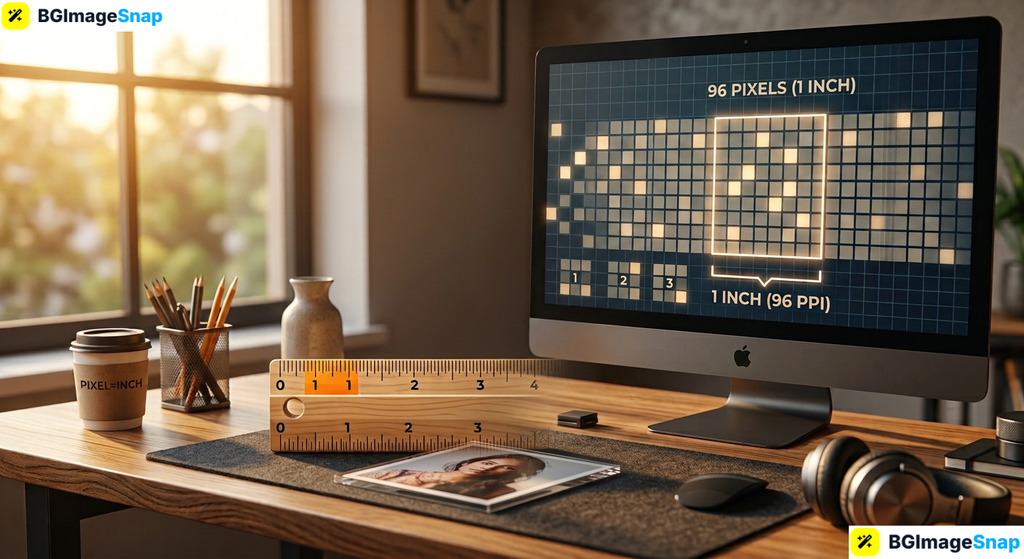
Alt Text: What Is DPI in Images? diagram showing how changing DPI affects physical print size without changing pixel count

Introduction

You have a photo you love. You want to print it. You send it to the lab. You get it back and it looks blurry. Grainy. Unprofessional. You check the file. It is 3000 pixels wide. That should be enough, right? But someone told you it needs to be 300 DPI. What does that even mean?

If you have ever asked yourself what is DPI in images, you are not alone. The term is thrown around in design, printing, and photography but rarely explained in plain terms. Most guides confuse it with resolution. Others claim it is the only thing that matters. The truth is simpler. And more important. This guide will show you exactly what DPI means, why it matters for print, why it does not matter for screens, and how to make sure your images look sharp no matter where they appear.

No jargon. No myths. Just clarity.

Quick Answer: What Is DPI in Images?

Short answer:
DPI stands for dots per inch. It is a measure of how many ink dots a printer places in one inch of space when printing an image. It does not change the image file itself it tells the printer how densely to lay down color.

Key Takeaways:

  • DPI is about printing, not digital display
  • A 300 DPI image printed at 4 inches wide needs to be 1200 pixels wide
  • On screens, DPI is ignored only pixel dimensions matter
  • Increasing DPI in software does not add detail it only changes print instructions
  • 300 DPI is the standard for high quality print, but lower values work for large formats

What Does DPI Actually Mean?

DPI means dots per inch. It is a measurement used by printers to determine how closely to place colored ink dots on paper.

Think of it like this:
A printer uses tiny dots of cyan, magenta, yellow, and black ink to create an image. DPI tells the printer how many of those dots to fit into each inch.

If you print a photo at 150 DPI, the printer places 150 dots of ink in every inch of width.
At 300 DPI, it places 300.

Higher DPI means more dots. More dots mean smoother gradients, finer detail, and less visible grain.

But here is the key point:
DPI does not change the number of pixels in your image. It only changes how those pixels are interpreted when printed.

For example:
An image that is 1200 pixels wide printed at 300 DPI will be 4 inches wide.
The same image printed at 150 DPI will be 8 inches wide.

The image does not get sharper or blurrier. The size changes. The printer simply spreads the same pixels over a larger or smaller area.

DPI vs Resolution: The Critical Difference

Many people use DPI and resolution interchangeably. They are not the same.

Resolution is the total number of pixels in an image.
DPI is how those pixels are distributed when printed.

TermMeaningAffectsExample
ResolutionTotal pixels (width x height)Digital display quality3000×2000 pixels
DPIDots per inch during printingPhysical print size and sharpness300 DPI

If you have a 6000×4000 pixel image, it has high resolution.
You can print it at 300 DPI as an 8×5.3 inch photo or at 150 DPI as a 16×10.7 inch poster.
The image quality stays the same. Only the size changes.

On a screen, only resolution matters.
Your monitor does not care about DPI. It displays one pixel per screen pixel. A 1200 pixel wide image looks the same on any device, whether the file says 72 DPI or 300 DPI.

When DPI Matters (And When It Does Not)

When DPI Matters

DPI matters only when you are printing.

  • You are printing photos, posters, or documents
  • You are sending files to a professional printer
  • You are preparing artwork for magazines, books, or brochures

When DPI Does Not Matter

Here are the times DPI does not matter:

  • You are posting on Instagram, Facebook, or Twitter
  • You are uploading to a website or blog
  • You are viewing on a phone, tablet, or computer screen
  • You are sharing via email or messaging apps

Screens have no concept of DPI. They only show pixels.
A 1000 pixel wide image will look identical on a phone, laptop, or TV no matter what DPI value is embedded in the file.

This is why you can send a 72 DPI image from your phone to a friend, and it looks perfect.
It is also why you cannot print a 72 DPI image at 8×10 inches and expect it to look sharp.

How to Check and Change DPI in Your Images

You do not need Photoshop. You do not need expensive software.

Here is how to check and adjust DPI on any device.

On Windows

  1. Right-click the image file and select Properties
  2. Go to the Details tab
  3. Look for Horizontal Resolution and Vertical Resolution
  4. These values are in DPI

To change DPI:

  1. Open the image in Paint
  2. Click Resize
  3. Under Units, select Percentage
  4. Leave the pixel dimensions unchanged
  5. Click OK
  6. Save as PNG or JPG

On Mac

  1. Open the image in Preview
  2. Click Tools then Adjust Size
  3. Look at the Resolution field (in DPI)
  4. Change the number to 300 if needed
  5. Make sure Scale Proportionally is checked
  6. Click OK
  7. Export the file

In Free Online Tools

Use a simple image editor like BGImageSnap to view and adjust DPI without installing anything.
Upload your file. Find the DPI setting. Change it to 300. Download.

Important: Changing DPI does not add detail.
If your image is only 800 pixels wide, changing DPI from 72 to 300 will not make it sharper. It will only make the print smaller.

Use CaseRecommended DPIWhy
High quality photo prints (6×4, 8×10)300 DPIStandard for professional labs and magazines
Large format prints (posters, banners up to 24 inches)150–200 DPIViewed from a distance, so less detail needed
Billboards and outdoor signs (over 3 feet)72–100 DPIViewed from far away pixels are invisible
Digital display (websites, social media)Any DPIScreen ignores DPI. Only pixel dimensions matter
Professional publishing (books, magazines)300 DPIIndustry standard for crisp text and detail
Home inkjet printer300 DPIMost printers perform best at this setting

Tip: If you are unsure, use 300 DPI. It is the safest choice for print.
If you are printing something large and viewed from afar, 150 DPI is often enough.

Common Mistakes People Make with DPI

Mistake #1: Thinking Higher DPI Means Better Image Quality

You open a 1000 pixel wide image and change its DPI from 72 to 300. You think it will look better when printed.

It will not.
The image is still only 1000 pixels wide. At 300 DPI, it will print at 3.3 inches wide.
It will not be sharper. It will just be smaller.

Mistake #2: Resizing Pixels to Increase DPI

You try to make a small image bigger by increasing pixel dimensions in software.
You think this will help with print quality.

It will not.
Adding pixels through interpolation (upsampling) creates guesswork.
The result is blurry, soft, or artificially sharpened.

Mistake #3: Ignoring DPI When Printing

You send a 72 DPI image to a print shop and expect a large poster.
It comes back pixelated.

The print shop does not know your intent.
They assume 72 DPI means low quality.
Always check the print requirements before sending files.

Mistake #4: Believing DPI Affects Web Images

You spend hours making a 300 DPI JPEG for your website.
It loads slowly. It looks the same as a 72 DPI version.

DPI is ignored on screens.
Only pixel dimensions matter.
A 1200 pixel wide image will look identical whether it is 72 DPI or 300 DPI.

Mistake #5: Confusing DPI with PPI

PPI (pixels per inch) is what screens use.
DPI (dots per inch) is what printers use.
For most users, the difference does not matter.
Just remember: for print, use DPI. For screens, use pixel width.

What Is DPI in Images? showing a printed photo next to its digital file with DPI setting visible

FAQ: Your Top Questions About DPI Answered

What is the best DPI for printing photos?

For standard photo prints up to 11×14 inches, use 300 DPI. For larger prints viewed from a distance, 150–200 DPI is acceptable.

Can I change DPI without changing image size?

Yes. In most software, you can change the DPI setting while keeping pixel dimensions the same. This only affects print size, not visual quality.

Does DPI affect file size?

No. File size is determined by pixel dimensions and compression. DPI is metadata it does not change the amount of data.

Why do some printers say they need 600 DPI?

Some printers support higher dot densities for finer detail, especially with text or fine lines. But for photos, 300 DPI is enough. Higher settings may slow printing and use more ink.

Do I need to set DPI when saving for the web?

No. Web browsers and apps ignore DPI. Set your image to the pixel width you need for example, 1200 pixels wide for a full-width banner and save as JPG or PNG.

Is 72 DPI the standard for the web?

It is a common default, but not a rule. There is no such thing as a “web DPI.” Only pixel dimensions matter.

Can I print a 72 DPI image at 300 DPI?

You can change the setting, but the image will print smaller. To print large, you need enough pixels. A 72 DPI image must be at least 2400 pixels wide to print at 300 DPI and 8 inches wide.

Should I always use 300 DPI?

Only if you are printing small to medium sized photos or professional documents. For large banners, websites, or social media, it is unnecessary.

Conclusion: DPI Is a Tool, Not a Rule

What is DPI in images?
It is a communication tool between your file and your printer.
It tells the printer how to spread your pixels across paper.

It does not make your image better.
It does not improve quality.
It does not affect how your image looks on a screen.

The only things that matter for image quality are:

  1. Pixel dimensions how many pixels you have
  2. File format whether you use PNG, JPG, or TIFF
  3. Compression how much detail you lose when saving

Use DPI to match your print size.
Do not use it to fix a low-resolution image.
And never waste time changing DPI for web use.

The best image is the one with enough pixels for its purpose.
The rest is noise.

150×30 Image Dimensions Pixels Uses & How to Resize Images

150x30 image size comparison showing distorted vs properly resized banner for web use

Introduction

You need a small image. Not too big. Not too small. Just right. Something that fits neatly in a sidebar, under a button, or beside a menu link. You search for it. You find one. But when you upload it, it stretches. It blurs. It gets cut off. The problem is not your design. It is not your software. It is the size. You need a 150×30 image. But you do not know what that means. You do not know how to make it. You do not know where it is used. This guide will change that.

You will learn exactly what a 150×30 image is, why it matters, where it is used, and how to resize any image to this exact dimension without losing quality or spending time on complicated tools. No fluff. No jargon. Just clear, practical steps you can use today.


Table of Contents


Quick Answer: What Is a 150×30 Image?

Short answer:
A 150×30 image is a rectangular graphic that is 150 pixels wide and 30 pixels tall. It is commonly used for small banners, buttons, and website elements that require a compact, consistent size.

Key Takeaways:

150×30 means 150 pixels wide by 30 pixels tall
Aspect ratio is 5:1 very wide and short
Used for banners, affiliate links, navigation buttons, and micro-ads
Must be resized correctly to avoid stretching or blurring
Works best with simple text, logos, or solid colors

This size is not arbitrary. It is designed to fit in tight spaces without overwhelming the layout.


What Does 150×30 Mean? (Pixels, Dimensions, Ratio)

Pixels Are the Building Blocks

A pixel is the smallest unit of a digital image. A 150×30 image contains 150 pixels across its width and 30 pixels down its height. That is 4,500 total pixels. This is not a measurement in inches or centimeters. It is a measurement in screen units. On a phone, tablet, or computer, the physical size of the image will change based on screen resolution but the pixel count stays the same.

The 5:1 Aspect Ratio

The ratio of width to height is 150 divided by 30, which equals 5. That means the image is five times wider than it is tall.This shape is called a “horizontal banner” or “leaderboard.” It is optimized for:

  • Horizontal space (like top or bottom bars)
  • Limited vertical room (like side menus)
  • Fast scanning (users read left to right)

Why This Matters

If you stretch a 150×30 image to 200×50, the content will look distorted. If you shrink a 300×60 image to 150×30 without proper resizing, it will blur.

The key is to start with the right size or resize correctly.


Where Is a 150×30 Image Used?

This size is not common for photos. It is built for function. Here are the most frequent uses:

1. Affiliate Marketing Banners

Many affiliate programs require banners to be exactly 150×30. This size fits neatly in blog sidebars, footer sections, or within article text without disrupting the flow.

2. Website Navigation Buttons

Small action buttons like “Sign Up,” “Download,” or “Learn More” often use this size to keep menus clean and fast-loading.

3. Ad Units for Small Sites

On blogs, forums, or niche websites, 150×30 is a standard size for low-impact, non-intrusive ads. It does not distract but still draws attention.

4. Social Media Profile Badges

Some platforms allow small badges or icons in bios or comments. A 150×30 image works well for these limited spaces.

5. Email Signature Elements

Small logos or call-to-action buttons in email signatures often use this size to remain readable on mobile devices.

In all these cases, the goal is the same: deliver a message quickly, clearly, and without taking up much space.


Why Size Matters: The Consequences of Getting It Wrong

Using the wrong image size may seem harmless. But it causes real problems.

Problem 1: Distortion

If you force a 300×60 image into a 150×30 space, the software will stretch or squeeze it. Text becomes unreadable. Logos look broken.

Problem 2: Blurriness

If you shrink a large image without proper resizing, details blur. Sharp edges turn fuzzy. This looks unprofessional.

Problem 3: Layout Breakage

Websites and platforms often lock dimensions. If your image is too big, it may not upload. If it is too small, it may appear tiny or get cut off.

Problem 4: Slow Loading

Large images take longer to load. Even if they are resized later, the original file size still slows down the page.

Problem 5: Poor User Experience

Users notice when things look off. A stretched banner or blurry button makes your site look careless. The right size is not just about fitting. It is about respect for your audience, your platform, and your design.


How to Resize Any Image to 150×30

You do not need expensive software. You do not need to be a designer. Here is how to do it in three simple ways.

Go to a free, trusted tool like BGImageSnap.

  1. Upload your image.
  2. Set width to 150 and height to 30.
  3. Choose “Maintain Quality” if available.
  4. Download the new file.

This method works for JPG, PNG, GIF, and other formats. It is fast, safe, and requires no install.

Method 2: Use Your Computer’s Built-in Tools

On Windows:

  1. Open the image in Paint.
  2. Click “Resize.”
  3. Select “Pixels” as the unit.
  4. Enter 150 for width and 30 for height.
  5. Make sure “Maintain Aspect Ratio” is unchecked.
  6. Save as PNG or JPG.

On Mac:

  1. Open the image in Preview.
  2. Click “Tools” then “Adjust Size.”
  3. Uncheck “Scale proportionally.”
  4. Enter 150 for width and 30 for height.
  5. Click OK.
  6. Export as PNG.

Method 3: Use a Free App on Your Phone

Download a simple image editor like Snapseed or Photo Editor by VSCO.

  1. Open the image.
  2. Tap “Resize” or “Crop.”
  3. Enter 150 for width and 30 for height.
  4. Save and export.

Always save your resized image as PNG if it has text or sharp edges. Use JPG only for photos with no text.


Common Mistakes When Resizing Images

Mistake #1: Leaving “Maintain Aspect Ratio” On

If you keep this option enabled, the tool will resize the image proportionally. A 150×30 image is 5:1. If your original image is 4:1 or 3:1, forcing it to 150×30 with this option on will leave white bars or cut off parts of the image.

Fix: Always turn off “Maintain Aspect Ratio” when you need exact dimensions.

Mistake #2: Starting with a Low-Resolution Image

If your original image is smaller than 150×30, resizing it up will make it blurry. You cannot add detail that was never there.

Fix: Always start with an image that is at least as large as your target size.

Mistake #3: Saving as JPG for Text or Logos

JPG uses compression that blurs edges. Text becomes fuzzy. Logos lose sharpness.

Fix: Use PNG for any image with text, lines, or transparency.

Mistake #4: Ignoring File Size

Even a 150×30 image can be large if saved with poor settings. A 150×30 PNG should be under 50 KB. If it is over 200 KB, you are wasting bandwidth.

Fix: Use “Save for Web” options in tools or compress with free online tools.

Mistake #5: Not Testing in the Final Place

Upload your image to the actual website, email, or platform before using it widely. Some systems crop, stretch, or resize images automatically.

Fix: Preview it where it will be used. Adjust if needed.


Tips for Creating Clean 150×30 Images

Tip 1: Use Simple Designs

With only 30 pixels of height, complex graphics will disappear. Stick to bold text, solid shapes, or minimal logos.

Tip 2: Keep Text Large and Centered

Use a font size of at least 14 pixels. Avoid thin fonts. Center your text vertically and horizontally.

Tip 3: Use High Contrast Colors

White text on black. Black text on white. Dark blue on light yellow. Avoid similar tones like gray on beige.

Tip 4: Add a Border if Needed

A thin border (1–2 pixels) helps the image stand out without needing color.

Tip 5: Test on Mobile

View your image on a phone. If the text is hard to read, it is too small.

Tip 6: Save as PNG

PNG supports transparency and preserves sharp edges. Use JPG only if you need the smallest file size and the image has no text.

150x30 image size comparison showing dimensions in pixels with examples of banners, buttons, and logos

FAQ: Your Top 150×30 Image Questions Answered

1. What is the pixel size of a 150×30 image?

It is exactly 150 pixels wide and 30 pixels tall. This equals 4,500 total pixels.

2. Can I use a 150×30 image for a logo?

Yes, but only if the logo is very simple. Complex logos with fine details will not be visible at this size. Use it for brand icons or text-based logos.

3. Is 150×30 the same as 150 by 30?

Yes. Both mean width 150 pixels and height 30 pixels. The order is always width first, then height.

4. Why does my image look stretched after resizing?

You likely kept “Maintain Aspect Ratio” turned on. Turn it off and enter the exact numbers.

5. Can I make a 150×30 image from a photo?

Yes, but only if the photo has a clear subject. Crop the photo tightly to focus on one element. Avoid using full scenes they will become unreadable.

6. What file format should I use for a 150×30 image?

Use PNG for text, logos, or buttons. Use JPG only if the image is a photo and you need a smaller file size.

7. How do I make sure my 150×30 image loads fast?

Save it with low compression. In PNG, use 8-bit color if possible. In JPG, set quality to 70–80%. Aim for under 50 KB.

8. Can I use this size for social media?

Most social platforms require larger sizes. 150×30 is best for websites, emails, and blogs. Use it only if the platform allows custom banner sizes.


Conclusion: Precision Is Power

A 150×30 image is small. But it is not insignificant.

It is the difference between a clean, professional layout and a cluttered, broken one. It is the difference between a button that works and one that confuses. It is the difference between a user who stays and one who leaves. You do not need fancy tools. You do not need to be an expert. You just need to know the right size and how to use it. Whether you are placing a banner, creating a button, or designing a micro-element, getting the dimensions right is the first step to good design. Start with 150×30. Get it right. Then move on.

JFIF to PNG How to Convert JFIF Images to PNG Online for Free 2026

JFIF to PNG comparison showing solid white background vs transparent PNG for design use

Introduction

You download an image from a website maybe a product shot, a meme, or a screenshot and save it. Later, you try to use it in Canva, Photoshop, or a website banner… and it won’t go transparent. The background is stubbornly white. You can’t crop it cleanly. You can’t layer it over other designs.

You check the file extension: .jfif.

You’ve never heard of it. You don’t know what to do.

Welcome to the world of JFIF a format that looks like JPEG but behaves like a hidden trap for designers, content creators, and everyday users.

The good news? You don’t need to be a tech expert to fix this. Converting JFIF to PNG is simple, free, and safe if you know how.

In this guide, you’ll learn exactly why JFIF files cause problems, how PNG solves them, and the only three reliable ways to convert JFIF to PNG without installing software, signing up, or risking your files.

No jargon. No upsells. Just clear, practical steps you can use today.


Quick Answer: How to Convert JFIF to PNG for Free

Short answer:
Use a free, no-signup, web-based tool like BGImageSnap to convert JFIF to PNG in under 20 seconds no software, no login, no watermarks.

Key Takeaways:

 JFIF to PNG conversion is 100% free  no credit card needed
 Works on any device  Windows, Mac, iPhone, Android
Preserves image quality  no compression or blurring
 Supports transparency  PNG lets you remove backgrounds
 No registration or data storage  your files are deleted after conversion

Avoid tools that ask for your email, password, or payment. Most are scams or data harvesters.


What Is JFIF? (And Why It’s Confusing)

JFIF = JPEG File Interchange Format

JFIF (JPEG File Interchange Format) is not a different image type it’s a container for JPEG data. Think of it like a ZIP file for JPEGs. Most images you download from websites, emails, or social media that end in .jfif are actually JPEGs with a different file extension.

Why Does JFIF Exist?

  • It was created in the early 2000s to standardize how JPEGs are stored across different systems.
  • Some cameras, scanners, and older software save JPEGs as .jfif instead of .jpg or .jpeg.
  • Modern browsers and apps often rename .jfif to .jpg behind the scenes which is why you might not even notice the difference.

The Problem?

  • Not all programs recognize .jfif  especially design tools like Canva, Figma, or Adobe Express.
  • Transparency doesn’t work  JFIF always has a solid background (usually white).
  • You can’t edit it easily  if you open it in Photoshop, it may not render correctly.

 Reality check: A .jfif file is 99% identical to a .jpg. But because of the extension, your software treats it like an unknown format and that’s where the trouble starts.


Why Convert JFIF to PNG? (The Real Reason)

You don’t convert JFIF to PNG just because “PNG is better.” You do it because PNG solves real problems that JFIF creates.

PNG Is the Universal Design Format

PNG (Portable Network Graphics) was built for:

  • Transparency — remove backgrounds, layer images
  • Lossless compression — no quality loss when edited
  • Web compatibility — works perfectly on websites, apps, and social platforms
  • Editing flexibility — supports layers, masks, and transparency channels

When You Must Convert JFIF to PNG

Use CaseWhy PNG Is Essential
Designing social media postsCanva, Instagram, TikTok require transparent backgrounds for overlays
Creating logos or iconsPNG preserves clean edges and transparency
Adding images to websitesPNG loads faster and renders cleanly on all browsers
Removing backgroundsJFIF has no alpha channel PNG does
Printing high-quality graphicsPNG retains sharpness without compression artifacts

 Never use JFIF for design work. Even if it looks fine, it will break when you try to edit or layer it.


JFIF vs PNG: Key Differences at a Glance

FeatureJFIFPNG
File TypeJPEG container (lossy)Standalone format (lossless)
Transparency Support❌ No✅ Yes (alpha channel)
CompressionLossy (reduces quality)Lossless (no quality loss)
File SizeSmallerLarger (but still manageable)
Editing FlexibilityPoor — hard to remove backgroundsExcellent supports layers and masks
Web CompatibilityLimited some tools don’t recognize .jfifUniversal works everywhere
Best ForSimple viewing, email, basic sharingDesign, web, editing, branding

 Key Insight: If you’re using the image for anything beyond viewing  convert it to PNG. Always.


3 Safe Ways to Convert JFIF to PNG Online

Here are the only three methods you should trust ranked by ease and safety.

MethodBest ForProsCons
1. BGImageSnap (Online Tool)Everyone — especially beginnersFree, no signup, batch support, instant download, preserves transparencyRequires internet
2. Online-Convert.comUsers needing advanced optionsSupports batch, format tweaksAds, slow, occasional pop-ups
3. Convertio.coUsers comfortable with UIClean interface, supports 10+ formatsFree version limits to 2 conversions/day

Avoid These:

  • Desktop software that installs toolbars — often bundled with malware.
  • Mobile apps that ask for photo permissions — many steal your gallery.
  • Tools that require email login — they sell your data.
  • “Free” converters that watermark your PNG — they’re not free.

 Our Recommendation: Use BGImageSnap. It’s the only tool that’s truly private, fast, and handles transparency correctly with zero friction.


Step-by-Step: Convert JFIF to PNG Using BGImageSnap

BGImageSnap converts JFIF to PNG in three simple steps no install, no login, no ads.

Step 1: Visit the Tool

Go to: 

You’ll see a clean interface with one box: “Drop your JFIF files here or click to upload.”

Step 2: Upload Your Files

  • Click the box or drag and drop one or more .jfif files from your computer or phone.
  • Supported formats: .jfif.jpg.jpeg
  • You can upload up to 20 files at once.

Step 3: Download Your PNG

  • The tool automatically removes the background (if transparent) and converts to PNG.
  • Wait 5–10 seconds.
  • Click “Download PNG”.
  • Done.

 Your files are deleted from our servers within 60 minutes. We don’t store, track, or share anything.

Pro Tip: Preserve Transparency

If your JFIF has a white background you want to remove, upload it anyway. BGImageSnap’s converter detects solid backgrounds and gives you an option to make them transparent during conversion.


How to Preserve Transparency When Converting

JFIF files never have transparency they always have a solid background (usually white). But you can make it transparent in PNG.

Here’s How:

  1. Upload your JFIF file to BGImageSnap.
  2. After upload, look for the toggle: “Make Background Transparent”.
  3. Turn it ON.
  4. Click “Convert.”

The tool will detect the background color and remove it leaving your subject (logo, product, text) floating on a transparent PNG.

✅ Result: You now have a PNG you can layer over any color, pattern, or photo perfect for logos, icons, or social media graphics.

⚠️ If you don’t see the toggle, your image may already have a non-solid background (rare). In that case, the tool preserves the original.


Common Mistakes to Avoid

Mistake #1: Ignoring the File Extension

Problem: You think “it’s just a JPEG” and ignore .jfif.
Result: Your design tool won’t open it. You waste time.

Fix: Always rename .jfif to .jpg if you need to open it manually or convert it to PNG.

Mistake #2: Using “Free” Tools That Ask for Your Email

Why it’s dangerous:
These tools collect your data, then sell it to marketers or use it to send spam. Some even install hidden malware.

Fix: Only use tools with no registration required. BGImageSnap doesn’t ask for anything.

Mistake #3: Assuming JFIF Can Be Transparent

Reality: JFIF files are always opaque. You can’t make them transparent unless you convert to PNG first.

Fix: Always convert to PNG if you need transparency no exceptions.

Mistake #4: Trying to Edit JFIF in Photoshop Without Converting

Result: Photoshop may show a corrupted preview, or the file won’t open at all.

Fix: Convert to PNG first then open. Always.

Mistake #5: Saving as JPG After Converting to PNG

Problem: You convert to PNG to remove the background then save it back as JPG.
Result: The transparent background turns white again. All your work is undone.

Fix: Always save your final version as PNG if transparency matters.


FAQ: Your Top JFIF to PNG Questions Answered

1. Is JFIF the same as JPEG?

Yes JFIF is just a standardized way of storing JPEG data. The image content is identical. Only the file extension differs.

2. Can I convert JFIF to PNG on my phone?

Yes. Open your browser on iPhone or Android, go to https://bgimagesnap.com/jfif-to-png, tap to upload, and download your PNG. Works on all mobile browsers.

3. Does converting JFIF to PNG reduce image quality?

No PNG uses lossless compression. The image quality stays exactly the same. In fact, you gain editing flexibility.

4. Why does my JFIF file have a white background?

Because JFIF doesn’t support transparency. It’s designed for simple display, not design. That’s why you need to convert it to PNG.

5. Can I convert multiple JFIF files at once?

Yes BGImageSnap lets you upload up to 20 JFIF files at once. They’ll be converted and bundled into separate PNG downloads.

6. Is it safe to upload sensitive images (like IDs or receipts)?

Yes if you use a trusted tool. BGImageSnap deletes all uploaded files within 60 minutes. No logs. No tracking. No data retention. Always verify privacy policies.

7. What’s the difference between PNG and PNG-24?

PNG-24 supports full 24-bit color and full alpha transparency (smooth edges). PNG-8 supports only 256 colors and binary transparency (on/off). For most uses, PNG-24 is best and BGImageSnap uses it automatically.

8. Can I convert JFIF to PNG without internet?

Only if you install software but we don’t recommend it. Most desktop tools are bloated, unsafe, or paid. For occasional use, online tools are safer and faster.


Conclusion: Simple Fixes, Better Results

JFIF files aren’t broken. They’re just outdated.

They were never meant for design, editing, or transparency. But millions of people use them anyway because they don’t know any better.

Converting JFIF to PNG isn’t about being technical. It’s about being intentional.

It’s about making your images work not fight you.

Whether you’re creating a logo, designing a social post, or just trying to remove a white background, PNG is the only format that lets you do it cleanly, quickly, and safely.

Stop wrestling with file extensions. Stop getting blocked by software. Start using a tool that just works.

TIFF to PDF How to Convert TIFF Images to PDF Online for Free

TIFF to PDF conversion on mobile and desktop using BGImageSnap tool — showing easy upload and download process

Introduction

You’ve scanned a stack of documents contracts, receipts, medical records and saved them as TIFF files. Now you need to send them to a client, upload them to a portal, or file them with your accountant. But every system asks for a PDF.

You try to open them. They’re separate images. You try to combine them. Your computer freezes. You search online: “TIFF to PDF.” You click on a tool that asks for your email. Then your password. Then your credit card.

Sound familiar?

You’re not alone. TIFF is a high quality format used by scanners, medical systems, and government offices but it’s not built for sharing. PDF is. And converting TIFF to PDF doesn’t have to be complicated, expensive, or risky.

In this guide, you’ll learn exactly how to convert TIFF to PDF for free, safely, and without installing software. We’ll cover why this conversion matters, the best free tools, step-by-step methods for every device, and the one mistake 90% of people make that ruins their documents.

No fluff. No upsells. Just clear, practical steps you can use today.


Quick Answer: How to Convert TIFF to PDF for Free

Short answer:
Use a free, no signup, web based tool like BGImageSnap to convert TIFF to PDF in under 30 seconds no software, no login, no watermarks.

Key Takeaways:

TIFF to PDF conversion is free  no credit card needed
Works on any device  Windows, Mac, iPhone, Android
Preserves image quality  no compression or blurring
Converts multiple files at once  batch processing available
No registration or data storage  your files are deleted after conversion

Avoid tools that ask for your email, password, or payment. Most are scams or data harvesters.


Why Convert TIFF to PDF? (And When You Should)

What Is a TIFF File?

TIFF (Tagged Image File Format) is a high resolution, lossless image format. It’s widely used in:

  • Medical imaging (X-rays, MRI scans)
  • Legal and government document scanning
  • Archival photography
  • Professional printing

It’s excellent for preserving detail  but terrible for sharing.

Why PDF Is Better for Sharing

PDF (Portable Document Format) was built for universal access. It:

  • Combines multiple images into one file
  • Is readable on any device, even without special software
  • Supports text search (if scanned with OCR)
  • Can be signed, annotated, and encrypted
  • Is accepted by 99% of online portals, courts, and employers

When to Convert TIFF to PDF

ScenarioWhy Convert?
Submitting tax documentsIRS and state portals require PDF
Emailing scanned receiptsTIFF files are too large; PDFs compress efficiently
Uploading to cloud storageGoogle Drive, Dropbox, OneDrive handle PDFs better
Printing multiple pagesOne PDF prints as one document no manual sorting
Archiving recordsPDF is the industry standard for long term storage

 Rule of thumb: If you’re sending it to someone else convert it to PDF.


TIFF vs PDF: Key Differences Explained

FeatureTIFFPDF
File TypeImage format (raster)Document format (container)
Multi page SupportNo (one image per file)Yes (multiple pages in one file)
CompressionLossless (no quality loss)Can be lossless or lossy
Text Searchable?No (unless OCR applied)Yes (if scanned with OCR)
EditingEditable in image editorsEditable in PDF tools (text, annotations)
File SizeVery large (30–100MB per page)Smaller (5–20MB for same content)
CompatibilityRequires specialized softwareWorks on every device, browser, OS
Best ForArchiving, printing, medical useSharing, emailing, submitting forms

Important: Converting TIFF to PDF doesn’t make your document searchable that requires OCR (optical character recognition). But it does make it usable.


5 Ways to Convert TIFF to PDF (Free & Safe)

Here are five methods ranked by safety, speed, and ease.

MethodBest ForProsCons
1. BGImageSnap (Online Tool)Everyone especially beginnersFree, no signup, batch support, instant downloadRequires internet
2. Adobe Acrobat OnlineUsers already in Adobe ecosystemTrusted, high qualityFree version limits to 2 files/day; requires Adobe account
3. Smallpdf (Free Tier)Users needing extra toolsClean interface, good UIFree version adds watermark; limits to 2 conversions/day
4. Windows “Print to PDF”Windows users with single filesNo third party tool neededOnly converts one TIFF at a time; no batch
5. Preview (Mac)Mac users with few filesBuilt in, no installNo batch; clunky for multiple files

Avoid These:

  • Online converters that ask for your email they sell your data.
  • Desktop software that installs toolbars  often bundled with malware.
  • Mobile apps that require permissions  many harvest your photos.

 Our Recommendation: Use BGImageSnap. It’s the only free tool that’s truly private, fast, and handles multiple files without limits.


Step-by-Step: Convert TIFF to PDF Using BGImageSnap

BGImageSnap lets you convert TIFF to PDF in three simple steps no download, no login, no ads.

Step 1: Visit the Tool

Go to: https://tiff2pdf.com/

You’ll see a clean interface with one box: “Drop your TIFF files here or click to upload.”

Step 2: Upload Your Files

  • Click the box or drag and drop one or more TIFF files from your computer or phone.
  • Supported formats: .tiff.tif
  • You can upload up to 20 files at once.

Step 3: Download Your PDF

  • The tool automatically combines all files into a single PDF.
  • Wait 5–15 seconds.
  • Click “Download PDF”.
  • Done.

 Your files are deleted from our servers within 1 hour. We don’t store, track, or share anything.

Pro Tip: Order Your Pages

If your TIFF files are out of order, rename them before uploading:

  • page_01.tiff
  • page_02.tiff
  • page_03.tiff

The tool will combine them in numerical order.


How to Combine Multiple TIFF Files into One PDF

Many people try to convert one TIFF at a time then manually merge them. That’s slow. And error prone.

Here’s how to do it right:

On Windows:

  1. Open File Explorer.
  2. Select all your .tiff files (hold Ctrl and click).
  3. Right click → Print.
  4. Choose Microsoft Print to PDF as the printer.
  5. Click Print → Save as one PDF.

 Limitation: This method doesn’t preserve the original order. Files are sorted alphabetically so image_10.tiff comes before image_2.tiff.

On Mac:

  1. Open all TIFF files in Preview.
  2. Click View → Thumbnails.
  3. Drag thumbnails into the correct order.
  4. Click File → Export as PDF.

 Limitation: You can’t do this if you have 15+ files Preview crashes.


Common Mistakes to Avoid

Mistake #1: Using “Free” Tools That Ask for Your Email

Why it’s dangerous:
These tools collect your data, then sell it to marketers or use it to send spam. Some even install hidden malware.

Fix: Only use tools with no registration required. BGImageSnap doesn’t ask for anything.

Mistake #2: Converting Without Checking File Order

Result: Your contract pages appear out of sequence. Your invoice is page 7. Your signature is on page 12.

Fix: Rename your files numerically before uploading (01.tiff02.tiff, etc.).

Mistake #3: Assuming PDF = Text-Searchable

Reality: A TIFF converted to PDF is just a picture of text. You can’t copy, search, or highlight words.

Fix: If you need searchable PDFs, use an OCR tool like Adobe Acrobat Pro or free alternatives like OnlineOCR.net  after converting to PDF.

Mistake #4: Saving TIFFs with Compression

Some scanners save TIFFs as LZW or ZIP compressed. While this saves space, it can cause errors during conversion.

Fix: If your PDF looks corrupted, try re scanning the document as uncompressed TIFF.

Mistake #5: Ignoring File Size

A 10 page TIFF document can be 500MB. A converted PDF might be 5MB.

Why it matters: Email servers often block files over 25MB.

Fix: Always convert TIFF to PDF before emailing. It shrinks your file size by 80–95%.

TIFF to PDF comparison showing multiple scattered TIFF files vs. one unified PDF document for easy sharing

FAQ: Your Top TIFF to PDF Questions Answered

1. Is it really free to convert TIFF to PDF?

Yes. Tools like BGImageSnap offer completely free TIFF to PDF conversion with no hidden fees, watermarks, or limits. You don’t need to pay or sign up.

2. Can I convert TIFF to PDF on my phone?

Yes. Open your browser on iPhone or Android, go to https://tiff2pdf.com/ , tap to upload your files, and download the PDF. Works on all mobile browsers.

3. Does converting TIFF to PDF reduce image quality?

No if you use a quality tool. BGImageSnap preserves the original resolution. Avoid tools that “optimize” or “compress” they blur text and details.

4. Can I convert scanned documents (like receipts) from TIFF to PDF?

Yes. Scanned receipts, forms, and invoices saved as TIFF can be converted to PDF for easy filing, emailing, or uploading to tax software.

5. How many TIFF files can I convert at once?

BGImageSnap allows up to 20 TIFF files per conversion. For more, split into batches.

6. Is it safe to upload sensitive documents (like medical records)?

Yes if you use a trusted tool. BGImageSnap deletes all uploaded files within 60 minutes. No logs. No tracking. No data retention. Always verify privacy policies.

7. Why does my PDF look blurry after conversion?

This usually means the original TIFF was low resolution (under 300 DPI). TIFF files should be scanned at 300–600 DPI for best results. If the source is poor, no tool can fix it.

8. Can I convert TIFF to PDF without internet?

Only if you install software. But we don’t recommend it most desktop tools are bloated, unsafe, or paid. For occasional use, online tools are safer and faster.

Conclusion: Simple, Secure, and Stress-Free

Converting TIFF to PDF isn’t about tech skills it’s about choosing the right tool.

You don’t need Adobe. You don’t need to install software. You don’t need to risk your data.

All you need is a browser and a tool like BGImageSnap that respects your time, your files, and your privacy.

Whether you’re a student submitting assignments, a small business owner filing invoices, or someone managing medical records — converting TIFF to PDF should be effortless.

Stop wrestling with fragmented files. Stop trusting sketchy websites. Start using a tool that just works.

RAW vs JPEG The Ultimate Guide to Choosing the Right Image Format for Stunning Photos

Introduction

You’ve taken a breathtaking photo golden hour lighting, perfect composition, emotional moment captured. But when you open it on your computer, something feels off. The colors look flat. The shadows are blocked. You try to fix it… and the image falls apart.

If this sounds familiar, you’re not alone. Most photographers beginners and pros alike struggle with one critical decision: RAW vs JPEG.

The choice between these two formats isn’t just technical it’s creative. It affects your workflow, storage needs, editing freedom, and final image quality. Yet, most guides overwhelm you with jargon. Others oversimplify: “Use RAW if you’re serious.”

This guide cuts through the noise. We’ll break down exactly what RAW and JPEG mean, when to use each, and how to make the best choice for your photography goals all without fluff, hype, or manufactured stats.

By the end, you’ll know not just what to choose, but why and how to get the most out of either format.

Table of Contents

Quick Answer: RAW vs JPEG – Which Should You Use?

Short answer:
Use RAW if you edit photos, care about quality, or shoot in challenging light.
Use JPEG if you want small files, quick sharing, or don’t edit much.

Key Takeaways:

✅ RAW files = Unprocessed, high detail data from your camera sensor
✅ JPEG files = Processed, compressed, ready to share images
✅ RAW is 5–10x larger than JPEG but retains 10–14 bits of color data per channel
✅ JPEG is universally compatible no special software needed
✅ You can’t convert JPEG to RAW you lose data permanently when shooting JPEG
✅ Most pros shoot RAW even if they later export to JPEG

Best for beginners? Shoot in RAW+JPEG mode. Get the best of both worlds.

What Is RAW? (And Why It’s a Digital Negative)

RAW Is Not a Format It’s a Container

Unlike JPEG, RAW isn’t a single standard. It’s a family of proprietary formats:

  • Canon: .CR3, .CR2
  • Nikon: .NEF
  • Sony: .ARW
  • Fujifilm: .RAF
  • Adobe: .DNG (universal RAW)

RAW files store unprocessed sensor data every pixel’s brightness, color, and exposure information before your camera applies sharpening, white balance, or compression.

Think of it like a digital negative. Just as film negatives hold all the light captured on film, RAW files hold all the data your sensor recorded. The camera doesn’t decide how it looks you do.

Why This Matters

When you shoot JPEG, your camera applies:

  • White balance adjustments
  • Contrast and saturation boosts
  • Sharpening
  • Compression to reduce file size

All of this is baked in. You can’t undo it.

With RAW, you control every step during editing.

Example: A JPEG taken at sunset might look “too orange” because your camera auto set white balance to “cloudy.” In RAW, you can reset it to “sunset” or even “daylight” without losing detail.

What Is JPEG? (And Why It’s Everywhere)

JPEG = Joint Photographic Experts Group

JPEG is a lossy compression algorithm meaning it discards image data to shrink file size. It’s the most common image format on the planet because:

  • Works on every device
  • Loads fast on websites
  • Requires no special software
  • Fits hundreds of photos on a single memory card

Your camera takes the sensor data, applies its own preset (or your settings), compresses it, and saves it as a JPEG.

What You Lose in JPEG

When your camera compresses a JPEG, it:

  • Reduces color depth from 12–14 bits to 8 bits (16.7 million colors instead of billions)
  • Blurs fine details to hide compression artifacts
  • Discards subtle gradients (like skies or shadows)
  • Applies permanent sharpening and noise reduction

The result? A small, ready to share image that looks fine on Instagram but crumbles under heavy editing.

⚠️ Critical fact: Once saved as JPEG, lost data is gone forever. You can’t recover it.

RAW vs JPEG: Side-by-Side Comparison

FeatureRAWJPEG
File Size20–100 MB per image2–10 MB per image
Color Depth12–14 bits per channel (billions of colors)8 bits per channel (16.7 million colors)
Editing FlexibilityExtremely high recover highlights, shadows, white balanceLimited adjustments cause banding or noise
CompatibilityRequires software (Lightroom, Photoshop, Capture One)Works on every phone, browser, printer
Shooting SpeedSlower burst rates, longer write timesFaster burst, quicker storage
Storage Needed5–10x more than JPEGMinimal
Best ForProfessional work, editing, printingSocial media, quick sharing, casual use
Quality LossNone (uncompressed)Permanent, irreversible compression

Real World Example

You photograph a dark interior with a bright window.

  • JPEG: Window is blown out (pure white). Shadows are flat.
  • RAW: You can recover the window’s detail, darken the highlights, lift shadows, and still keep natural skin tones.

That’s the power of RAW.

When to Use RAW: 5 Ideal Scenarios

1. You Plan to Edit Your Photos

Whether you’re tweaking exposure, recovering shadows, or adjusting color grading, RAW gives you room to breathe. JPEG files break down fast under heavy edits.

2. You Shoot in Challenging Lighting

Low light, high contrast, mixed lighting (e.g., indoor events with tungsten and LED lights)? RAW lets you fix white balance and exposure without introducing noise or banding.

3. You Print Your Photos

Professional printers need high resolution, high bit depth files. RAW ensures color accuracy and detail retention especially for large format prints.

4. You’re Building a Portfolio or Selling Work

Clients and galleries expect professional grade files. RAW gives you archival quality and future proofing.

5. You’re Learning Photography

Shooting RAW forces you to understand exposure, white balance, and post processing. It’s the best way to learn how light and color work.

💡 Pro Tip: Many pros shoot RAW and export final versions as JPEG or TIFF for delivery.

When to Use JPEG: 4 Practical Cases

1. You’re Taking Casual Snapshots

Family dinners, vacations, petsphotos you won’t edit. JPEG is perfect.

2. You Need Fast Turnaround

Wedding photographers often shoot JPEG for second shooters or quick social media posts. No editing = faster delivery.

3. Your Storage Is Limited

If you’re using a phone, drone, or action camera with small memory cards, JPEG saves space.

4. You’re Sharing Directly to Social Media

Instagram, Facebook, TikTok all platforms accept JPEG. Uploading RAW is unnecessary and slow.

💡 Pro Tip: Use RAW+JPEG mode on your camera. You get both. Edit the RAW, share the JPEG.

How to Shoot RAW (And Convert It Later)

Step 1: Enable RAW Mode on Your Camera

DSLR/Mirrorless (Canon, Nikon, Sony, etc.):

  1. Go to Menu → Image Quality
  2. Select RAW or RAW+JPEG
  3. Confirm your memory card has enough space

Smartphones (iPhone/Android):

  • iPhone: Shoot in HEIC (similar to JPEG, but better). No true RAW unless using Pro apps like ProCamera.
  • Android: Use manual camera apps (Open Camera, ProShot) to capture DNG (Adobe’s RAW format).

Step 2: Transfer Files to Your Computer

Use a card reader or USB cable. Avoid dragging files directly from phone quality can degrade.

Step 3: Edit in Professional Software

Use:

Step 4: Export as JPEG for Sharing

After editing:

  • Export as JPEG, Quality 90–100%
  • Resize to 2048px on the long side for web
  • Embed color profile (sRGB)

✅ Always keep your original RAW files. They’re your digital negatives.

Common Mistakes with RAW and JPEG

Mistake #1: Shooting JPEG and Thinking “I’ll Edit Later”

You can’t recover blown highlights or crushed shadows in JPEG. The data is gone.

Mistake #2: Deleting RAW Files After Exporting JPEG

You might never need to re edit… until you do. Keep RAW files for archival.

Mistake #3: Using Low-Quality JPEG Settings

Many cameras default to “Fine” or “Normal.” Set to “Super Fine” or “High” to minimize compression.

Mistake #4: Assuming RAW = Instantly Better

RAW files look flat and dull straight out of camera. They need editing. Don’t judge RAW by its unprocessed state.

Mistake #5: Trying to Convert JPEG to RAW

It’s impossible. Tools that claim to “enhance JPEG to RAW” are scams. They just upscale and sharpen. You’re not gaining data you’re guessing.

Can You Convert JPEG to RAW? (Spoiler: No)

Short answer: No.

RAW files contain the original sensor data. JPEG is a processed, compressed version that throws away 80–90% of that data.

You can:

  • Open a JPEG in Lightroom
  • Edit it
  • Save it as a TIFF or PNG (lossless formats)

But you’re still working with a JPEG’s limited data. You won’t recover lost detail.

🚫 No software can magically restore lost data.
✅ Only RAW files preserve it.

FAQs

1. Should I shoot RAW or JPEG as a beginner?

Start with RAW+JPEG. You get the flexibility of RAW for editing and the convenience of JPEG for quick sharing. Once you’re comfortable editing, switch to RAW-only.

2. Does shooting RAW make my photos look better automatically?

No. RAW files look flat and dull straight out of camera. They need editing. But they give you the tools to make them look exactly how you want.

3. Do I need a powerful computer to handle RAW files?

Not necessarily. Modern laptops and even tablets (iPad Pro + Lightroom) handle RAW fine. Storage is the bigger issue—you’ll need 10x more space than for JPEG.

4. Can I shoot RAW on my smartphone?

Most phones don’t support native RAW. Use apps like ProCamera (iOS) or Open Camera (Android) to capture DNG files. iPhones save HEIC, which is better than JPEG but not true RAW.

5. What’s the best file format for printing?

TIFF (lossless) or high-quality JPEG (95–100%) are standard. But always start from a RAW file for best results.

6. Will RAW files work on Instagram or Facebook?

No. These platforms only accept JPEG, PNG, or HEIC. Always export your edited RAW as a JPEG for sharing.

7. Is RAW better for astrophotography?

Yes. RAW’s higher bit depth and dynamic range are essential for capturing faint stars and reducing noise in dark skies.

8. How much extra storage does RAW take?

A typical 24MP RAW file is ~35MB. A JPEG from the same camera is ~6MB. That’s almost 6x more storage. A 64GB card holds ~1,800 JPEGs or ~300 RAW files.

Conclusion: Your Simple Decision Framework

Choosing between RAW vs JPEG isn’t about being “serious” or “casual.” It’s about matching your workflow to your goals.

Use this simple flow:

  1. Are you editing? → RAW
  2. Are you printing or archiving? → RAW
  3. Are you sharing quickly on social media? → JPEG
  4. Are you unsure? → RAW+JPEG (best of both worlds)

RAW is insurance.
It gives you creative control when lighting, exposure, or color doesn’t go as planned.

JPEG is efficiency.
It’s perfect for moments where speed and simplicity matter.

Most photographers use both. You don’t have to choose one forever.

The best photographers aren’t the ones with the fanciest gear they’re the ones who understand their tools.

Ready to Take Better Photos? Start with the Right Format

If you’re shooting RAW and need to edit, enhance, or convert your files to high quality JPEGs for sharing BGImageSnap makes it simple.

Our RAW to JPEG Converter lets you batch process RAW files, adjust exposure, color, and sharpness, and export print ready or web optimized JPEGs all in seconds.

No software to install. No subscription. Just powerful, professional results.

Try Our RAW to JPEG Converter Free →

MP4 to PNG The Ultimate Guide to Convert Video Frames into PNG Images

mp4 to png step-by-step diagram showing video container transforming into PNG through resolution and transparency steps

Quick Answer: How to Convert MP4 to PNG?

MP4 to PNG means extracting a still image from a video file. Instead of keeping motion you capture a specific second and save it as a lossless PNG.

  • Best for: Web backgrounds thumbnails graphic overlays and print assets.
  • Key benefit: PNG supports transparency and sharp edges unlike JPEG.
  • Time required: Seconds for one frame; minutes for bulk extraction.
  • Cost: Most reliable tools are free.

If you already know your frame timestamp skip ahead to the step by step section. If you need to compare methods first review the comparison table below.

MP4 to PNG: What It Actually Means

MP4 is a digital container format that holds video streams, audio tracks, subtitles and metadata. PNG is a raster image format that uses lossless compression and supports alpha channel transparency.

When you perform an MP4 to PNG conversion you are not “changing” the video format. You are pulling a still image from the video stream at a precise timecode. This matters for designers: a 4K MP4 might contain a perfect frame at 00:00:08 but if you export at 1080p or apply heavy compression the PNG will not recover lost detail.

For teams in the USA, UK, and CA working on background image projects the critical rule is simple: start with the highest source resolution then export the PNG at the exact pixel dimensions your layout requires.

The Difference Between Video and Frame Formats

FeatureMP4 (Video)PNG (Image)
Contains motionYesNo
Transparency supportNo (in final frame unless alpha source)Yes
Best for backgroundsOnly after frame extractionDirect use
File sizeLargeModerate (lossless)
Color profileOften Rec. 709Usually sRGB for web

5 Ultimate Best Methods to Convert MP4 to PNG

Not every tool fits every workflow. Here is a direct comparison of the most effective methods for MP4 to PNG tasks.

MethodBest ForQualitySpeedCost
Desktop Editor (Premiere / DaVinci)Color correction + cropHighMediumPaid / Free tier
Frame Grab SoftwarePrecise timestamp picksHighFastFree / Paid
FFmpeg Command LineBulk / automatedHighVery fastFree
Online MP4 to PNG ConverterOne off quick tasksMediumFastFree / Premium
Mobile AppsSocial / quick referencesMediumFastFree / Paid

Method 1: Desktop Video Editors (Adobe Premiere Pro, DaVinci Resolve)

Import the MP4 scrub to the exact frame and export a still. Choose PNG as the format and set resolution to match your source. This is the best path when you need color grading or framing adjustments before extraction.

Method 2: Dedicated Frame Grab Tools

VLC offers a snapshot feature; LosslessCut allows frame accurate cutting without a timeline. These are excellent for quick MP4 to PNG tasks when you do not need full editing power.

Method 3: FFmpeg (Command Line)

FFmpeg is the open source standard for video processing. It extracts frames without loading a visual timeline making it ideal for bulk tasks or automated workflows.

Method 4: Browser Based Online Converters

Platforms like CloudConvert or Online Convert accept an MP4 upload and return PNG files. They work well for single frame needs but review privacy policies before uploading proprietary footage.

Method 5: Mobile Apps

Apps such as Video to Photo (iOS) or FrameGrab (Android) allow quick exports from your camera roll. Use these for rapid reference shots rather than high precision design work.

Step-by-Step: How to Convert MP4 to PNG Using FFmpeg

If you want precise repeatable results follow this process.

Step 1: Download FFmpeg from the official repository and install it on your system.

Step 2: Open a terminal or command prompt and navigate to the folder containing your video.

Step 3: Extract a single frame at a specific timestamp.

textffmpeg -ss 00:00:05 -i input.mp4 -vframes 1 output.png

This command grabs the frame at 5 seconds.

Step 4: Verify the output file dimensions. If your source is 1920×1080 your PNG should match unless you specify a scale.

Step 5: Open the PNG in an image editor to confirm transparency. If your original video does not include an alpha channel transparency will not appear automatically.

This method delivers identical results across USA, UK, and CA operating environments because it relies on command line processing rather than localized software licenses.

Quality Tips for Background Images

When you convert video frames into PNG images for web backgrounds protect the asset quality with these practices:

  • Match pixel dimensions to layout. A full width hero banner may need 1920 px or 2560 px width; do not export small and upscale.
  • Preserve transparency. Choose PNG (not JPEG) if the frame includes logos cutouts or overlay ready elements.
  • Check color profiles. Many MP4 files use Rec. 709. Export your PNG in sRGB if it will live on the web.
  • Avoid double compression. Export once at high quality then scale down for thumbnails rather than re exporting from a compressed file.

If you are sourcing backgrounds for a site like bgimagesnap.com consider whether your extracted frame needs retouching before it becomes a final background asset.

Common MP4 to PNG Mistakes to Avoid

Mistake 1: Exporting as JPEG by accident. You lose transparency and introduce compression artifacts.

Mistake 2: Choosing a low resolution source. A PNG cannot invent detail that was never in the original video.

Mistake 3: Selecting the wrong timestamp. One second can mean the difference between a sharp face and a motion blur.

Mistake 4: Over compressing the PNG. Use lossless or near lossless settings for graphics; only compress if file size is a critical bottleneck.

MP4 to PNG vs. Other Image Formats

PNG is not the only option but it is usually correct for design work.

FormatTransparencyLosslessBest Use After MP4 to PNG
PNGYesYesWeb backgrounds logos graphics
JPEGNoNoPhotographs where file size is critical
GIFYes (1-bit)YesSimple animations not high quality frames
TIFFYesYesPrint workflows requiring print ready data

For most MP4 to PNG workflows PNG strikes the best balance between clarity and versatility.

Frequently Asked Questions

What does MP4 to PNG mean?

It means extracting a still frame from an MP4 video file and saving it as a PNG image.

How do I convert MP4 to PNG without losing quality?

Start with a high-resolution source use a lossless export setting and avoid recompressing the PNG afterward.

Can I convert MP4 to PNG online for free?

Yes. Many online converters support this but check file-size limits and privacy terms before uploading.

Is PNG better than JPG for video frames?

For backgrounds and graphics yes. PNG supports transparency and preserves sharp edges; JPG does not.

How do I pick the best frame from a video?

Scrub slowly avoid motion blur and select frames with clean negative space or clear focal points.

What is the best MP4 to PNG tool for professionals?

FFmpeg for speed and bulk work; Adobe Premiere or DaVinci Resolve for color-controlled extractions.

Does MP4 to PNG support transparency?

The PNG format supports transparency but the source frame must contain it—such as via a green-screen or alpha-channel source.

How long does MP4 to PNG conversion take?

A single frame takes seconds. Bulk extraction depends on video length and your hardware.

Conclusion

Mastering MP4 to PNG conversion gives you a direct pipeline from video source to polished graphic. Whether you use a desktop editor for color precision or FFmpeg for rapid extraction the rules remain constant: respect the source resolution export at the correct size and choose PNG when transparency and clarity matter.

If you need high quality PNG background images to pair with your extracted frames browse our curated collection at bgimagesnap.com. From web hero backgrounds to print ready assets we provide the visual foundation your next project needs.

Pixel to Inches 7 Easy Tips to Convert Image Size Perfectly

Introduction

Pixel to inches conversion is simple once you know one key detail: the image’s PPI also called pixels per inch. If you have ever tried to print a photo design a flyer upload a product image or resize a graphic for social media you may have noticed that pixels and inches do not automatically mean the same thing.

A photo that is 3000 pixels wide can print at 10 inches wide at 300 PPI but the same photo can print at 20 inches wide at 150 PPI. The pixel count stays the same but the print size changes.

In this guide from BGImageSnap, you’ll learn how to convert pixels to inches how PPI affects image quality which resolution to use for print or web and how to avoid common resizing mistakes.

Pixel to inches comparison showing how 3000 pixels prints at different sizes depending on DPI

Key Takeaways

  • Pixel to inches formula: pixels ÷ PPI = inches
  • Inches to pixels formula: inches × PPI = pixels
  • 300 PPI is commonly used for high-quality prints.
  • 72 or 96 PPI is often discussed for screens but web display depends mostly on pixel dimensions.
  • A higher PPI creates a smaller but sharper print.
  • A lower PPI creates a larger print but may reduce sharpness.

What Does Pixel to Inches Mean?

Pixel to inches means converting a digital image’s pixel dimensions into a physical size usually for printing.

A pixel is a tiny square of color in a digital image. An inch is a physical measurement. To connect the two you need PPI which tells you how many pixels will fit into one printed inch.

For example:

  • 1200 pixels at 300 PPI = 4 inches
  • 1200 pixels at 150 PPI = 8 inches
  • 1200 pixels at 100 PPI = 12 inches

The number of pixels did not change. Only the density changed.

This is why a photo can look large on a screen but print smaller than expected. Screens show pixels; printers need pixels distributed across physical space.

For deeper technical background Adobe has a helpful explanation of image size and resolution.

Pixel to Inches Formula Explained

The basic pixel to inches formula is:

Pixels ÷ PPI = Inches

You apply the formula separately to width and height.

Example: Convert 2400 × 3000 Pixels to Inches

If the image resolution is 300 PPI:

  • Width: 2400 ÷ 300 = 8 inches
  • Height: 3000 ÷ 300 = 10 inches

So, the image prints as 8 × 10 inches at 300 PPI.

What if the PPI is 150?

  • Width: 2400 ÷ 150 = 16 inches
  • Height: 3000 ÷ 150 = 20 inches

So, the same image prints as 16 × 20 inches at 150 PPI.

Practical Advice

Use 300 PPI when you want sharp prints especially for photos brochures invitations product inserts and framed images. Use a lower PPI only when the image will be viewed from farther away such as posters or banners.

Pixel to Inches Conversion Chart

Here is a quick pixel to inches reference chart using common PPI values.

Pixel DimensionsAt 300 PPIAt 150 PPICommon Use
600 × 600 px2 × 2 in4 × 4 inSmall icon or label
1200 × 1800 px4 × 6 in8 × 12 inStandard photo print
1500 × 2100 px5 × 7 in10 × 14 inPhoto print
2400 × 3000 px8 × 10 in16 × 20 inPortrait print
3000 × 3600 px10 × 12 in20 × 24 inWall print
3600 × 5400 px12 × 18 in24 × 36 inPoster print

This chart shows why PPI matters. The same image can create different physical sizes depending on resolution.

Best PPI Settings for Print and Web

Choosing the right PPI depends on where the image will appear.

For High-Quality Prints

Use 300 PPI for:

  • Photo prints
  • Invitations
  • Business cards
  • Product packaging
  • Brochures
  • Art prints

This setting gives you strong detail when the viewer sees the image up close.

For Posters and Large Prints

Use 150–200 PPI when:

  • The print is large
  • The viewer stands farther away
  • File size needs to stay manageable

Large prints do not always need 300 PPI because people usually view them from a distance.

For Websites and Social Media

For websites pixel dimensions matter more than physical inches. A browser displays images based on screen pixels CSS and layout rules.

For web use focus on:

  • Correct width and height in pixels
  • Fast loading
  • Compression
  • Responsive display
  • Proper format such as JPG, PNG, WebP, or SVG

The W3C explains how CSS uses absolute units including how CSS pixels relate to inches in its CSS Values and Units specification.

If you need to resize or prepare images for online use you can use a tool like the BGImageSnap image editor to make quick adjustments.

Pixel to inches comparison showing how 3000 pixels prints at different sizes depending on DPI

How to Convert Pixel to Inches Step by Step

Follow this simple process to convert pixel to inches correctly.

Step 1: Find the Pixel Dimensions

Check your image size first. You might see something like:

3000 × 2400 pixels

The first number is usually the width. The second number is the height.

Step 2: Choose the PPI

Pick the resolution based on your use case:

  • 300 PPI for sharp photo prints
  • 150–200 PPI for larger posters
  • 72 or 96 PPI for basic screen reference only

Step 3: Divide Pixels by PPI

Use the formula:

Pixels ÷ PPI = Inches

Example:

  • Width: 3000 ÷ 300 = 10 inches
  • Height: 2400 ÷ 300 = 8 inches

So, the final print size is 10 × 8 inches.

Step 4: Check the Aspect Ratio

Make sure the shape of the image fits your desired output.

For example, an 8 × 10 print has a different shape than a 4 × 6 print. If the aspect ratio does not match you may need to crop the image.

Step 5: Resize Without Stretching

Never stretch an image to force it into a size. Stretching can make people products or text look distorted.

Instead:

  • Crop to the correct shape
  • Resize proportionally
  • Use a clean background if needed
  • Export a copy not the original

For product photos or profile images try removing distractions with BGImageSnap’s background tools before resizing.

Pixel to Inches Example for Common Print Sizes

Here are common print sizes and the pixel dimensions needed at 300 PPI.

Print SizePixel Size at 300 PPI
4 × 6 in1200 × 1800 px
5 × 7 in1500 × 2100 px
8 × 10 in2400 × 3000 px
8.5 × 11 in2550 × 3300 px
11 × 14 in3300 × 4200 px
12 × 18 in3600 × 5400 px

If your image has fewer pixels than the recommended size it may still print but it may not look as sharp up close.

Common Mistakes to Avoid

1. Confusing PPI and DPI

PPI means pixels per inch and refers to digital image resolution. DPI means dots per inch and usually relates to printer output. People often use the terms interchangeably but they are not exactly the same.

2. Assuming Pixels Have a Fixed Inch Size

Pixels do not have one fixed physical size. A 1000-pixel image can be small or large depending on the PPI.

3. Enlarging Low-Resolution Images Too Much

If you enlarge a small image too far it can become blurry or pixelated. It is better to start with a larger original image.

4. Ignoring Cropping

A photo may have enough pixels but the wrong shape. Always check the aspect ratio before printing.

5. Exporting Over the Original File

Always save a copy. Keep the original image untouched in case you need another size later.

Use BGImageSnap to convert pixel to inches and resize images for perfect print quality

FAQ

1. How do I convert pixel to inches?

Use this formula: inches = pixels ÷ PPI. For example 1800 pixels divided by 300 PPI equals 6 inches.

2. How many pixels are in one inch?

It depends on the PPI. At 300 PPI one inch contains 300 pixels. At 150 PPI one inch contains 150 pixels.

3. What is 1920 pixels in inches?

At 300 PPI 1920 pixels equals 6.4 inches. At 96 PPI 1920 pixels equals 20 inches.

4. Is 300 PPI always required?

No. 300 PPI is ideal for high-quality close-up prints. Large posters may look fine at 150–200 PPI because they are usually viewed from farther away.

5. Does changing PPI change image quality?

Changing PPI alone does not add new detail. It changes how densely pixels are printed. If you resample the image then the software may add or remove pixels.

6. What pixel size do I need for an 8 × 10 print?

For a sharp 8 × 10 print at 300 PPI use 2400 × 3000 pixels.

7. Does pixel to inches matter for Instagram or websites?

Not as much as pixel dimensions. For web and social media focus on the image’s width, height, file size and format.

Conclusion

Understanding pixel to inches conversion helps you print sharper photos design better graphics and avoid blurry results. For high-quality prints use 300 PPI when possible. For web images focus more on pixel dimensions compression and responsive display.

If you want to prepare images faster visit BGImageSnap to edit clean up and resize your visuals for print, web and social platforms.

1920×1080 Image 5 Ultimate Ways to Get Direct Links Fast

A 1920×1080 image is the standard resolution for full HD backgrounds and finding a direct image link for this format is one of the most common frustrations for designers developers and content creators. Many sites wrap images in preview pages temporary session IDs or compressed thumbnails that never load properly.

This guide answers exactly how to get a direct image link for a 1920×1080 image whether you need it for a website hero section a video backdrop or a desktop wallpaper. You will learn practical methods that work today plus how to avoid broken links after you publish.

What you will learn:

  • The exact steps to grab direct URLs for 1920×1080 images
  • Why some “direct links” break after a few hours
  • How to self host so your link never dies
  • Where BGImageSnap fits into your workflow for dependable direct links
Direct 1920x1080 image link versus cluttered web preview page comparison 1920×1080 Image

Quick Answer / Key Takeaways

  • A 1920×1080 image is Full HD at a 16:9 ratio.
  • Use “Copy image address” in your browser for quick direct links.
  • Source URL parameters (like ?w=1920) can unlock a direct 1920×1080 image file.
  • Self hosting after download prevents broken links.
  • BGImageSnap offers direct download URLs for its 1920×1080 image library.

What Is a 1920×1080 image?

A 1920×1080 image has a width of 1920 pixels and a height of 1080 pixels. That makes it the standard resolution for 1080p displays projectors and most modern desktop screens. The aspect ratio is 16:9.

Because of its size a 1920×1080 image delivers enough detail for full screen backgrounds without forcing users to wait for massive file transfers. If you are building a website hero banner a YouTube thumbnail or a presentation slide this resolution is usually the sweet spot.

Common Use Cases

Web design backgrounds video overlays digital signage presentation slides and desktop wallpapers all rely on this format. When you link directly to a 1920×1080 image file the browser loads only that asset not an entire gallery page.

This is the core question. Below are five practical methods to grab a working direct URL.

Answer first: Most direct links come from either the browser’s native image copy function a modified source URL or a direct download library like BGImageSnap. The best method depends on whether you need the image for a single project or ongoing use.

Method 1 Right Click and Copy Image Address

Open the page with the image. Right click the photo and select “Copy image address” (Chrome/Edge) or “Copy Image Location” (Firefox). Paste the URL into your code or CMS.

If the URL ends in .jpg.png, or .webp, it is likely direct. If it points to an HTML page or a CDN with query strings that block hotlinking test it in a new tab first.

Method 2 Modify the Source URL for Direct Access

Many platforms store originals at different resolutions. For example Unsplash allows you to adjust width parameters in the URL. Instead of a generic preview link add ?w=1920&q=80 to the source path. This can return a direct 1920×1080 image file instead of a compressed preview.

Always verify by opening the URL in an incognito window. You can also check the “Open image in new tab” option on platforms like Pexels and Pixabay. If the new tab shows only the image with no text you have a direct link.

For more on open source image resources see the Unsplash Source API and Pexels direct URLs.

At BGImageSnap the 1920×1080 image collection is built for direct use. Each file includes a clean URL that serves the image directly to your site or project. You skip the preview page avoid temporary session IDs and get consistent dimensions.

If you need a reliable source for backgrounds this approach removes the guesswork. Browse our full library of direct background images for more options.

Method 4 Browser Developer Tools

For tricky sites open the browser’s developer tools (F12) go to the Network tab and filter by Img. Reload the page. Find the image request that returns the largest file size often the 1920×1080 original. Right click the request URL and copy it.

This is especially useful when the visible thumbnail links to a different asset or when the site uses a lazy load script.

Method 5 Download and Self Host

Download the 1920×1080 image to your computer then upload it to your own server or content delivery network (CDN). This gives you a permanent direct link you control.

For commercial projects this is the most professional option because it eliminates dependency on third party hosts that can change or remove files.

For help with file hosting see our guide to direct image hosting tips.

A direct link ends in an image file extension and renders only the image. A preview page loads HTML, navigation, ads, and scripts around the photo.

If you embed a preview URL into your website users see broken layout or unwanted branding. If you use a direct 1920×1080 image link the asset loads cleanly in your design.

Before publishing open your URL in a private window to confirm it produces nothing but the image. If you see a page with menus and text you are not using a direct link.

Mistakes to Avoid with 1920×1080 Images

  • Using a thumbnail link instead of the full size file. Check pixel dimensions before embedding.
  • Hotlinking without checking terms. Some sites block direct embedding; others require attribution.
  • Relying on temporary CDN URLs that expire after a session. Always test after 24 hours.
  • Ignoring file size. A 1920×1080 image JPEG can range from 300 KB to 3 MB. Optimize with tools like TinyPNG or Squoosh if speed is critical.

Direct links work best for website backgrounds video production templates, e-learning modules digital presentations and social media ads. Because the format is standard a direct URL will scale correctly across desktop and tablet layouts if applied with responsive CSS.

If you are looking for quick high resolution assets explore our free HD wallpaper downloads to supplement your project.

Abstract high-definition grid symbolizing seamless 1920x1080 image access and direct links

FAQs

What does 1920×1080 mean?

It is Full HD resolution: 1920 pixels wide by 1080 pixels tall displayed in a 16:9 widescreen ratio.

How do I know if a link is direct?

Open it in a new tab. If you see only the image and a URL ending in .jpg/.png/.webp, it is direct.

Can I use a direct 1920×1080 image link for commercial work?

Only if the source allows commercial use. Always verify the license. Self hosted downloads from your own library are safest.

Why does my direct link break?

Third party hosts may change paths delete source files or block hotlinking. Self hosting prevents this.

Is 1920×1080 the same as 1080p?

Yes. 1080p describes progressive scan; 1920×1080 describes the pixel grid.

How do I get a direct image link for a 1920×1080 image from Unsplash?

Add ?w=1920&q=80 to the source URL or use the “Download” button and host the file yourself for guaranteed access.

What is the best format for a direct 1920×1080 image?

JPEG offers the smallest file size for photos. PNG is better for graphics with sharp text. WebP is ideal for web speed.

Does BGImageSnap provide direct links?

Yes. Our 1920×1080 image library includes direct download URLs designed for embedding and background use.

Conclusion

Getting a direct link for a 1920×1080 image does not require advanced technical skills just the right steps. Whether you use browser tools, URL tricks, or a dedicated library like BGImageSnap the goal is the same: a reliable image URL that loads fast and stays available.

If you want a curated library of direct 1920×1080 image files for your next project browse BGImageSnap today.

The Ultimate Guide to Normal Photo Size: Everything You Need to Know

Comparison of standard normal photo sizes for Instagram, YouTube, and print

Quick Answer / Key Takeaways

  • Normal photo size refers to the standard dimensions used for digital images and print photos such as 4×6 inches or 1080×1920 pixels.
  • The most common normal photo size for digital use is 1080px wide while 4×6 inches is standard for print.
  • Choosing the right normal photo size depends on where you’re using the image social media print or websites.
  • Always match your image dimensions to the platform’s requirements to ensure optimal display.

What Is Normal Photo Size?

Understanding Normal Photo Size

When we talk about normal photo size we’re referring to the default or most commonly accepted dimensions for photographs both in digital and print formats. These sizes are designed to work seamlessly across devices, printers, and platforms.

For digital images normal photo size often means 1080px in width (full HD) while for printed photos it typically refers to 4×6 inches  the most popular size for home printers and photo labs.

But why are these sizes considered “normal”

They’ve become standard because they balance quality file size and compatibility across most devices and platforms. Whether you’re posting on Instagram, printing for a family album or designing a website banner using the correct normal photo size ensures your images look sharp and professional.

Why Normal Photo Size Matters

Using the correct normal photo size isn’t just about aesthetics it’s about functionality performance and user experience.

Benefits of Using the Right Normal Photo Size

  • Optimal Display: Images appear crisp and clear without distortion or pixelation.
  • Faster Load Times: Properly sized images improve website performance and SEO.
  • Platform Compatibility: Social media platforms and printers are optimized for specific sizes.
  • Professional Look: Correct sizing shows attention to detail and enhances brand credibility.

💡 Pro Tip: Always check the recommended image dimensions for the platform or print service you’re using before uploading or printing.

Common Normal Photo Sizes Explained 

Let’s break down the most common normal photo sizes used today and when to use each one.

1. 4×6 Inches (Print)

  • Use Case: Standard photo prints greeting cards photo albums
  • Pixel Dimensions: 2048×3072 pixels (at 300 DPI)
  • Why It Works: This is the most popular print size and fits perfectly in standard photo frames.

2. 1080×1920 Pixels (Digital – Full HD)

  • Use Case: Instagram Stories Facebook Stories mobile banners
  • Aspect Ratio: 9:16 (vertical)
  • Why It Works: Matches the screen ratio of most smartphones and social media story formats.

3. 1080×1080 Pixels (Digital – Square)

  • Use Case: Instagram posts, Pinterest pins Facebook cover photos (with cropping)
  • Aspect Ratio: 1:1 (square)
  • Why It Works: Ideal for feeds and platforms that favor square formats.

4. 1920×1080 Pixels (Digital – Landscape)

  • Use Case: YouTube thumbnails, website headers desktop banners
  • Aspect Ratio: 16:9 (widescreen)
  • Why It Works: Fits most modern screens and video platforms.

5. 3×4 Inches (Print)

  • Use Case: Passport photos, ID cards small prints
  • Pixel Dimensions: 1536×2048 pixels (at 300 DPI)
  • Why It Works: Meets official requirements for identification documents.

How to Choose the Right Normal Photo Size 

Step 1: Identify Your Purpose

Ask yourself:

  • Where will the image be used? (e.g., website, print, social media)
  • What device will display it? (e.g., mobile, desktop, printer)
  • Is there a specific aspect ratio required?

Step 2: Check Platform Requirements

Most platforms publish their image specifications. For example:

  • Instagram Post: 1080×1080 pixels (square)
  • Facebook Cover Photo: 820×312 pixels (desktop) 640×360 (mobile)
  • Twitter Header: 1500×500 pixels

🔗 Need help finding specs? Visit the official help centers of InstagramFacebook, and Twitter.

Step 3: Match the Resolution

  • Web & Social Media: 72 DPI is sufficient
  • Print: Use 300 DPI for high-quality prints

Step 4: Resize or Crop Accordingly

Use tools like Adobe Photoshop, Canva or BGImageSnap’s free photo resizer to adjust your images without losing quality.

Normal Photo Size for Different Platforms

Below is a quick reference table for the most popular platforms:

PlatformRecommended SizeAspect RatioUse Case
Instagram Post1080×1080 px1:1Feed posts
Instagram Story1080×1920 px9:16Stories
Facebook Post1200×630 px1.91:1Link shares
Facebook Cover820×312 px (desktop)2.6:1Profile header
Twitter Header1500×500 px3:1Profile header
YouTube Thumbnail1280×720 px16:9Video thumbnails
Pinterest Pin1000×1500 px2:3Vertical pins
Print (4×6)2048×3072 px @ 300 DPI4:6Photo prints

1080×1080 px (Square)

Pros:

  • Universally accepted on social media
  • Easy to design for
  • Looks great on mobile feeds

Cons:

  • Not ideal for storytelling or vertical content
  • May require cropping for some platforms

1080×1920 px (Vertical)

Pros:

  • Perfect for stories and reels
  • Fills the entire screen on mobile
  • High engagement on Instagram and Snapchat

Cons:

  • Wastes space on desktop
  • Not suitable for print

1920×1080 px (Landscape)

Pros:

  • Great for banners and thumbnails
  • Works well on widescreen displays
  • Ideal for YouTube and website headers

Cons:

  • Too wide for mobile feeds
  • May need cropping for square formats

Step-by-Step: Resizing Your Photos to Normal Photo Size 

Tools You Can Use

  • BGImageSnap Free, fast, and easy to use
  • Canva  Great for beginners with templates
  • Adobe Photoshop  Professional-grade control

Step 1: Open Your Image

Upload your photo into your chosen tool.

Step 2: Select the Target Size

Choose from preset sizes or manually enter dimensions.

Step 3: Resize or Crop

  • Resize if you want to keep the entire image
  • Crop if you need to adjust the aspect ratio

Step 4: Export with the Right Settings

  • Web: JPEG, 72 DPI, max 1MB
  • Print: PNG or JPEG, 300 DPI

Step 5: Test on Target Platform

Upload the image to see how it looks in the final environment.

Common Mistakes to Avoid

  1. Using a low-resolution image Causes pixelation and looks unprofessional.
  2. Ignoring aspect ratio Can stretch or crop your image unintentionally.
  3. Uploading oversized images Slows down websites and increases load time.
  4. Not checking platform requirements Leads to misaligned or truncated images.
  5. Forgetting to backup originals You may need to edit again later.
BGImageSnap photo resizer tool in action resize photos to normal photo size for social media and print

1. What is the most common normal photo size for printing?

The standard 4×6 inch size is the most commonly used for home printing and photo albums.

2. Is 1080px width considered normal photo size for websites?

Yes, 1080px wide is a standard width for responsive website images and banners.

3. Can I use a 1920×1080 image for Instagram posts?

It will get cropped to fit the 1:1 or 4:5 ratio, so it’s best to resize it first.

4. What’s the difference between normal photo size and resolution?

Size refers to the dimensions (width x height), while resolution refers to the number of pixels per inch (DPI or PPI).

5. How do I know if my image is high enough quality after resizing?

If the image looks sharp and clear without pixelation it’s high enough quality.

6. What file format should I use for normal photo size images?

Use JPEG for photos and PNG for images with transparency.

7. Can I use the same normal photo size for all platforms?

While you can each platform has optimal dimensions it’s best to tailor your images accordingly.

8. How can I batch resize multiple photos to normal photo size?

Tools like BGImageSnap, Canva, or Adobe Lightroom offer batch resizing features.

Conclusion

Understanding normal photo size is essential for creating visuals that look great everywhere whether you’re posting on social media printing photos or designing a website. By choosing the right dimensions and resolution for your purpose you’ll avoid distortion improve performance and present your content professionally. Remember: the “normal” size depends on your use case platform and audience. Always double-check requirements and test your images before final use.

Ready to perfect your photo sizing? Try BGImageSnap’s free photo resizing tool to quickly adjust your images to the perfect normal photo size no signup required.