Passport Bio Page What It Is Where to Find It and How to Take a Clear Photo

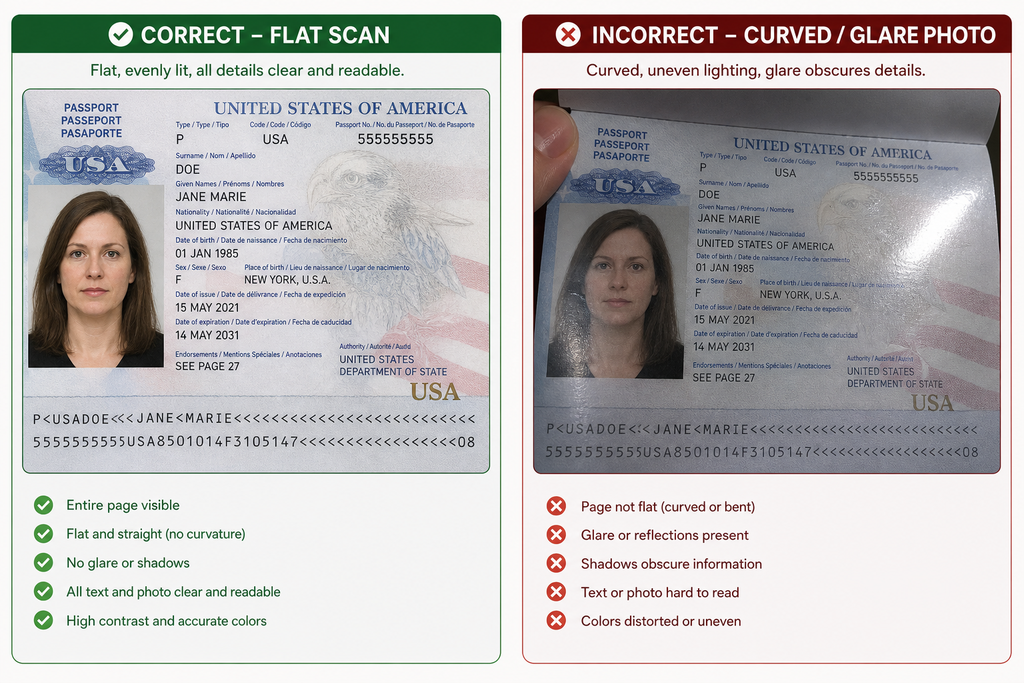
Correct and incorrect examples of photographing a passport bio page

Passport Bio Page is the single most important sheet in your travel document. It carries your photo, full name, birth date, passport number, and expiration all the details immigration officers, banks, and online portals scan first. If you are applying for a visa, renewing travel documents, or uploading identity verification, knowing exactly what this page contains and how to capture it clearly can save you days of resubmission.

In this guide, you will learn what a Passport Bio Page is, where it sits inside US, UK, and Canadian passports, and how to photograph or scan it without glare, shadows, or cut-off corners.


Quick Answer / Key Takeaways

  • Passport Bio Page (also called the data page) contains your photo, name, birth date, nationality, passport number, and machine-readable zone.
  • It is usually the first or second page inside your booklet, or the front of a card-style passport.
  • For digital submissions, lay the page flat, use even daylight, and keep all four corners visible no fingers over text, no flash glare.

What Is a Passport Bio Page?

The Passport Bio Page is your identity anchor inside the booklet. It is not a visa page, not a stamps page, and not the decorative cover. It is the standardized data sheet issued by your government.

What it typically includes:

  • Your passport photo
  • Surname and given name
  • Date and place of birth
  • Sex/gender marker
  • Nationality
  • Passport number
  • Issue date and expiration date
  • Issuing authority
  • Machine-Readable Zone (MRZ) at the bottom

Because this page relies on a machine-readable zone and precise typography, any distortion, glare, or missing corner can cause automated systems to reject your upload.

Is a Passport Bio Page the Same as a Data Page?

Yes. In official language, many governments call it the “data page,” but travelers often refer to it as the Passport Bio Page because it holds your biographical data. The term applies regardless of whether you hold a US large booklet, UK passport, or Canadian document.


Where to Find Your Passport Bio Page

Location depends slightly on your country and document style.

USA

  • Large booklet: Page 2 (immediately inside the front cover).
  • Passport Card: Printed on the front face of the plastic card.

UK

  • Large booklet / Nano booklet: Inside the front cover (the first page after the cover sheet).

Canada

  • Large booklet: Inside the front cover or page 2, depending on issue year.

If you are holding a current passport and cannot locate the Passport Bio Page quickly, check for the page with your photo and the long alphanumeric passport number this is always the correct sheet.

CountryDocument TypePassport Bio Page Location
USALarge BookletPage 2 (opposite cover)
USAPassport CardFront face of card
UKBooklet / NanoInside front cover
CanadaLarge BookletInside front cover / Page 2

We recommend practicing once with your physical document so you can locate the Passport Bio Page quickly when an application timer is running.


How to Take a Clear Photo of Your Passport Bio Page

This is not about taking your portrait for a passport application this is about capturing the page itself for digital submission, backup storage, or verification.

How to Photograph a Passport Bio Page Without Glare

  1. Clean the surface: Wipe the laminate. Remove dust that creates dark spots.
  2. Use a flat surface: Lay the booklet open on a neutral desk or table. Do not hold it in your hand; curves create shadows and focus blur.
  3. Position the camera directly above: Hold your smartphone or camera parallel to the page. Avoid shooting at an angle, which can shorten the MRZ and distort text.
  4. Turn off the flash: Direct flash creates hot spots on laminated paper. Use ambient light instead.
  5. Frame the full page: Ensure all four corners are visible. Do not crop out the MRZ at the bottom.

Best Lighting for a Passport Bio Page Scan

Natural daylight near a window works best. If you must shoot indoors, place two lamps at roughly 45-degree angles from the page to eliminate shadows. Avoid overhead fluorescent lights that create yellow color casts.

Step-by-Step Capture Process

  1. Open the booklet to the Passport Bio Page.
  2. Place it flat with the data facing up.
  3. Set your camera to highest resolution; disable digital “beauty” filters that soften text.
  4. Use a timer or remote shutter to avoid hand shake.
  5. Take two shots: one tight crop to check focus, one full-page frame.
  6. Review at 100% zoom check that names and numbers are sharp.
  7. Save as PNG or high-quality JPEG; avoid heavy compression.

If you need a clean, uniform background for your digital copy, explore our background library at BG Image Snap for neutral, high-resolution templates.

How to scan a passport bio page using a smartphone for digital submissions

Common Mistakes When Photographing Your Passport Bio Page

  • Flash glare on laminate: This hides the MRZ and can cause rejection.
  • Fingers over text: Even one finger covering a digit of your passport number invalidates the image for many portals.
  • Cropping the expiration date: If the field is cut off, you must retake.
  • Curved page: A curved page changes text spacing; flat is essential.
  • Dark background: Some auto-crop tools confuse a black background with missing data.

Frequently Asked Questions

What is a Passport Bio Page exactly?

It is the data sheet in your passport containing your photo, name, birth details, passport number, and machine-readable zone.

Where is the Passport Bio Page located in a US passport?

For standard booklets, it is page 2 inside the front cover.

Can I submit a photo of my Passport Bio Page for visa applications?

Yes, many online visa systems ask for a copy of the bio page. Always verify whether they want a scan, a photo, or both.

What is the best lighting for a Passport Bio Page scan?

Even natural daylight near a window is best. Avoid direct flash and overhead yellow lighting.

How do I crop a Passport Bio Page correctly?

Keep a small white border, but never cut off the bottom MRZ or the top photo area. Include all four corners.

Is it safe to upload a Passport Bio Page to government websites?

Only upload to verified government portals (such as official visa or immigration sites). Avoid emailing copies over unsecured platforms.

Do UK passports have a Passport Bio Page on the inside cover?

Yes, in most UK passports the bio data page is the first page inside the front cover.

Why does my Passport Bio Page photo get rejected?

Common reasons include glare, blur, missing corners, cropped MRZ, or incorrect file size/format.

Conclusion

Your Passport Bio Page is more than a photo it is the legal identity proof inside your passport. Whether you are navigating a visa portal, renewing early, or building a secure digital backup, taking a clear, flat, evenly lit photo of this page is a simple skill that prevents major delays.

If you need clean, high-resolution backgrounds to standardize document scans or passport-related visuals, visit BG Image Snap for professional templates.

Need a clutter-free backdrop for your passport scans or ID templates? Browse the high-quality background collection at BGImageSnap and keep every detail sharp.

Photo Passport Studio vs. OnlineMaker How to Choose the Best Option for Your Passport Application.

Photo Passport Studio vs Online Maker Discover 8 key differences between professional studios and online makers passport applications in 2026

Quick Answer / Key Takeaways

  • A photo passport studio offers the highest acceptance rate because staff control lighting background and framing in real time.
  • Online makers work best only when you already understand official sizing, background rules and high quality printing.
  • The USA requires a 2×2 inch image; the UK requires 35×45 mm; Canada requires 50×70 mm.
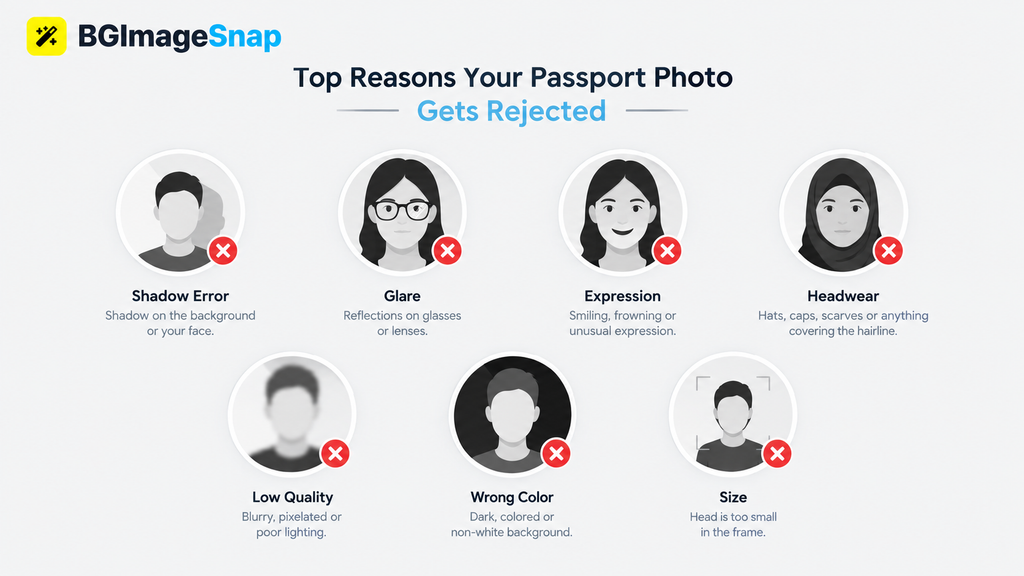
  • Background shadows, wrong head sizing, and outdated photos are the leading causes of rejection.
  • For babies first time applicants or urgent deadlines a professional studio is usually the safer investment.
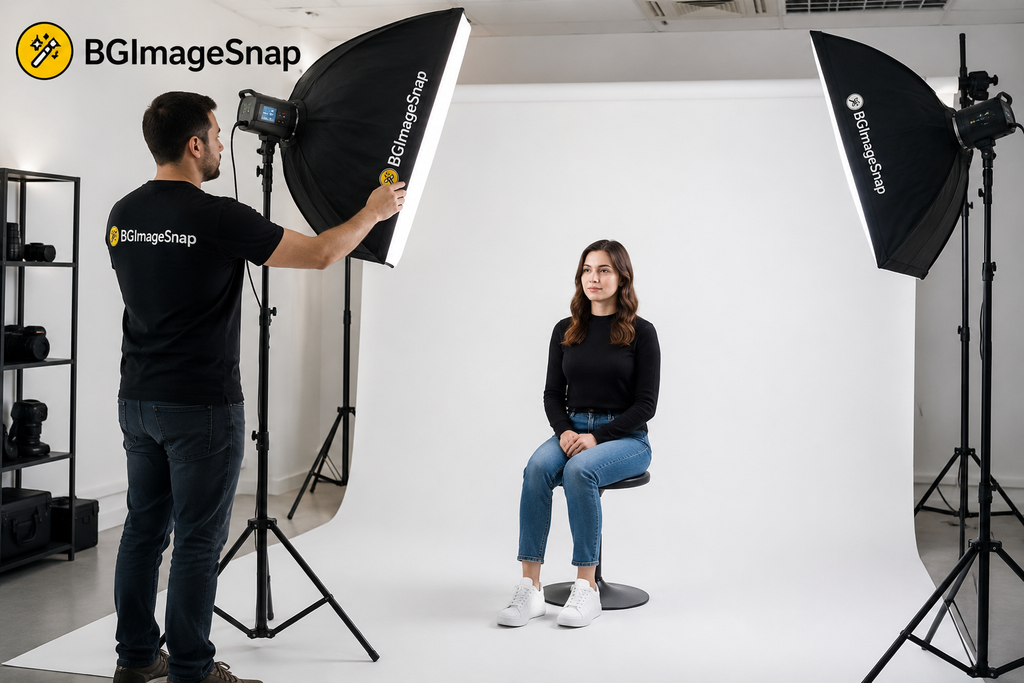
Photo Passport Studio vs. Online Maker Split-screen comparison of a poorly lit home passport photo with shadows versus a crisp studio passport photo with even lighting and a white background, featuring BGImageSnap branding.

What Is a Photo Passport Studio?

A photo passport studio is a dedicated physical location often inside a pharmacy chain photography shop or independent portrait studio where trained staff capture identification images using professional cameras standardized backdrops and uniform lighting. Unlike casual selfies these studios understand country specific framing head size ratios and background requirements. Photo Passport Studio vs. Online Maker. If you search for a photo passport studio near you prioritize providers that explicitly list government compliant passport services. A reliable location will ask which country you are applying to and confirm whether you need the USA’s 2×2 inch format the UK’s biometric size or Canada’s 50×70 mm standard. They should also provide printed copies on photo grade paper within minutes reducing the risk of home printing errors.

Photo Passport Studio vs Online Passport Photo Maker: Which Is Better?

This is the central decision for modern applicants. Both options can produce valid images but the risk profile, speed and quality control differ significantly.

FactorPhoto Passport StudioOnline Passport Photo Maker
Typical Cost (USA)Usually $10–$25 for a printed setOften free to $10 for digital files
TurnaroundImmediate prints in minutesMinutes to hours for digital delivery
Background ControlPhysical white/off white backdrop; shadow free by designDepends on user environment and editing accuracy
LightingProfessional, even illumination across the faceNatural or room light; high risk of uneven shadows
Sizing AccuracyPrecise country specs verified by staffAutomated crop; requires manual verification
Print QualityProfessional photo paper correct finishHome printer or mail service; color variance possible
Rejection RiskLow, when staff are experiencedModerate to high without expert guidance
Best ForFirst-time applicants, children urgent travelTech comfortable users with quality cameras and perfect lighting

A photo passport studio removes guesswork. The photographer positions your head within the required frame checks that your background image is pure white or off white with zero shadows and prints on correct paper stock. Online makers rely on algorithms. While some platforms automatically crop and adjust backgrounds they cannot always detect a faint wall texture uneven lighting behind your ears or a subtle gray tint. For applicants in the USA where non compliant photos remain one of the more common processing delays the studio option often pays for itself by avoiding resubmission fees and rushed travel adjustments.

Passport Photo Requirements in the USA, UK, and CA

Rules vary by country and a reputable photo passport studio should maintain current knowledge of each format.

USA (U.S. Department of State)

  • Size: 2×2 inches (51 × 51 mm)
  • Head Size: Between 1 and 1 3/8 inches (25–35 mm) from bottom of chin to top of head
  • Background: Plain white or off white; no shadows, textures or patterns
  • Expression: Neutral; mouth closed; both eyes open
  • Validity: Taken within the last 6 months
  • Glasses: Generally prohibited unless accompanied by a signed medical statement

Official specifications: travel.state.gov

UK (HM Passport Office)

  • Size: 35 × 45 mm
  • Background: Plain cream or light gray
  • Expression: Neutral; mouth closed; no smiling
  • Other: No hair across the eyes; no head coverings except for religious or medical reasons

Official specifications: gov.uk

Canada (Government of Canada)

  • Size: 50 × 70 mm
  • Background: Plain white or light colored
  • Other: Neutral expression; photo must be taken by a commercial photographer who stamps the back with the date and studio name

Official specifications: canada.ca

Because these dimensions and background rules are not interchangeable confirming that your photo passport studio serves your specific destination is essential before the shutter clicks.

Why Your Background Image Is the Hidden Risk Factor

Your passport photo background is not decorative it is a regulatory requirement. In the USA the background must be white or off-white with no shadows, textures or visible objects. The UK allows light cream or light gray but patterns and gradients still fail. Canada requires a plain white or light colored surface.

A photo passport studio achieves compliance with physical backdrops and diffused studio strobes. If you choose an online route you must manage your own background image environment. Even high quality background removal software can leave artifacts faint halos, uneven edges or gray spots that automated government checks flag. Before submitting any digitally edited photo inspect the background image at 100% zoom. The surface should be completely uniform with no gradient.

If you need help cleaning up a background image, checking purity or understanding editing limits for official documents resources like BG Image Snap provide practical guidance on creating compliant background images for identification.

Learn more about passport photo background requirements and why shadow removal is critical for approval.

How to Prepare for a Photo Passport Studio Visit

Preparation takes less than five minutes and significantly improves results.

  • Wear dark solid colored clothing. Avoid white shirts that blend into the background.
  • Remove glasses, large earrings and headphones. Most countries restrict eyewear.
  • Keep hair away from your face and eyes. No strands across eyebrows or cheeks.
  • Maintain a neutral expression. Mouth closed, eyes open facing the camera directly.
  • Skip filters and digital smoothing. Studios capture raw accurate images for government verification.

Arriving prepared allows the photographer to focus entirely on framing, lighting and background uniformity reducing the chance of a costly retake.

Common Mistakes That Cause Rejection

Even at a professional photo passport studio errors happen if communication fails.

  • Wrong country format: Requesting a US 2×2 image when you actually need UK 35×45 mm.
  • Shadow on the background: Usually caused by standing too close to the backdrop.
  • Incorrect head size: Too much space above the crown or cropping too tightly at the chin.
  • Outdated photo: Most countries reject images older than six months.
  • Incorrect paper or finish: Some applications require matte paper; others need gloss.
  • White clothing on white background: Creates a “floating head” effect that fails automated checks.

When using an online maker risk increases further. Home printers may apply incorrect color profiles and automated cropping can misalign your head within the frame.

Step-by-Step: How to Get a Compliant Passport Photo

Choose your path based on experience, equipment and deadline pressure.

Path A: Visiting a Photo Passport Studio

  1. Search for local providers and confirm they offer services for your destination country.
  2. Confirm pricing includes the correct size, background color and print finish.
  3. Dress in dark solids and follow the preparation checklist above.
  4. Review the printed proof for background uniformity, head sizing and shadow absence before leaving.
  5. Request extra copies if submitting by mail.

Path B: Using an Online Passport Photo Maker

  1. Set up near a large window with indirect even daylight; avoid overhead bulbs that cast shadows downward.
  2. Hang a plain white or off-white sheet with no wrinkles behind you.
  3. Use a high-resolution camera or smartphone mounted on a tripod at eye level.
  4. Frame the shot with space above your head and both shoulders visible.
  5. Apply background editing only if it produces a pure shadow free result without gray halos.
  6. Print on high quality photo paper at the exact millimeter dimensions required do not rely on automatic “fit to page” settings.

If you need to verify or edit your background image before printing visit BG Image Snap for practical tools designed for official photo compliance.

When Should You Skip the Studio?

An online maker makes sense if you already understand framing rules own quality lighting and need only digital files for an electronic application. However consider visiting a photo passport studio if:

  • You are applying for a baby or young child who must keep eyes open with no parent hands visible.
  • Your travel deadline is within days and you cannot risk resubmission.
  • You are unsure which country’s rules apply.
  • Your home environment has poor natural light or textured walls.

In these cases the cost of a studio session is usually lower than the cost of delaying your application.

Anchor TextSuggested URLWhy Link
passport photo background requirementshttps://bgimagesnap.com/passport-photo-background/Helps readers understand exact background rules that cause rejection
background image verification toolshttps://bgimagesnap.com/Brand resource for checking and cleaning background images
USA passport photo size guidehttps://bgimagesnap.com/usa-passport-photo-guide/Supports USA-targeted readers with precise specifications
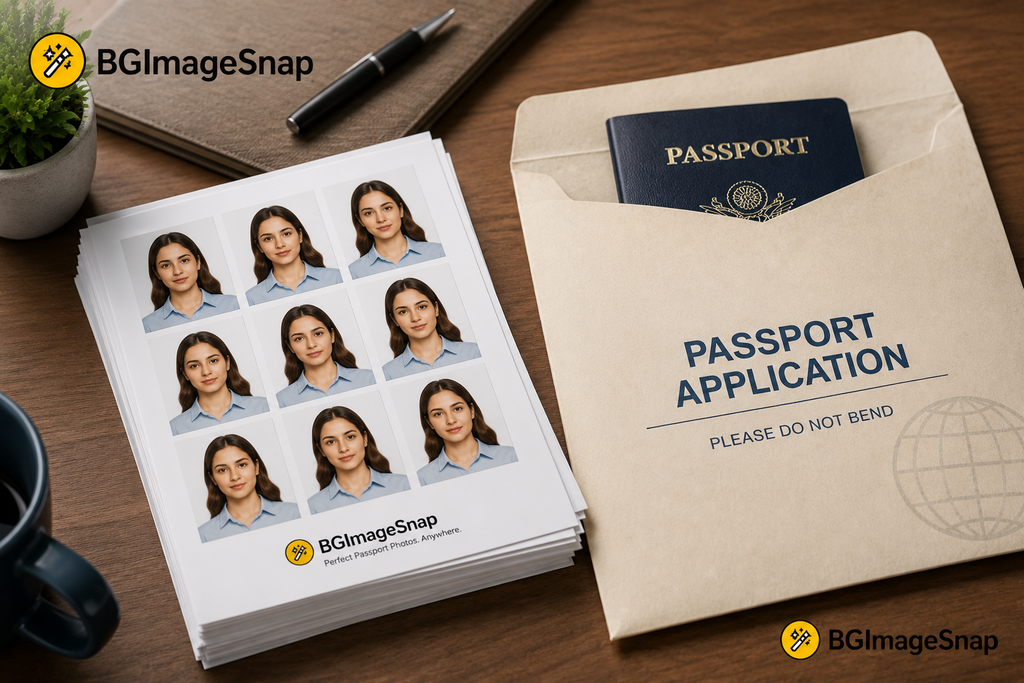
Photo Passport Studio vs. Online Maker Printed passport photo sheets beside a passport application envelope on a wooden desk, featuring BGImageSnap branding and logo.

Frequently Asked Questions

Q: How much does a photo passport studio charge in the USA?

A: Prices typically range from about $10 to $25 for a standard printed set though costs vary by city and whether digital files are included. Confirm that the price includes country-specific formatting.

Q: Can I wear glasses at a photo passport studio?

A: The USA generally prohibits glasses unless you provide a signed medical statement. The UK and Canada also restrict eyewear that obscures the eyes. Most studios will ask you to remove them.

Q: What background image color is correct?

A: The USA accepts white or off-white. The UK prefers cream or light gray. Canada requires white or light-colored backgrounds. A professional studio keeps all compliant options available.

Q: Why do online passport photos fail?

A: Common failures include background shadows incorrect head sizing poor print resolution outdated images and using filters. Automated tools do not always catch these errors before submission.

Q: Is a photo passport studio necessary for babies?

A: Parents can take baby photos at home but many find a studio easier because staff understand infant positioning manage lighting without startling the child and capture an alert expression with open eyes.

Q: How recent must my passport photo be?

A: The USA, UK, and Canada generally require images taken within the last six months. A studio can confirm the session date on the print or receipt.

Q: Can I use my phone instead of visiting a studio?

A: Yes but only if your camera is high resolution your background is perfectly uniform and you print at exact dimensions with correct color balance. Many applicants prefer a studio to avoid these variables.

Q: Does my background image need editing?

A: If taken in a studio editing is usually unnecessary. If taken at home you may need precise background removal and color correction to meet official standards.

Conclusion

Choosing between a photo passport studio and an online maker comes down to risk tolerance experience and urgency. A studio provides controlled lighting accurate framing and immediate verification critical for first-time applicants, families and anyone with a tight deadline. Online makers offer flexibility but require you to manage lighting background images and printing with precision. No matter which route you choose verify that your final image matches your destination country exactly: correct dimensions neutral expression uniform background and a recent capture date. Inspect your background image closely before submission uniformity is not optional; it is required.

Visa Photo Requirements by Country 2025 (US, UK, Schengen, UAE, Canada)

Visa photo requirements vary significantly between countries — wrong dimensions or background color means instant rejection. BGImageSnap.com free Passport Photo Maker has presets for over 50 countries so you always get the correct size.

Visa Photo Requirements by Country 2025

  • United States (US Visa): 2×2 inches (51×51 mm). White background. Head 1 to 1-3/8 inches tall.
  • United Kingdom (UK Visa): 35×45 mm. Cream or light grey background. Head 29-34 mm tall.
  • Schengen Visa (EU Countries): 35×45 mm. White or off-white background. Face must cover 70-80% of photo.
  • UAE / Dubai Visa: 43×55 mm. White background. No glasses.
  • Canada Visa: 50×70 mm. White or light background. Head 31-36 mm tall.

Universal Visa Photo Rules (All Countries)

  • No glasses (most countries now ban them)
  • No head coverings (except for religious reasons)
  • Neutral, natural expression — no smiling
  • Eyes open, looking directly at camera

How to Make Visa Photo at Home Free

  1. Take a photo against a white wall in natural daylight.
  2. Upload to our Passport Photo Maker.
  3. Select your destination country from the dropdown.
  4. Face detection automatically crops to exact visa dimensions.
  5. Use our Background Remover to apply official white background.

Frequently Asked Questions

What is the standard Schengen visa photo size?

35 x 45 mm with white or off-white background. Head must be 32-36 mm tall (70-80% of photo height). Our Passport Photo Maker has Schengen preset.

Can visa photos be taken at home?

Yes. Most embassies accept digital photos taken at home, provided they meet the exact specifications.

Passport Photo Size India 2025: Visa, Aadhaar, PAN Card Complete Guide

India has specific passport photo size requirements that differ between document types. Getting the wrong size means your application gets rejected. BGImageSnap.com free Passport Photo Maker has exact India presets built in — select the document type and the tool crops automatically.

India Passport Photo Size Requirements 2025

  • Indian Passport (regular): 51 x 51 mm (2 x 2 inches) at 300 DPI. White background. Head size 25-35 mm. Recent photo (within 6 months).
  • Indian Visa (standard): 35 x 45 mm. White background. Face must cover 70-80% of the frame.
  • Aadhaar Card: 35 x 45 mm. White or light background.
  • PAN Card: 25 x 30 mm. White background.
  • Government job application (SSC/UPSC/Railway): Usually 35 x 45 mm. Check specific notification.

Indian Passport Photo Background Rules

The official MEA requirement is a plain white or off-white background. No patterns, shadows, or colored backgrounds are accepted. Use our Background Remover to instantly replace any background with official white.

How to Make India Passport Photo at Home Free

  1. Take a photo against a white wall in natural daylight.
  2. Upload to our Passport Photo Maker.
  3. Select “India Passport” from the country dropdown.
  4. Face detection automatically crops to 51×51 mm at 300 DPI.
  5. Download and print using our ID Photo Grid Maker on a 4×6 inch sheet.

Common Reasons Indian Passport Photo Gets Rejected

  • Background not pure white (any shadow or off-white causes rejection)
  • Photo older than 6 months
  • Wearing spectacles (not allowed since 2018 MEA rule)
  • Smiling with teeth visible

Frequently Asked Questions

What is the correct size for Indian passport photo in mm?

51 x 51 mm (square format) for Indian passports. For visa applications, 35 x 45 mm. Both must be at 300 DPI minimum.

Can I take Indian passport photo with mobile?

Yes. Use your mobile camera in good lighting against a white wall, then upload to our Passport Photo Maker for automatic cropping to official dimensions.

What Is an ID Photo Grid? How to Print Passport Photos at Home

When you visit a photo studio for passport photos, they print multiple copies on a single sheet and cut them for you. With BGImageSnap.com free ID Photo Grid Maker, you can create the same print-ready sheet at home in under a minute, saving time and money.

What Is an ID Photo Grid?

An ID photo grid is a layout of multiple identical passport or ID photos arranged on a standard print size, with dashed cut-guide lines so you can accurately trim each photo after printing. Common configurations:

  • 4×6 inch sheet: Fits 4 to 6 passport-size photos (most common for home printing)
  • 5×7 inch sheet: Fits 6 to 9 passport photos depending on size
  • A4 sheet: Standard European paper size, fits 8 to 12 passport photos

How to Create a Passport Photo Grid Free Online

  1. Make your passport photo: Use our Passport Photo Maker to get the correctly sized and cropped photo for your country.
  2. Remove or replace the background: Use our Background Remover to apply the required official white or light blue background.
  3. Open the Grid Maker: Go to the ID Photo Grid Maker.
  4. Upload your cropped passport photo.
  5. Select your print sheet size: Choose 4×6, 5×7, or A4.
  6. Download the grid as a high-resolution JPG or PDF at 300 DPI, ready to print.
  7. Print at 100% scale: Never use fit to page — always print at actual size (100%) for accurate dimensions.

How Many Passport Photos Fit on a 4×6 Sheet?

For US passport photos (2×2 inches), a 4×6 sheet fits 4 photos in a 2×2 grid. For smaller UK or EU photos (35×45 mm), you can fit 6 to 8 per 4×6 sheet. Our tool automatically calculates the optimal grid layout based on your photo size and selected sheet.

Where to Print Your Passport Photo Grid

  • Home printer: Use glossy or matte photo paper and print at maximum quality.
  • Photo lab or pharmacy: Upload the downloaded file to Walgreens, CVS, Costco, or similar services for professional glossy prints.
  • Office printer: A4 grids work well on standard office printers at full size.

Frequently Asked Questions

Can I use an ID photo grid for a driving licence or visa photo?

Yes. Our grid maker works for any ID photo size. Use our Passport Photo Maker to get the correct crop first, then create the grid with cut guides.

What DPI should passport photos be printed at?

Official passport photos must be printed at a minimum of 300 DPI for sharp edges and accurate color. Our tool exports grids at 300 DPI by default to meet government standards.

Can I download the grid as a PDF?

Yes. The ID Photo Grid Maker lets you download a high-res JPG or a print-ready PDF at 300 DPI.

Is the grid maker completely free?

Yes. BGImageSnap.com ID Photo Grid Maker is 100% free with no watermarks, no signup required, and no limits on usage.

How to Make a Passport Photo at Home: Complete Country-by-Country Guide

Taking a passport photo at home is easier than most people think. With BGImageSnap.com free Passport Photo Maker, face detection automatically crops and sizes your photo to the exact specifications for over 50 countries — no photo studio required.

Passport Photo Size Requirements by Country

  • United States (US): 2×2 inches (51×51 mm) at 300 DPI. Head must be 1 to 1.375 inches tall.
  • United Kingdom (UK): 35×45 mm. Head height 29 to 34 mm. Plain light grey or cream background.
  • European Union (Schengen): 35×45 mm. White background, neutral expression.
  • India: 51×51 mm or 35×45 mm depending on document type. White background.
  • Canada: 50×70 mm. Plain white or off-white background.

Our Passport Photo Maker has presets for all these standards. Select your country and the tool sizes and crops automatically.

How to Take a Perfect Passport Photo at Home

  1. Set up your background: Use a plain white wall or hang a white sheet. Even daylight lighting is essential — face a window for best results.
  2. Frame your shot: Use a timer or ask someone to help. Face the camera directly, mouth closed, neutral expression, eyes open and looking forward.
  3. Upload to our tool: Open the Passport Photo Maker, select your country, and upload your photo.
  4. Auto face crop: The tool uses face-api.js to locate your face and crop to exact required dimensions.
  5. Set the background: Use our Background Remover to replace the background with official white or light blue.
  6. Print: Download at 300 DPI and use our ID Photo Grid Maker to print multiple copies on a 4×6 inch sheet.

Common Passport Photo Mistakes to Avoid

  • Wearing glasses (rejected in most countries since 2016)
  • Smiling or showing teeth
  • Shadows on the face or background
  • Head tilted or rotated
  • Hair covering the eyes or face
  • Wrong DPI or incorrect file dimensions

Frequently Asked Questions

Can I use my phone camera for a passport photo?

Yes. Modern smartphones produce more than sufficient quality for passport use, provided you follow the framing, lighting, and background requirements above.

What background color is needed for a US passport photo?

US passport photos must have a plain white or off-white background. Use our Background Remover to remove and replace your background before using the Passport Photo Maker.

How do I print 6 passport photos on one sheet?

Use our ID Photo Grid Maker to arrange multiple copies on a print-ready sheet with dashed cut-guide lines included.

Does the tool store my photos?

No. All face detection and cropping runs entirely in your browser using JavaScript. No data is sent to any server.