Introduction
You need a small file. You want a vintage look. You are testing how compression affects a design. You need a low quality image maker. Most guides talk about improving images. They focus on sharpening, upscaling, or adding clarity. But sometimes the goal is the opposite. You need to reduce quality intentionally. You need to make pixels visible, blur details, or shrink file sizes to meet exact requirements. A low quality image maker gives you that control. It is not about ruining a photo. It is about creating a specific result with purpose.
In this guide, you will learn what a low quality image maker actually does, why creators and developers use one, the safest methods to reduce resolution online, common errors to avoid, and practical tips for consistent results. Whether you work on art projects, web testing, or simple file management, this guide gives you the knowledge to reduce image quality safely and intentionally.
No confusion. No unnecessary tools. Just clear steps.
Quick Answer
A low quality image maker is an online tool or method that intentionally reduces the resolution, detail, or file size of an image. It creates low resolution results for artistic effects, compression testing, small file delivery, or retro design styles.
Key takeaways:
- It reduces pixel density or applies compression to lower quality
- It is used for vintage aesthetics, testing load times, and small banners
- Online tools work faster than manual software adjustments
- Always save an original copy before reducing quality
- Results vary by method, so choose based on your end goal
What Is a Low Quality Image Maker
A low quality image maker is any tool or process designed to lower the visual fidelity of an image file. It can reduce dimensions, apply heavy compression, add pixelation, or blur fine details.
The term covers both automated online services and manual techniques in editing software. Some makers focus on reducing pixel count. Others apply algorithms that simulate old cameras or degraded digital storage.
What separates a useful maker from a simple resize tool is control. A good maker lets you choose exactly how much quality to remove. You decide whether the result looks slightly soft or heavily distorted.
This tool is not for correcting mistakes. It is for creating them on purpose with professional intent.
Why Would You Want Lower Image Quality
Most people assume lower quality is always bad. That is not true. There are many valid reasons to use a low quality image maker.
Artistic Style: Pixel art, glitch aesthetics, and retro gaming visuals rely on visible pixels. Reducing resolution creates that look without complex drawing.
Testing and Development: Web developers test how sites load with small or compressed files. A low quality image maker produces realistic test files quickly.
Small File Requirements: Some platforms limit upload sizes. Rather than changing the entire design, you can reduce image quality to meet the limit while keeping the layout intact.
Social Media Filters: Some trends favor grainy, low fidelity photos that feel authentic or nostalgic.
Educational Demonstrations: Teachers show how digital images degrade with compression. A maker creates consistent examples.
The key is intention. Random low quality looks like an error. Planned low quality looks like a choice.
How Low Quality Image Makers Work
Understanding the mechanics helps you choose the right approach.
When you upload an image to a maker, one of two things happens. The tool either reduces the total pixel dimensions or it applies compression algorithms that discard data to shrink the file.
Reducing dimensions is straightforward. A 3000 by 2000 pixel image might become 300 by 200 pixels. Every detail shrinks with it.
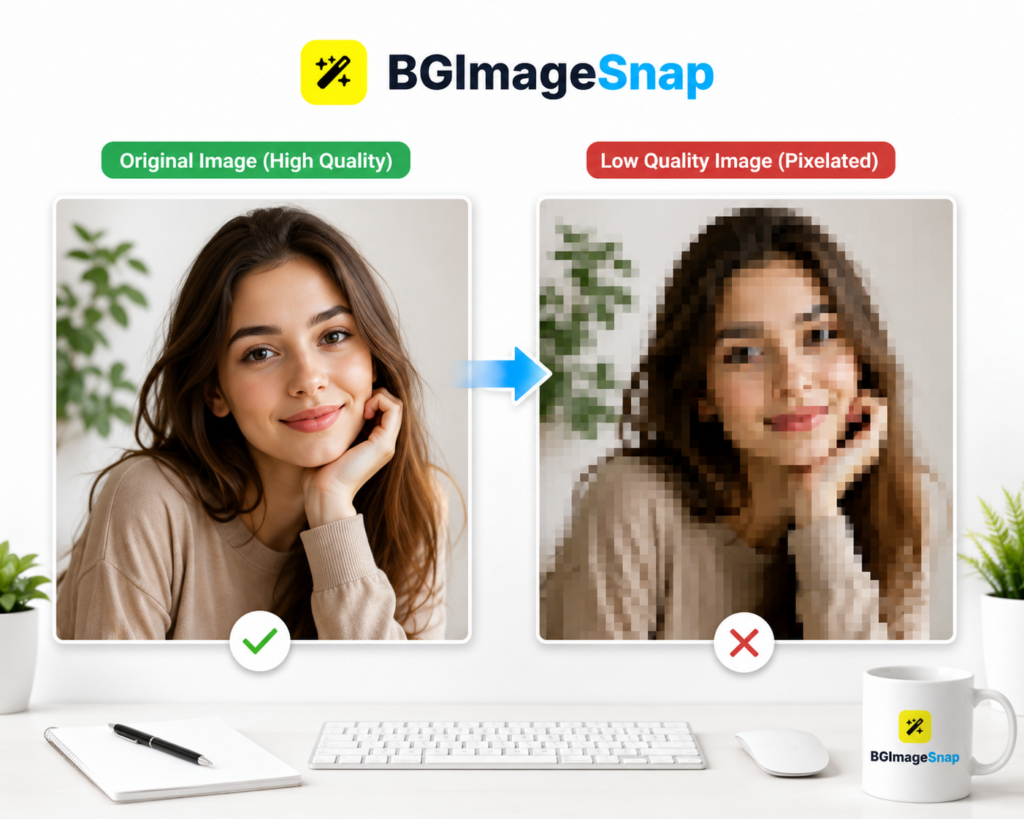
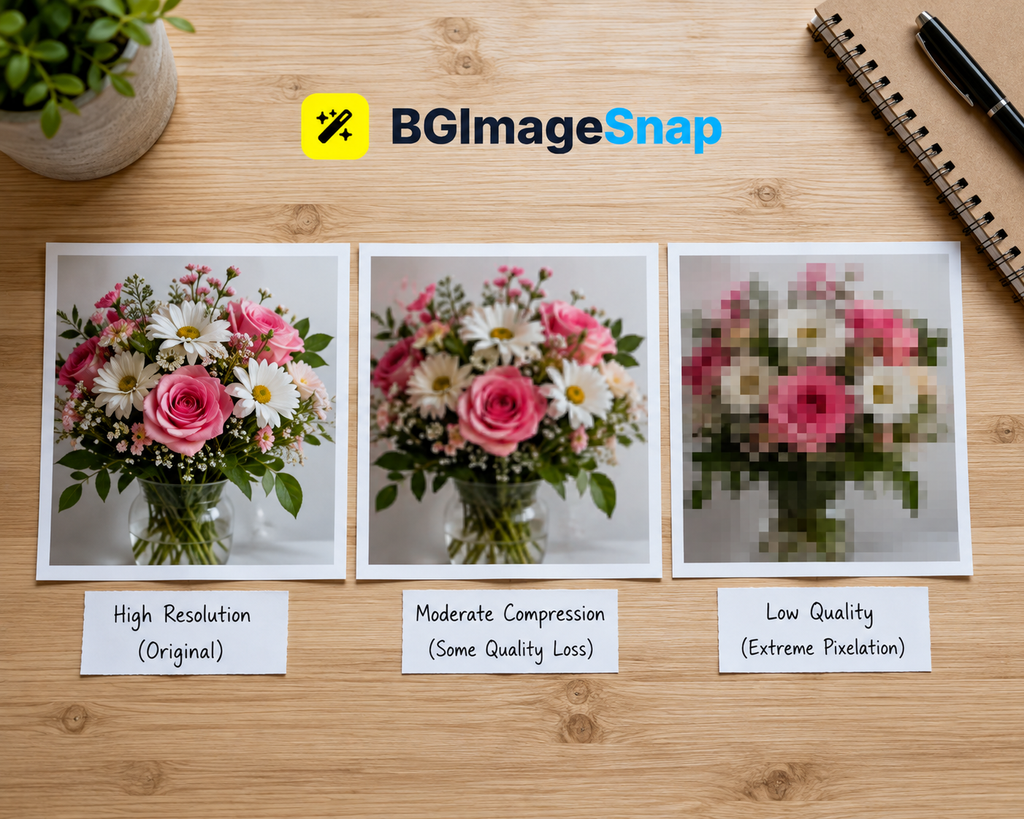
Compression works differently. The pixel dimensions stay the same, but the file stores less information about each pixel. The image looks similar at first glance, but close inspection shows artifacts, blockiness, or color banding.
Some advanced makers blend both methods. They reduce size and apply compression together for stronger effects.
The result is always a file that takes up less space and displays less detail than the original.
Types of Low Resolution Results
Not all low quality looks the same. Knowing the types helps you match the method to your project. Pixelated: Large square pixels are visible. This happens when dimensions drop sharply. It is common in retro designs. Blurry: Edges lose sharpness. Fine text becomes unreadable. This usually comes from heavy compression or smoothing filters. Compressed Artifacts: Strange patterns appear in smooth color areas. These blocks and bands come from algorithms discarding too much color data.
Color Reduced: The image uses fewer colors. It may look flat or posterized. This is useful for specific graphic styles. Grainy or Noisy: Random speckles cover the image. Some makers add noise to simulate film or old digital sensors. Choose the type that fits your creative or technical goal.
Seven Methods to Create Low Resolution Images
Here are seven reliable ways to lower image quality using a low quality image maker or manual process.
One. Resize to Small Dimensions: Change width and height to low numbers like 150 by 150 pixels. This forces clear pixelation.
Two. Apply Heavy JPEG Compression: Save the file with a very low quality setting. The dimensions stay the same but artifacts appear quickly.
Three. Use Online Pixelation Tools: Upload the image to a maker that applies block style pixel reduction. This gives precise control over pixel size.
Four. Convert to Low Bit Color: Change the image to use 8 or 16 colors instead of millions. This creates flat, posterized results.
Five. Add Blur and Sharpen Cycles: Apply a strong blur then slight sharpening. This creates a strange, degraded texture without changing dimensions.
Six. Use Downsampling: Reduce the image to 25 percent or 10 percent of its original size using resize options in basic editors.
Seven. Apply Vintage Filters: Some makers simulate old cameras with combined blur, noise, and color reduction in one click.
Each method produces a different result. Test more than one to find the right fit.
Step-by-Step Guide to Reducing Image Quality
Follow these steps to create consistent low resolution results without losing your original file.
Step 1: Save Your Original
Always keep a high quality backup. Once you reduce quality, you cannot fully restore the original detail.
Step 2: Choose Your Method
Select one of the seven approaches above. If you are unsure, start with resizing dimensions.
Step 3: Upload to a Low Quality Image Maker
Use an online tool or open your image in basic editing software.
Step 4: Adjust Settings
Set dimensions, compression level, or effect strength. Preview the result before finalizing.
Step 5: Save as a New File
Never overwrite the original. Use a clear name like image_low_version.jpg.
Step 6: Check the File Size
Compare the new file to the original. A successful reduction should be significantly smaller.
Step 7: Verify Visual Quality
Open the result at full size. Confirm the level of degradation matches your goal.
This process takes only minutes once you know your preferred method.
Best Tools for Creating Low Quality Images
Not all makers work the same way. Here is a comparison to help you choose.
| Tool Type | Main Function | Best For | Key Consideration |
|---|---|---|---|
| Online Compressors | Reduce file size with compression | Quick file shrinking | Quality loss may vary |
| Pixelation Makers | Create visible square pixels | Art and retro design | Controls pixel size clearly |
| Resize Tools | Change dimensions precisely | Small banners and icons | Must set exact numbers |
| Vintage Filter Apps | Combine blur, noise, and color shifts | Social content | Less manual control |
| Basic Editors | Manual adjustments | Learning and testing | Takes more time per file |
When using any low quality image maker, check if it saves your original. Some online tools delete uploads quickly for privacy. Others keep files longer. Read their policies if your image contains sensitive content.
Common Mistakes to Avoid
Creating low quality on purpose does not mean being careless. Avoid these common errors.
Mistake One: Overwriting the Original File
Always save a new version. You may need the full quality file later for a different project.
Mistake Two: Applying Too Many Effects
Combining extreme compression with heavy blur and color reduction creates messy results. Choose one or two effects.
Mistake Three: Not Checking File Size
Some methods reduce visual quality but do not shrink the file much. If your goal is a small file, verify the result.
Mistake Four: Using the Wrong Format
JPEG handles compression best. PNG keeps edges sharper but creates larger files. Choose the format based on your output needs.
Mistake Five: Ignoring the Final Use
An image meant for a small web icon needs different treatment than one used for a large artistic print. Match the method to the display size.
Planning prevents these issues.
Tips for Professional Low Quality Results
Quality in low quality means consistency and purpose. These tips help you achieve reliable results.
Define Your Target First: Know the pixel dimensions or file size you need before you start reducing quality.
Use Preview Features: Most makers show a live preview. Use it to compare original and reduced versions side by side.
Work in Layers: If you use editing software, apply effects to duplicate layers. This lets you adjust strength without destroying the base.
Test at Actual Size: An image that looks fine in a small preview may reveal unwanted artifacts when viewed full screen.
Save Multiple Versions: Create one heavily reduced file and one moderately reduced file. Having options saves time.
Document Your Settings: Note which settings produced which result. This helps you repeat the effect for future projects.
These practices turn random degradation into controlled design.
FAQs
What is a low quality image maker used for?
A low quality image maker creates images with reduced detail, smaller dimensions, or compressed data. It serves artistic goals, testing needs, and file size requirements.
Can I restore quality after using a maker?
No. Once pixels are removed or compressed, the original data is lost. Always keep a backup of your high-quality file.
Does reducing quality always make files smaller?
Not always. Some methods change appearance without reducing file size significantly. Check the output file size to confirm.
Are online makers safe for private images?
Most delete files after processing, but policies vary. Avoid uploading sensitive content to unknown services.
Which format should I save in?
Use JPEG for compressed, degraded looks. Use PNG if you want sharp pixel edges with no compression artifacts.
How low should resolution go?
It depends on use. For small web icons, 150 pixels wide works. For artistic effects, experiment until you reach the desired look.
Can I use these methods for video?
These methods apply to still images. Video compression uses different tools and settings.
How do I know if I reduced quality too much?
If important details become unrecognizable or text becomes unreadable, you may have reduced quality beyond your goal.
Conclusion
A low quality image maker is a practical tool for artists, developers, and anyone who needs control over image fidelity. It turns a single photo into many possible versions, each with a different purpose. You now understand how these makers work, why people use them, and which methods produce which results. You have a step by step process, a comparison of approaches, and tips to avoid common errors. The best results come from clear goals and careful backups. Start with your original file protected. Apply your chosen method. Review the result. Adjust if needed. Low quality is not always a mistake. With the right maker and clear intent, it becomes a design choice.