

Quick Answer / Key Takeaways
Black and white photos remain one of the most powerful forms of visual storytelling in 2026. They strip away color distractions to reveal emotion texture and composition in their purest form. Whether you’re a professional photographer or someone looking to convert personal images understanding monochrome photography can transform how you see and capture the world.
Key takeaways:
- Black and white photography emphasizes light, shadow, texture, and emotion over color
- Modern tools make it easy to convert any color image to stunning monochrome
- The best black and white photos start with intentional composition and lighting
- Monochrome images create stronger emotional connections with viewers
- Professional conversion requires understanding tonal range and contrast
Why Black and White Photos Still Matter
In an era of vibrant 4K displays and HDR photography black and white photos continue to captivate audiences worldwide. But why does this century-old medium still resonate so deeply?
The answer lies in simplicity. When you remove color from an image you’re left with the essential elements of visual storytelling: light, shadow, form and texture. These elements speak directly to human emotion in ways that color sometimes cannot.
The Timeless Appeal of Monochrome
Black and white photography has a unique ability to transcend time. A well-crafted monochrome image from 1920 can feel just as relevant and powerful today as it did a century ago. This timeless quality makes black and white photos particularly valuable for:
- Portraits that reveal character and emotion
- Street photography that captures authentic moments
- Landscapes that emphasize natural drama
- Architecture that highlights structural beauty
- Fine art that explores abstract concepts
According to photography experts at Digital Photography School black and white images force viewers to engage more deeply with the subject creating a more contemplative viewing experience.
The Psychology Behind Monochrome Photography
Understanding why black and white photos affect us psychologically can help you create more impactful images.
How the Brain Processes Monochrome Images
When viewing black and white photography the human brain shifts from automatic color processing to more interpretive analysis. This change creates several psychological effects:
- Increased attention span – Viewers spend more time examining details
- Stronger emotional response – Without color cues emotions feel more direct
- Enhanced memory retention – Monochrome images are often remembered more vividly
- Universal appeal – Removes cultural color associations
Research from visual psychology experts suggests that black and white photos activate different neural pathways than color images leading to deeper engagement and more personal interpretation.
Emotional Impact
The absence of color amplifies emotional content. A portrait in black and white can convey:
- Nostalgia and timelessness
- Drama and intensity
- Intimacy and vulnerability
- Mystery and intrigue
- Elegance and sophistication
This emotional depth is why many professional photographers still choose monochrome for important projects from wedding photography to documentary work.
How to Turn Color Images Into Black and White Photos
Converting color images to black and white photos is both an art and a science. Here’s a step-by-step guide to achieving professional results.
Method 1: Professional Software Conversion
Adobe Photoshop remains the gold standard for black and white conversion:
- Open your color image in Photoshop
- Go to Layer > New Adjustment Layer > Black & White
- Use the color sliders to control how each color converts to gray
- Adjust the red slider to brighten or darken skin tones
- Use the blue slider to control sky brightness
- Fine-tune with Curves or Levels for perfect contrast
Pro tip: Always work on a duplicate layer to preserve your original color image.
Method 2: Lightroom’s Black & White Panel
For photographers using Adobe Lightroom:
- Import your image and switch to the Develop module
- Click Black & White in the Basic panel
- Use the B&W Mix panel to adjust individual color channels
- Add contrast with the Tone Curve
- Use Clarity to enhance texture
- Apply Sharpening selectively to key areas
Method 3: Free Online Tools
Several free tools can convert images to black and white photos:
- Canva – One-click Mono filters with intensity control
- ResizePixel – Simple online converter
- Cloudinary – Developer-friendly with API access
Method 4: Mobile Apps
For on-the-go conversion:
- Snapseed (Free) – Google’s powerful mobile editor
- VSCO – Professional-grade filters
- Lightroom Mobile – Full desktop functionality
Best Tools for Black and White Photo Conversion
Choosing the right tool depends on your needs skill level and budget.
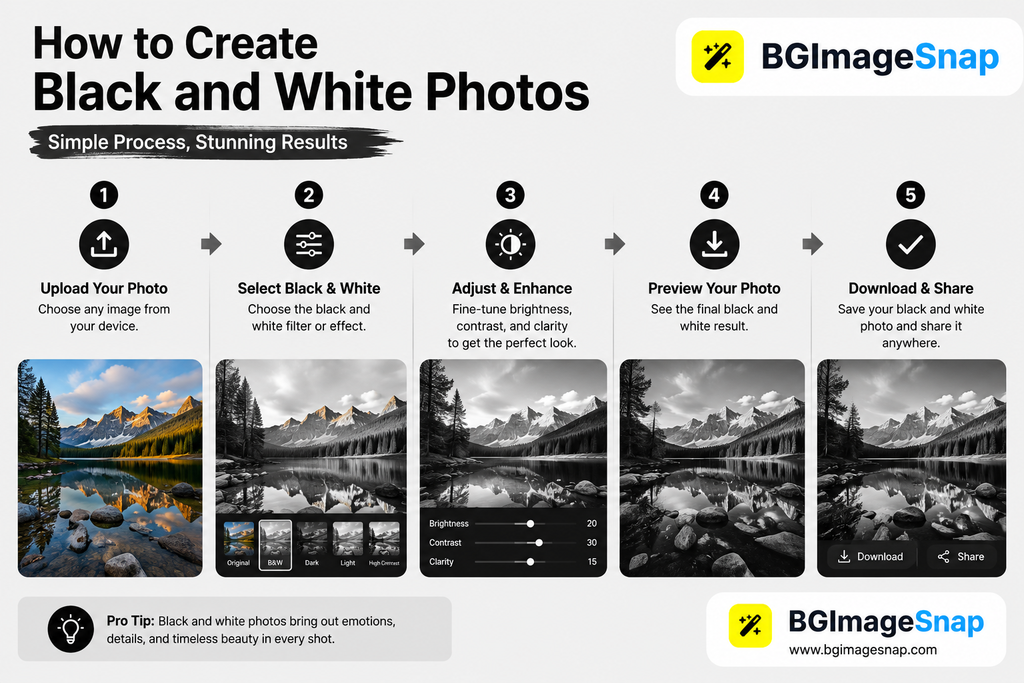
Professional-Grade Software
| Tool | Best For | Price | Key Features |
|---|---|---|---|
| Adobe Photoshop | Professional photographers | $20.99/month | Advanced channel mixing, layer-based editing |
| Adobe Lightroom | Batch processing | $9.99/month | Non-destructive editing, presets |
| Capture One | Studio photographers | $299 one-time | Superior color science, tethering |
| DxO PhotoLab | Noise reduction | $129 one-time | AI-powered conversions |
Free and Budget Options
| Tool | Best For | Price | Key Features |
|---|---|---|---|
| GIMP | Open-source enthusiasts | Free | Full-featured Photoshop alternative |
| Darktable | RAW processing | Free | Lightroom alternative |
| Snapseed | Mobile users | Free | Professional mobile editing |
| Canva | Quick social media edits | Free tier available | One-click filters |
Specialized Black & White Tools
- Silver Efex Pro (Part of Nik Collection) – Film emulation presets
- Alien Skin Exposure – Vintage film looks
- VSCO Film – Authentic analog aesthetics
7 Powerful Techniques for Stunning Black and White Photos
Master these techniques to elevate your black and white photos from ordinary to extraordinary.
1. See in Tones Not Colors
Train your eye to visualize scenes in grayscale before shooting. Look for:
- Strong contrast between light and shadow
- Interesting textures and patterns
- Clear geometric shapes
- Leading lines and visual flow
Practice exercise: Set your camera to monochrome mode and shoot for a week. This trains your brain to “see” in black and white.
2. Master the Histogram
Your histogram is your best friend in monochrome photography:
- Zone 0-3: Deep shadows (pure black to dark gray)
- Zone 4-6: Midtones (medium gray)
- Zone 7-10: Highlights (light gray to pure white)
Aim for a full tonal range without clipping at either end.
3. Use Directional Lighting
Light direction dramatically affects black and white images:
- Side lighting creates dramatic shadows and reveals texture
- Backlighting produces silhouettes and rim lighting
- Front lighting minimizes shadows for flat even tones
- Rembrandt lighting creates classic portrait drama
4. Emphasize Texture
Without color texture becomes a primary visual element:
- Rough surfaces like stone wood or fabric
- Skin details in portraits
- Natural patterns in landscapes
- Architectural details and materials
5. Control Contrast in Post-Processing
Contrast is the soul of black and white photography:
- High contrast creates drama and impact
- Low contrast produces soft dreamy effects
- Local contrast (clarity) enhances texture
- Tonal contrast separates different gray values
6. Dodge and Burn Strategically
This classic darkroom technique remains powerful in digital editing:
- Dodge (lighten) areas you want viewers to notice
- Burn (darken) distracting elements
- Guide the viewer’s eye through the composition
- Create depth and dimension
7. Choose Your Subjects Wisely
Some subjects naturally excel in black and white:
Works well:
- Strong shadows and light patterns
- Textured surfaces
- Emotional portraits
- Architectural details
- Stormy skies
Often better in color:
- Sunset landscapes (unless emphasizing clouds)
- Colorful flowers or foliage
- Food photography
- Fashion with important color details
Common Mistakes to Avoid
Even experienced photographers make these errors with black and white photos:
1. Simply Desaturating Color Images
The mistake: Removing all color saturation without adjusting tones.
The fix: Use proper conversion tools that let you control how each color translates to gray.
2. Ignoring Composition
The mistake: Assuming black and white will “fix” a poorly composed image.
The fix: Compose intentionally. Without color composition becomes even more critical.
3. Over-Processing
The mistake: Pushing contrast clarity and sharpening too far.
The fix: Subtlety is key. Aim for natural-looking tonal transitions.
4. Neglecting the Histogram
The mistake: Not checking for clipped highlights or shadows.
The fix: Always review your histogram. Recoverable shadows are better than blown highlights.
5. Converting Every Image
The mistake: Assuming all images look better in black and white.
The fix: Choose images that benefit from monochrome. Some scenes need color.
Black and White vs. Color: When to Choose Which
Understanding when to use black and white photos versus color is crucial for visual storytelling.
Choose Black and White When:
- The scene has strong contrast and interesting light
- You want to emphasize texture and form
- Color is distracting or unimportant
- You’re aiming for a timeless classic feel
- The emotional content is more important than literal representation
- You’re working with mixed or unflattering lighting
Choose Color When:
- Color is essential to the story or subject
- You’re shooting vibrant saturated scenes
- The image relies on color contrast for impact
- You need accurate documentation
- The subject is naturally colorful (flowers, food, fashion)
Hybrid Approach
Many photographers shoot in RAW with a monochrome preview allowing them to decide later. This approach gives you maximum flexibility.
1. What makes a good black and white photo?
A strong black and white photo has clear tonal range from deep blacks to bright whites interesting texture good composition and emotional impact. The best monochrome images use light and shadow to tell a story that color would only distract from.
2. Should I shoot in black and white mode or convert later?
Always shoot in RAW format even if you preview in monochrome. RAW files retain all color data giving you maximum control during conversion. Set your camera’s picture style to monochrome for a black and white preview on your LCD.
3. How do I convert color photos to black and white professionally?
Use professional software like Adobe Photoshop or Lightroom with the Black & White adjustment layer. This lets you control how each color converts to gray rather than simply removing saturation. Adjust individual color channels to fine-tune skin tones skies and other elements.
4. What’s the best free tool for black and white conversion?
Snapseed (mobile) and GIMP (desktop) are excellent free options. For quick online conversion Canva and ResizePixel work well. However professional software offers more control over the conversion process.
5. Why do black and white photos often look more emotional?
Without color the brain focuses on facial expressions body language, light, and shadow. This creates a more direct emotional connection. Monochrome also evokes nostalgia and timelessness which can intensify emotional responses.
6. Can I print black and white photos at home?
Yes but use high-quality photo paper and ensure your printer has separate black and gray ink cartridges. For professional results consider using a dedicated photo printing service that specializes in fine art prints.
7. How do I avoid muddy-looking black and white photos?
Ensure you have true blacks and true whites in your image. Use the Levels or Curves adjustment to set black and white points. Add local contrast with the Clarity slider and consider selective sharpening on key details.
8. What camera settings work best for black and white photography?
Shoot in RAW at the lowest ISO possible for clean images. Use aperture priority mode: f/8-f/11 for landscapes f/1.8-f/2.8 for portraits. Protect your highlights slightly underexposed images are easier to recover than blown-out ones.
Conclusion
Black and white photos remain one of photography’s most powerful forms of expression. In 2026 they continue to captivate viewers by stripping away the distractions of color and revealing the essential elements of visual storytelling: light, shadow, texture and emotion.
Whether you’re a professional photographer seeking to master monochrome techniques or someone looking to convert cherished family photos understanding the principles of black and white photography will transform how you see and capture the world. The tools available today from professional software to free mobile apps make it easier than ever to create stunning monochrome images. But remember: the best black and white photos start with intentional composition, thoughtful lighting and a clear vision of what you want to communicate. Ready to explore the timeless art of monochrome photography? Start by converting one of your favorite color images to black and white and see how it transforms the emotional impact. You might be surprised at what you discover.