
Introduction
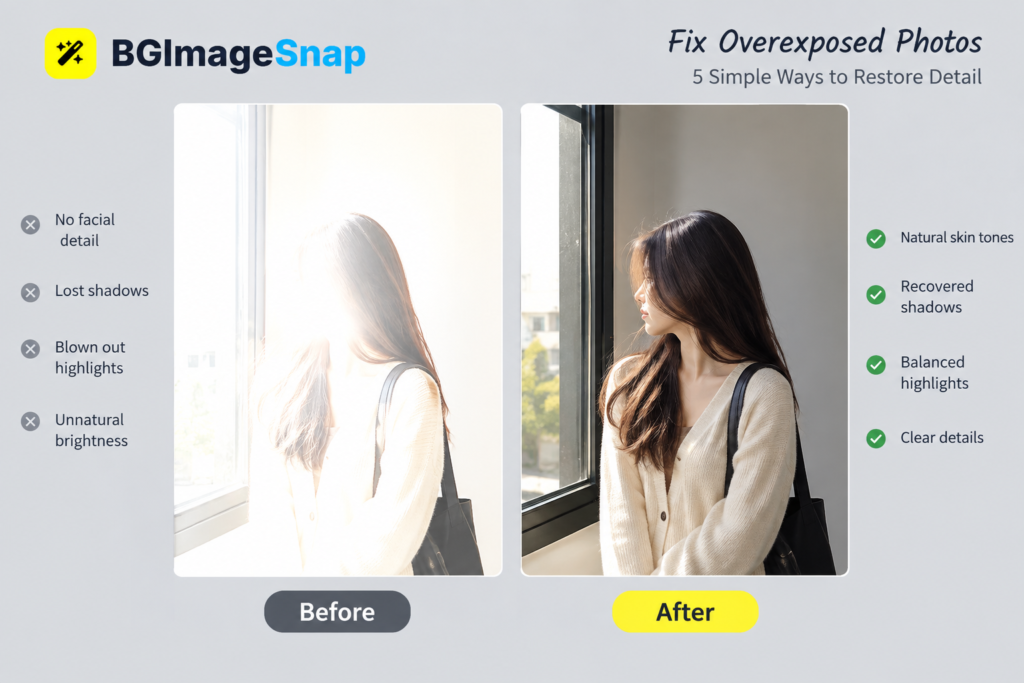
You take a photo under bright sunlight. The sky is glowing. Your subject’s face is bleached white. The details in their clothes are gone. You zoom in hoping to recover something but everything is just a blur of white.
This is overexposure. And it’s one of the most common mistakes photographers make especially when shooting on automatic mode or with smartphone cameras.
The good news? Overexposed photos can often be fixed. Not always completely but enough to save the moment, the expression, the memory.
In this guide you will learn exactly how to fix overexposed photos using simple tools and techniques. We will show you how to bring back detail without making your image look unnatural. You will learn what works and what doesn’t. And you will walk away with five practical methods you can use today whether you’re editing on your phone or on your computer.
No theory. No jargon. Just real results.
Quick answer
You can fix overexposed photos by reducing brightness and highlights in editing software. The best results come from using tools that preserve detail in the whites while recovering mid tones. For quick fixes on any device use BGImageSnap a free online tool that restores overexposed images in seconds without downloads or registration.
What causes overexposed photos
Overexposure happens when too much light hits the camera sensor. This overwhelms the sensor’s ability to record detail and turns bright areas into pure white with no texture or color.
Common causes include:
- Shooting in direct sunlight without adjusting exposure
- Using auto mode on a smartphone or camera
- Pointing the camera at a bright background like a window or sky
- Not using exposure compensation or HDR mode
- Editing photos with too much brightness or contrast applied
The result is a photo where the highlights are blown out meaning the information in those areas is permanently lost. But even in these cases, some detail can often be recovered especially if you are working with a RAW file or a high quality JPG.
Why you should fix overexposed photos
Overexposed photos are not just technically flawed they are emotionally disappointing.
You may have captured a perfect moment: a child laughing, a sunset, a family gathering. But if the faces are washed out or the details are gone you lose the heart of the image.
Fixing overexposure means:
- Recovering skin tones and facial features
- Restoring texture in clothing hair and objects
- Preserving the mood and story of the photo
- Making your images look professional and intentional
Even if you are not a professional photographer saving a single photo can mean preserving a memory you can’t recreate.
5 ways to fix overexposed photos
Here are five proven methods to bring life back to your overexposed images.
- Use a dedicated online repair tool
Tools like BGImageSnap let you upload your photo and automatically adjust exposure highlights and whites with one click. No skills required. - Adjust exposure in free editing apps
Use apps like Snapseed Photopea or Lightroom Mobile. Lower the exposure and highlights sliders. Increase shadows slightly to recover detail. - Use the recovery slider in desktop software
In Adobe Lightroom or Photoshop use the Recovery or Highlights slider to pull detail back from blown out areas. This works best on RAW files. - Convert to black and white
If color recovery is impossible converting the image to grayscale can sometimes hide blown highlights and emphasize texture instead. - Crop and reframe
If only part of the photo is overexposed crop it out. Focus on the well exposed areas and create a new composition.
Step by step guide to using BGImageSnap
You do not need to be an expert to fix overexposed photos. Here is how to do it in three simple steps using BGImageSnap.
Step 1 – Upload your photo
Go to https://bgimagesnap.com and click the upload button. Select your overexposed image from your phone or computer.
Step 2 – Apply the fix
Click the Auto Fix button. The tool will analyze the image and reduce highlights brighten shadows and restore natural contrast. You can also manually adjust the Exposure and Highlights sliders if needed.
Step 3 – Download your image
Once you are happy with the result click Download. Your photo is now saved with balanced tones and visible detail.
The entire process takes less than 30 seconds. No signup. No watermarks. No learning curve.
How to avoid overexposure in the future
Prevention is always better than repair. Here are three tips to avoid overexposed photos before you even press the shutter.
Tip 1: Use your camera’s histogram
Most smartphones and DSLRs show a histogram when reviewing photos. If the graph is pushed hard to the right the image is overexposed. Adjust exposure to center the curve.
Tip 2: Enable HDR mode
High Dynamic Range mode takes multiple exposures and blends them. This preserves detail in both shadows and highlights. Turn it on for outdoor shots.
Tip 3: Avoid shooting into the sun
Position your subject so the light is behind you or to the side. If you must shoot toward the sun use a lens hood or your hand to block direct glare.
Common mistakes when editing overexposed images
Even with the right tools it is easy to make things worse.
Mistake #1: Over correcting the exposure
Pulling down highlights too far can make your image look flat and gray. Always adjust in small steps.
Mistake #2: Ignoring skin tones
Overexposed faces often look chalky. Use the color balance or white balance tool to restore natural warmth.
Mistake #3: Using low quality tools
Some free apps compress your image too much during editing. This creates banding and noise. Always choose tools that preserve original quality.
Mistake #4: Editing JPG files multiple times
Each time you save a JPG it loses a bit of quality. Always edit from the original file and save one final version.
Mistake #5: Thinking all white areas are lost
Sometimes the white sky or wall still has subtle detail. Use the recovery slider carefully you might be surprised what you can bring back.
Frequently asked questions
Can you fix overexposed photos on your phone
Yes. Use free apps like Snapseed or Lightroom Mobile. Or upload to BGImageSnap directly from your phone browser.
Is it possible to recover a completely white sky
Sometimes. If the sky is pure white with no texture it is likely unrecoverable. But if there is even a hint of cloud detail the recovery slider can help.
Does editing overexposed photos reduce quality
Only if you use low quality tools or save multiple times. Use high resolution output and avoid re saving the same file repeatedly.
Can you fix overexposed photos in Photoshop
Yes. Use the Highlights and Whites sliders in the Camera Raw filter. You can also use the Shadows Highlights tool for fine control.
Is it better to fix overexposed photos or retake them
If you have the chance retake the photo. But if the moment is gone editing is your only option. Always keep the original file.
Can you fix overexposed photos taken at night
Overexposure is rare at night. If your night photo is too bright it is likely due to long exposure or high ISO. The same tools apply.
Why does my photo look grainy after fixing
This usually happens when you push the shadows too high to recover detail. It reveals noise from low light areas. Use noise reduction tools after fixing exposure.
Can you fix overexposed photos without software
Not really. Manual adjustments require editing software. But you can prevent overexposure by using your camera settings wisely.
Conclusion
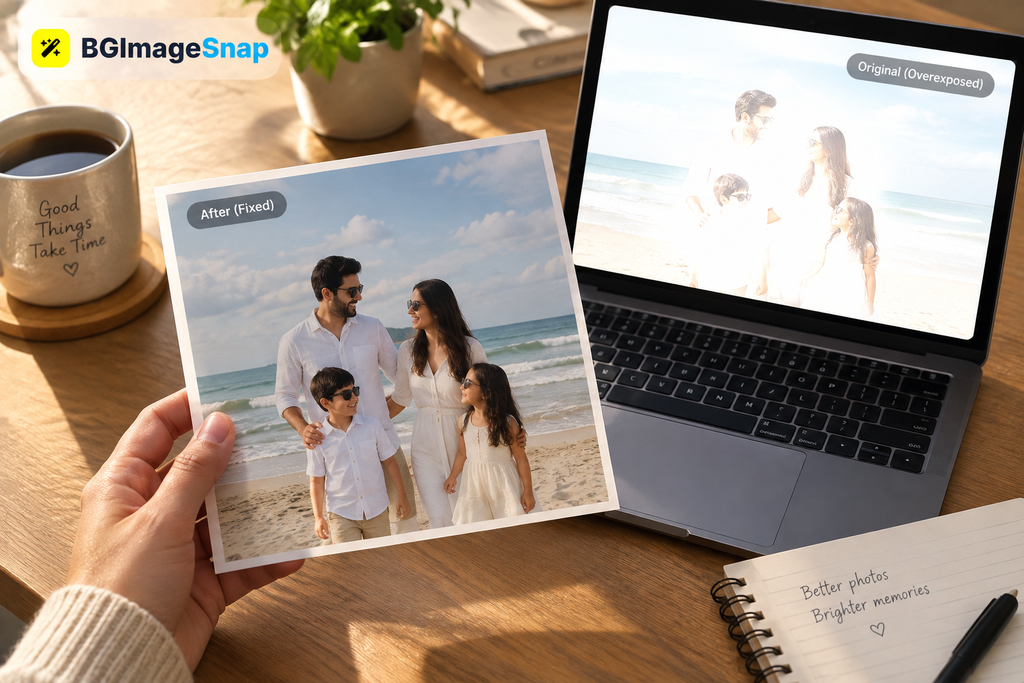
Overexposed photos are frustrating but they are not always lost. With the right tools and a little patience you can recover the details that matter most: the smile on your child’s face the texture of a summer dress the glow of a quiet sunset. You do not need expensive software. You do not need to be a professional. You just need to know how to use the tools that are already available. The difference between a washed out photo and a restored one is not skill it is knowing where to look and what to adjust. Start with BGImageSnap. Try it once. You will see how quickly you can turn a broken image into something beautiful.