

Removing unwanted shadows can make a photo look cleaner brighter and more professional. Whether you are preparing a product image editing a social media photo creating a presentation or improving a personal picture knowing how to remove shadow from photo can make a noticeable difference.
Shadows are often created by lighting nearby objects camera position or the original background. While natural shadows can add depth unwanted shadows may distract viewers or make an image look uneven.
In this guide you will learn what unwanted shadows are why people remove them how to remove shadow from photo which editing methods are useful, and how BGImageSnap can make image editing easier for beginners.
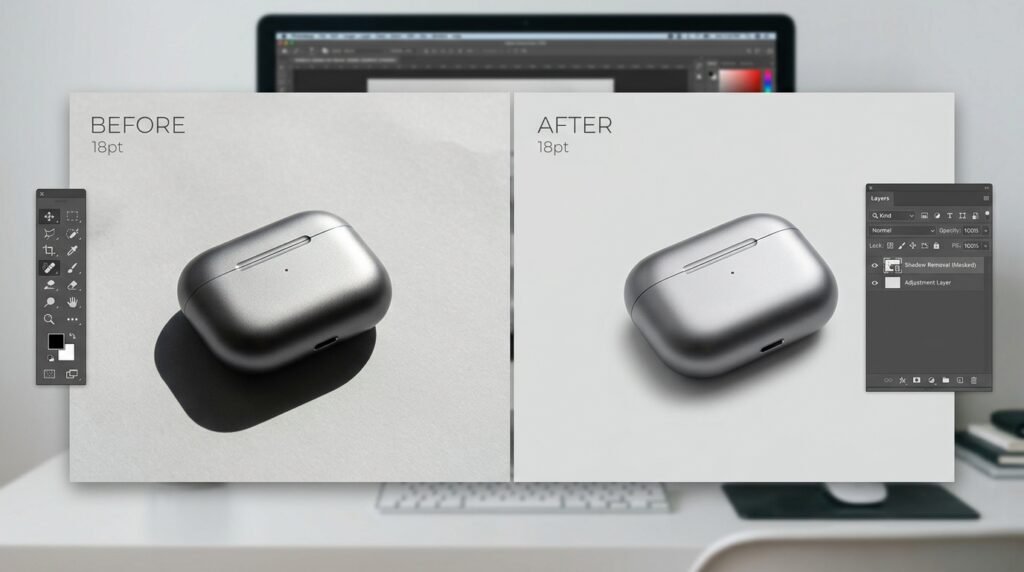
What Does It Mean to Remove Shadow From Photo?
To remove shadow from photo means reducing or completely eliminating unwanted dark areas caused by lighting or objects in the image.
A shadow can appear behind a person underneath a product around an object or across a surface. The best editing method depends on the type of shadow and the result you want.
Some shadows are easy to remove because they are located on a plain background. Others require more detailed editing because they overlap with the subject.
The goal is usually to create a cleaner image while keeping the main subject natural and realistic.
Why Remove Shadow From Photo?
There are many reasons someone may want to remove unwanted shadows from an image.
Improve Product Photos
E commerce sellers often need clean product images. Strong shadows can make products look less polished or interfere with a simple product presentation.
Removing distracting shadows can help the product stand out more clearly.
Create Cleaner Social Media Images
Creators and marketers often use edited images for posts advertisements thumbnails and promotional graphics. Removing unnecessary shadows can create a cleaner visual appearance.
Prepare Professional Images
Photographers designers students and businesses may need images with a simple and consistent appearance. Removing unwanted shadows can help images fit better into documents presentations websites and promotional materials.
Improve Background Editing
When you are changing or removing a background shadows can sometimes remain around the subject. Cleaning these areas can make the final result look more natural.
How to Remove Shadow From Photo
The right technique depends on the type of image you are editing. Here are some practical approaches beginners can understand.
Use Background Removal
If the unwanted shadow is connected to the background removing the background can be one of the simplest solutions.
This approach separates the main subject from the original scene. You can then place the subject on a transparent or new background.
This is particularly useful for product photography profile images catalog images and marketing graphics.
Use an Eraser or Brush Tool
For small shadows a brush or eraser can sometimes work well.
Zoom into the image and carefully edit the unwanted dark area. Use a soft brush when necessary to avoid creating sharp or unnatural edges.
This method is useful when the shadow covers only a small part of the background.
Adjust Brightness and Exposure
Some shadows do not need to be completely removed. They may simply need to be reduced.
Increasing brightness exposure or shadows in an image editor can make dark areas less noticeable.
However excessive adjustments can make the entire image look washed out so make small changes and compare the result.
Replace the Background
If the original background contains heavy shadows replacing it may produce a cleaner result than trying to repair every dark area.
A new background can give the subject a consistent appearance while removing distracting elements from the original image.
How BGImageSnap Can Help With Background Editing
BGImageSnap is designed to make image editing easier for people who want a simple way to work with backgrounds.
What BGImageSnap Does
BGImageSnap helps users work with image backgrounds and create cleaner subject focused images.
Instead of spending a long time manually selecting every part of a subject users can use a simpler background editing workflow.
This can be especially useful when unwanted shadows are part of the original background and you want to separate the subject from that environment.
How to Use BGImageSnap
Start by selecting the image you want to edit.
Upload the image to BGImageSnap and allow the tool to process the background.
Review the result carefully. Check the edges around hair clothing products and other detailed areas.
If the result looks good use the processed image for your intended project.
For images where the shadow is attached closely to the subject inspect the result before using it commercially or publishing it.
Who Can Benefit From BGImageSnap?
BGImageSnap can be useful for:
• E commerce sellers preparing product images
• Students creating presentations
• Content creators editing social media graphics
• Marketers preparing promotional visuals
• Designers working with image assets
• Beginners who want a simpler editing workflow
What Should You Expect From the Result?
The quality of any automated image editing result depends on the original photo.
Images with clear subjects and strong contrast between the subject and background are generally easier to process.
After processing always inspect important details. Hair transparent objects thin edges product handles and areas with similar colors may require additional editing.
Tips for Better Shadow Removal
Getting a clean result is not only about choosing an editing tool. The original photo also matters.
Use Good Lighting
Good lighting can reduce harsh shadows before editing begins.
When taking product or portrait photos use soft and balanced lighting whenever possible.
Avoid Extremely Dark Backgrounds
A subject that blends into a dark background can be harder to separate during editing.
A clear difference between the subject and background usually makes background editing easier.
Check the Edges
Always inspect the edges after removing or reducing a shadow.
Look around hair fingers clothing product edges and other detailed areas. Small unwanted fragments can make an edited image look artificial.
Do Not Over Edit
Trying to remove every small variation can sometimes make a photo look unnatural.
The best editing usually preserves realistic details while reducing distractions.
Common Mistakes When Removing Shadows
Beginners often make a few common editing mistakes.
Removing Natural Shadows
Not every shadow is a problem. Natural shadows can give objects depth and make them appear grounded.
Removing all shadows from a product can sometimes make it look like it is floating.
Using Excessive Brightness
Increasing brightness too much can remove detail from the image.
Instead of making the entire picture brighter focus on the unwanted dark areas when possible.
Ignoring Fine Details
Hair thin objects transparent areas and complex product shapes can be difficult to edit.
Always zoom in and inspect these areas before finishing the image.
Choosing the Wrong Background
A replacement background should match the purpose of the image.
A simple background may work well for product photography while a creative background may be more appropriate for social media content.
When Should You Remove a Shadow?
You should consider removing a shadow when it distracts from the subject or makes the image unsuitable for its intended purpose.
For example removing a shadow can be useful when preparing:
• Product listings
• Online catalogs
• Marketing graphics
• Profile images
• Presentations
• Website images
• Social media content
However keeping a subtle natural shadow can sometimes make an image look more realistic.
Frequently Asked Questions
Can I Remove Shadow From Photo Without Professional Editing Skills?
Yes. Beginners can use automated background editing tools to simplify the process. BGImageSnap can help reduce the amount of manual work involved in background editing.
Can BGImageSnap Remove Every Shadow?
The result depends on the image. Shadows that belong to the background may be removed when the background is removed while shadows overlapping the subject may require additional editing.
How Do I Remove Shadow From Photo Without Making It Look Fake?
Avoid excessive brightness and aggressive editing. Preserve important subject details and inspect the image edges after processing.
Is Removing Shadows Useful for Product Photos?
Yes. Removing distracting background shadows can create cleaner product images and help the main product receive more visual attention.
Should I Remove Natural Shadows From a Product?
Not always. A subtle natural shadow can add depth and make the product appear grounded. The decision depends on the style and purpose of the image.
Can I Remove Shadow From Photo Online?
Yes. Online image editing and background removal tools can make this process easier without requiring advanced desktop editing software.
Why Does Shadow Removal Sometimes Look Uneven?
Complex shadows can overlap with the subject or contain colors similar to the subject. These situations can make automatic editing more difficult and may require additional adjustments.
Conclusion
Learning how to remove shadow from photo can help you create cleaner and more professional looking images for products social media websites presentations and other projects.
The best approach depends on the image. You can reduce shadows with brightness adjustments manually edit small areas replace the background or use an automated background removal solution.
If you want a simpler starting point try BGImageSnap for your background editing workflow. Upload your image review the processed result and make sure the important details and edges look natural before using the final image.




[…] Remove Shadow → click here […]