Compress PNG Without Losing Quality Online: 5 Proven Tools That Deliver Sharp Results.

Compress PNG without losing quality online is a common need for web developers e-commerce sellers and designers who want smaller file sizes without blurry or pixelated images. PNG files often contain transparency and crisp details that make them ideal for product photos and logos but their large size can slow down websites.

This guide shows exactly how to compress PNG without losing quality online using reliable free tools with step-by-step instructions and practical tips for beginners.

Table of Contents

Why Compress PNG Files Without Losing Quality

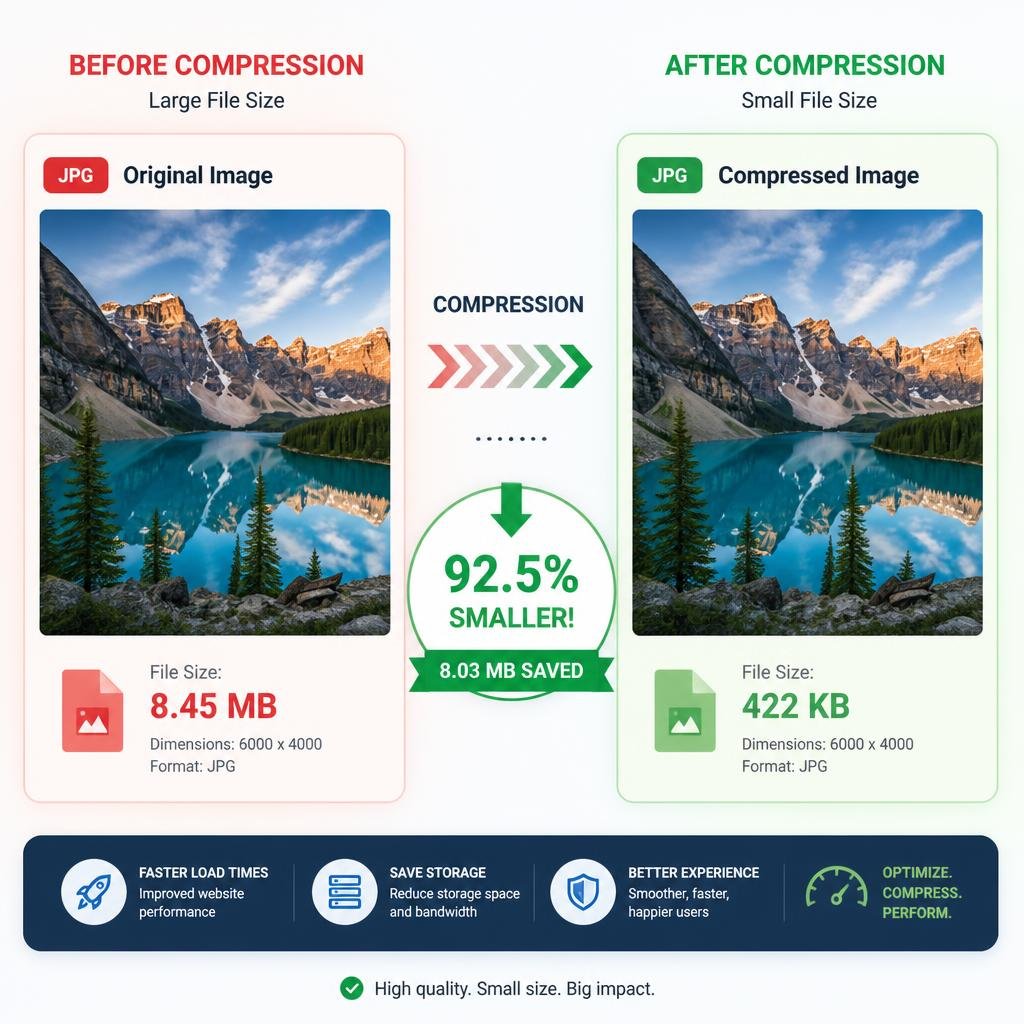
Large PNG files increase page load times and hurt user experience on websites. Compressing them reduces bandwidth use while keeping sharp edges transparency and color accuracy. This is especially important for product images in online stores where visual quality directly affects sales.

The goal is smart compression that removes unnecessary data without visible changes to the image.

How to Compress PNG Without Losing Quality Online

Online tools make the process simple and require no software installation. Most use lossless or near-lossless methods that target metadata and color information rather than image details.

General steps:

  1. Go to a trusted online compressor.
  2. Upload your PNG file or drag it into the upload area.
  3. Wait for the tool to process the image.
  4. Preview the result and compare file sizes.
  5. Download the compressed version.

These tools work directly in your browser and handle multiple files at once in most cases.

Best Free Tools to Compress PNG Without Losing Quality Online

Several reliable options exist. Here are the top choices for beginners:

ToolKey FeaturesBest ForLimits
TinyPNGSmart compression, batch supportProduct photosFree up to 20 images
Compressor.ioLossless mode optionHigh-detail imagesSingle file free
ImageOptim (web version)Simple interfaceQuick single filesBasic free tier
ILoveIMGBatch processing, resize optionsMultiple filesFree with daily limits

Choose based on your volume of images. All preserve transparency and sharpness when used correctly.

Step-by-Step Guide Using TinyPNG

TinyPNG is one of the most popular choices for lossless PNG compression.

Steps:

  1. Visit the TinyPNG website.
  2. Drag and drop your PNG files into the upload box.
  3. The tool automatically compresses them while keeping full quality.
  4. Compare original and new file sizes shown on screen.
  5. Click download for individual files or “Download all” for batches.

The process usually takes seconds and works on both desktop and mobile browsers.

Tip: If your PNG has many colors the tool may suggest slight adjustments. Always preview before final download.

Common Mistakes When Compressing PNG Files

  • Using lossy settings by accident which introduces visible artifacts.
  • Uploading files that already contain heavy compression from previous edits.
  • Ignoring transparency layers which some tools strip by default.
  • Compressing images that still need background removal or resizing afterward.

Always start with the original high-quality file and test the output on different screen sizes.

What to Do After Compressing Your PNG Images

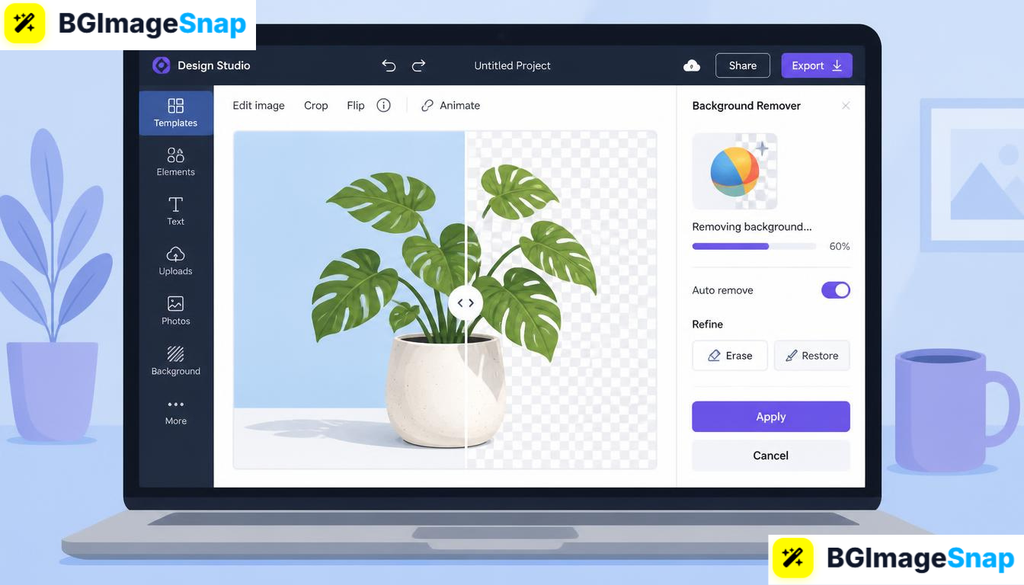
Once you compress PNG without losing quality online the files are often ready for web use. However product images frequently need additional work such as background removal or creating white or transparent backgrounds for consistent e-commerce listings.

A tool like BGImageSnap can help refine these compressed images further by handling background edits quickly. [Internal link: relevant BGImageSnap tool/article — URL to verify]

Related resources you may find useful include:

Tips for Best Results

  • Compress in batches to save time.
  • Keep a copy of the original file before processing.
  • Test the compressed PNG on your actual website to confirm load speed improvements.
  • Combine compression with proper image dimensions for maximum benefit.
  • Use tools that offer side-by-side previews for easy quality checks.

FAQs

Can I really compress PNG without losing quality online?
Yes. Tools like TinyPNG use smart algorithms that remove metadata and optimize color data while keeping the visual appearance identical.

Which online tool is best for beginners?
TinyPNG offers the simplest drag-and-drop experience with reliable results and no sign-up required for basic use.

How much can I reduce PNG file size?
Most images see 50-80% reduction while staying visually identical depending on the original file’s complexity.

Is it safe to upload PNG files to online compressors?
Use reputable sites for non-sensitive images. For confidential product photos consider desktop alternatives.

Does compression affect transparency in PNG files?
Good tools preserve transparency. Always preview the result to confirm the background remains intact.

Can I compress multiple PNG files at once?
Yes. Most recommended tools support batch uploads of up to 20 files in the free version.

What if the compressed image looks different?
Switch to a different tool or use the lossless mode if available. Slight variations usually come from aggressive settings.

Do I need to compress PNG files before or after editing?
Compress after final edits including any background removal or resizing to avoid re-compressing later.

Conclusion

Learning to compress PNG without losing quality online helps create faster websites and better user experiences. With the right free tools and careful previewing you can achieve significant file size savings while keeping images sharp. After compression refine your product photos further with BGImageSnap or explore our other helpful articles for image-editing workflows.

Combiner Tools: 7 Powerful Ways to Merge Files Fast.

Combiner tools let you merge multiple files into one clean document or image without losing quality or formatting. Whether you need to combine PDFs, photos, or spreadsheets these tools save time and keep your work organized.

This guide explains how combiner tools work the best methods for different file types and practical tips for beginners who want fast reliable results.

Table of Contents

What Is a Combiner Tool

A combiner is software or an online service that joins separate files into a single output. People use combiner tools to:

  • Merge several PDFs into one report
  • Combine product photos into a single image sheet
  • Join audio tracks for podcasts
  • Create one video from multiple clips

Most combiner tools work in your browser or as a desktop app so no advanced skills are required. The key is choosing the right tool for your file type and output needs.

How to Use a Combiner for PDF Files

PDF combiner tools are the most popular type. Here is the typical process:

  1. Open your chosen combiner website or app.
  2. Drag and drop the PDF files into the upload area.
  3. Arrange the pages in the correct order.
  4. Click the merge or combine button.
  5. Download the final PDF.

Popular options include Adobe Acrobat online Smallpdf and ILovePDF. These services handle large files and preserve original formatting.

Tip: Always check the file size limit before uploading. Some free combiner tools compress files automatically which can reduce image quality.

How to Use a Combiner for Images and Photos

When you need to combine product photos or design assets an image combiner is useful. This is common in e-commerce when creating image sheets or mood boards.

Steps:

  1. Prepare your images (crop, resize, or remove backgrounds first if needed).
  2. Upload them to an image combiner such as Canva PhotoJoiner or PineTools.
  3. Choose layout options like grid or vertical stack.
  4. Adjust spacing and alignment.
  5. Export the combined image.

If your photos have uneven backgrounds clean them first with a background removal tool before combining.

How to Use a Combiner for Audio and Video

Audio and video combiner tools follow a similar pattern but often require more processing power.

Basic workflow:

  1. Select your clips or tracks.
  2. Upload them in the desired playback order.
  3. Add transitions or crossfades if the tool supports them.
  4. Preview the result.
  5. Export in your target format (MP3, MP4, etc.).

Free options include Clideo, Kapwing, and the built in features in DaVinci Resolve or Audacity.

Common mistake: Forgetting to match audio levels between clips which creates noticeable volume jumps in the final file.

Best Free Combiner Tools in 2027

ToolBest ForFile TypesNotes
SmallpdfPDFsPDFBrowser based, easy for beginners
ILovePDFPDFsPDFStrong mobile support
CanvaImages & PDFsImages, PDFGood design options
ClideoVideo & AudioMP4, MP3Simple interface
PineToolsImagesImagesNo sign up required

Choose based on your main file type. Always test with a small batch first.

Common Mistakes When Using a Combiner

  • Uploading files in the wrong order
  • Ignoring file size limits which causes failed uploads
  • Using low resolution source files that look blurry after combining
  • Forgetting to remove passwords from PDFs before merging
  • Not checking the final file on different devices

Double check order and preview the result before downloading.

What to Do After Combining Files

After using a combiner to merge product images you may still need to edit the final file. Common next steps include background removal resizing for e-commerce platforms or creating white backgrounds for consistent listings.

You may also find these related guides helpful:

FAQs

What is a combiner tool used for?
combiner merges multiple files into one document image or media file while keeping the original content intact.

Can I use a combiner on my phone?
Yes. Most online combiner tools work in mobile browsers and dedicated apps are available for both Android and iOS.

Do combiner tools reduce file quality?
Some free tools compress files to save space. Choose higher quality settings or paid plans when image or video clarity matters.

Is it safe to upload files to an online combiner?
Only use trusted sites for non sensitive files. For confidential documents download a desktop combiner instead.

Can a combiner handle password protected PDFs?
Most tools require you to remove the password first. Unlock the file before uploading it to the combiner.

How many files can I combine at once?
Limits vary by tool. Free versions often allow 10–20 files while paid plans support larger batches.

What file formats work with a combiner?
Common formats include PDF, JPG, PNG, MP3, and MP4. Always check the tool’s supported formats before starting.

Are there completely free combiner tools with no limits?
Some open source desktop programs like PDFsam offer unlimited use though they require installation.

Conclusion

A good combiner makes merging files simple and efficient. Whether you work with PDFs, photos, or media, the right tool and a clear workflow will give you professional results quickly. After combining images clean them further with BGImageSnap or explore our other helpful articles for image-editing tips.

Combiner Tools Explained: How to Merge Images, PDFs, and Video Into One File.

A combiner is any tool that merges two or more separate files into a single file. That could mean stitching product photos side by side joining twelve invoice PDFs into one document or splicing video clips end to end.

The word itself is broad which is exactly why search results for it feel scattered. This guide sorts out what a combiner actually is which type you need how to use one properly and what to fix in your files before you merge them.

Table of Contents

  • What a Combiner Actually Does
  • The Main Types of Combiner Tools
  • Other Meanings of the Word
  • How to Use an Image Combiner Step by Step
  • How to Combine PDFs and Video Files
  • Combiner Comparison at a Glance
  • How to Choose the Right Combiner
  • Prepare Your Images Before You Merge Them
  • Where AI Fits Into Modern Combiner Tools
  • Common Mistakes to Avoid
  • Frequently Asked Questions
  • Conclusion

What a Combiner Actually Does

At its simplest a combiner takes multiple inputs and produces one output. How it does that depends on the file type.

  • Images are placed next to each other on a shared canvas horizontally, vertically, or in a grid.
  • PDFs are appended page after page in the order you set.
  • Video and audio are concatenated so one clip plays after the next.
  • Spreadsheets and CSV files are stacked so rows from every file sit in one sheet.

The distinction matters. An image combiner creates a new canvas. A PDF combiner preserves each original page as is. If you expect an image combiner to keep your files separate and browsable you will be disappointed it flattens everything into one picture.

The Main Types of Combiner Tools

Image Combiner

An image combiner merges photos into one file. Common uses:

  • Before and after comparison shots
  • Product grids and lifestyle collages for listings
  • Screenshot sequences for tutorials
  • Social media carousels flattened into a single post image

Key settings to look for: layout direction spacing between images background colour for gaps and output format. PNG preserves transparency; JPG produces smaller files but no transparency.

PDF Combiner

A PDF combiner joins documents in a set order. This is the most common business use merging scanned receipts contracts with signature pages or chapters into one report.

Good PDF combiners let you reorder pages before merging and rotate individual pages. Adobe offers a free browser based merge tool: Adobe Acrobat online Merge PDF 

Video Combiner

A video combiner joins clips into one timeline. The critical rule: clips should share the same resolution frame rate and codec. If they do not the tool has to re encode everything which takes longer and can soften quality.

FFmpeg is the free open source standard for this. Its official concatenation guide is here: FFmpeg Wiki Concatenate.

Audio Combiner

An audio combiner merges tracks end to end useful for podcast segments or voice recordings. Watch for volume mismatches between clips most basic combiners will not normalise levels for you.

Data Combiner

A CSV or spreadsheet combiner stacks rows from many files into one table. The one thing to check: every file must have identical column headers in the same order or rows will land in the wrong columns.

Other Meanings of the Word

If you landed here looking for something else here is the short version.

ContextWhat “combiner” means there
RF and antennasA passive device that merges multiple radio signals onto one feed line
Solar installationsA combiner box that joins several PV string outputs into one circuit
Hadoop / MapReduceAn optional step that aggregates mapper output locally before the reduce phase
Transformers franchiseMultiple robots that link into one larger figure

Those are genuinely different subjects with their own documentation. The rest of this guide covers the file merging meaning.

How to Use an Image Combiner Step by Step

Most online image combiners follow the same flow.

  1. Open the combiner tool in your browser and upload your images. Look for drag and drop support if you have several files.
  2. Set the order. Drag thumbnails into the sequence you want. Left to right for horizontal layouts top to bottom for vertical.
  3. Choose a layout. Horizontal works for before and after pairs. Vertical suits long screenshots. Grid suits four or more product shots.
  4. Match the dimensions. If your images are different sizes resize them first. Otherwise the combiner will stretch, crop, or pad them.
  5. Set spacing and background. A small gap of a few pixels keeps images visually distinct. Set the gap colour to white for clean product layouts.
  6. Pick the output format. PNG for transparency or sharp text. JPG for photos where file size matters.
  7. Preview then download. Always check the preview at full size before saving.

How to Combine PDFs and Video Files

For PDFs: upload the documents drag them into order delete any unwanted pages then export. If your PDFs came from scans check the page orientation before merging mixed orientations look sloppy in a combined document.

For video with FFmpeg: create a plain text file listing your clips.

textfile 'clip1.mp4'
file 'clip2.mp4'
file 'clip3.mp4'

Then run:

textffmpeg -f concat -safe 0 -i list.txt -c copy output.mp4

The -c copy flag joins the clips without re encoding which is fast and lossless. It only works when all clips share the same format and settings.

For images via command line: ImageMagick handles batch merging well. Its official documentation is at imagemagick.org.

Combiner Comparison at a Glance

Combiner typeTypical outputWatch out forBeginner difficulty
ImageSingle PNG or JPGMismatched dimensionsEasy
PDFOne multi-page documentPage order and orientationEasy
VideoOne continuous clipCodec and frame rate mismatchModerate
AudioOne trackUneven volume levelsEasy
DataOne spreadsheetInconsistent column headersModerate

How to Choose the Right Combiner

Ask four questions before picking a tool.

Does it handle my file type natively? A PDF combiner will not merge video. Generic “all in one” converters often do several jobs poorly.

Does it preserve quality? Some free combiners silently re compress your files. Compare the output file against the original at full zoom.

Where does the processing happen? Browser based tools that process locally never upload your file. Server based tools do. For contracts invoices or unreleased product photos this matters.

Is there a file limit? Free tiers often cap the number of files total size or daily uses. Check before you upload thirty images.

Prepare Your Images Before You Merge Them

This is the step most beginners skip and it is why merged images often look amateurish.

A combiner does not clean anything up. It faithfully preserves every flaw in every input file. If one product photo has a grey background and the next has a beige one the merged result shows both. If one image is 2000px wide and another is 600px the layout will look unbalanced.

Fix these before combining:

  • Inconsistent backgrounds. Remove the background from each photo and apply the same white or transparent background across all of them.
  • Mismatched sizes. Resize every image to identical dimensions so the grid lines up.
  • Uneven lighting or colour. Adjust brightness so photos taken on different days do not clash.
  • Low resolution. Upscale weak images before merging not after. Enlarging a merged file degrades everything at once.

BGImageSnap covers this prep work directly background removal white or transparent backgrounds resizing and image quality improvement for product photos.

Where AI Fits Into Modern Combiner Tools

A quick plain explanation for beginners.

Traditional combining is mechanical. The tool places image A next to image B on a canvas. No decisions are made about content.

AI background removal is different. The model has been trained on huge numbers of labelled photos so it can identify where the subject ends and the background begins including tricky edges like hair fur and glass. You get a cutout in seconds instead of tracing an outline by hand.

AI image generation creates new pixels from a text description. It does not merge your existing files. If you want your actual product photos in the output you need a combiner and an editor not a generator.

The practical workflow for e-commerce looks like this:

  1. Remove backgrounds from each product shot with an AI tool.
  2. Resize all cutouts to matching dimensions.
  3. Place them on a uniform white or transparent background.
  4. Run them through a combiner to build the final grid or comparison image.

Common Mistakes to Avoid

  • Merging before resizing. Fix dimensions first always.
  • Using JPG when you need transparency. JPG has no alpha channel. Transparent areas turn white or black.
  • Uploading confidential files to unknown web tools. Check the privacy policy or use an offline combiner.
  • Deleting originals right after merging. Keep source files until you have confirmed the output at full resolution.
  • Ignoring page or clip order. Reorder inside the combiner before exporting not after.
  • Combining video clips with different frame rates using a copy only command. The result can desync audio.

Frequently Asked Questions

What does combiner mean?

A combiner is a tool that merges multiple files into one. Most commonly it refers to image, PDF, video, or audio merging software. The word also has separate meanings in electronics solar installations and data processing.

What is the best free combiner for images?

That depends on your needs. Browser based combiners are fastest for one off jobs. ImageMagick or GIMP work offline and handle batches. Specific tool recommendations and current free tiers needs verification.

Is an online combiner safe for private documents?

Only if the tool processes files in your browser or clearly states that uploads are deleted. For contracts ID scans or unreleased product images use offline software instead.

Can a combiner merge different file types together?

Not directly. You cannot merge a JPG and an MP4 into one file. You can however convert images into PDF pages and then use a PDF combiner to join them with other documents.

Does using a combiner reduce image quality?

It can if the tool re compresses the output. Export as PNG for lossless results or set JPG quality to a high value. Merging at the original resolution avoids most quality loss.

How do I combine images into a single PDF?

Convert each image to a PDF page then run them through a PDF combiner. Many PDF tools accept image uploads directly and handle both steps at once.

Can I combine images that have transparent backgrounds?

Yes but export the merged file as PNG. Choosing JPG will fill every transparent area with a solid colour.

What is a combiner in electronics?

In RF and antenna systems a combiner is a passive device that merges multiple signal inputs onto a single output line. It is unrelated to file merging software. Consult manufacturer documentation for specifications.

Conclusion

A combiner solves one specific problem well: turning many files into one. The type you need depends entirely on your file format and the quality of your result depends far more on preparation than on the merging tool itself.

Match your dimensions clean up your backgrounds pick the right output format and check the preview before you export. Do that and almost any decent combiner will give you a professional result.

If your merge involves product photos the prep step is where the real difference is made. BGImageSnap can remove backgrounds apply clean white or transparent backgrounds and resize your images so they line up perfectly once combined.

Start with one product photo in the BGImageSnap background remover then bring your cleaned images into the combiner of your choice.

How to Extract Multiple Zip Files at Once

Knowing how to extract multiple zip files at once turns a slow click-by-click chore into a single action. If you have downloaded a batch of image packs, invoices, course files, or client assets opening each archive separately wastes real time.

This guide shows how to extract multiple zip files at once on Windows, Mac, and Linux using built-in tools free apps like 7-Zip and simple copy-paste commands. You will also learn how to send each archive into its own folder and how to avoid the mistakes that overwrite your files.

Table of Contents

  • What Batch Extraction Actually Does
  • How to Extract Multiple Zip Files at Once on Windows
  • How to Extract Multiple Zip Files at Once on Mac
  • How to Extract Multiple Zip Files at Once on Linux
  • Extract Each Archive Into Its Own Folder
  • Method Comparison at a Glance
  • Common Mistakes to Avoid
  • Problems That Break Batch Extraction
  • What to Do After Extracting Image-Heavy Archives
  • Frequently Asked Questions
  • Conclusion

What Batch Extraction Actually Does

A ZIP file is a container. Extracting it copies the contents out into a normal folder. Batch extraction simply repeats that process across many archives without asking you to confirm each one.

There are two possible outcomes and choosing the wrong one causes most beginner headaches:

  • Extract here: every file from every archive lands in the same folder. Fast but duplicate file names can overwrite each other.
  • Extract to separate folders: each archive creates its own folder named after the ZIP file. Slightly more clutter but nothing is lost.

If your archives contain files with generic names such as image1.jpginvoice.pdf, or data.csv, always choose separate folders.

How to Extract Multiple Zip Files at Once on Windows

Windows gives you three practical routes. The built-in one is the weakest so read all three before picking.

Using File Explorer

Windows File Explorer is built to handle one archive at a time. Selecting several ZIP files and choosing Extract All does not reliably process the whole batch and behavior differs between Windows versions.

  1. Open the folder containing your archives.
  2. Select a ZIP file.
  3. Click Extract All in the toolbar or right-click menu.
  4. Choose a destination and click Extract.

Use this only for two or three files. For anything larger the next two methods are far better. Exact multi-select behavior in your Windows build: needs verification on your own system.

Using 7-Zip

7-Zip is a free open-source archive manager and the simplest way to batch extract on Windows.

  1. Install 7-Zip from the official site: https://www.7-zip.org/
  2. Open the folder with your archives.
  3. Press Ctrl + A to select all or hold Ctrl and click specific files.
  4. Right-click the selection. On Windows 11 click Show more options first.
  5. Hover over 7-Zip.
  6. Choose one of these:
    • Extract Here  all contents go into the current folder.
    • Extract to each archive gets its own folder automatically.
  7. Wait for the progress window to finish.

That Extract to "*\" option is the fastest way to extract multiple zip files at once while keeping everything organized.

Using WinRAR

If WinRAR is already installed it has a dedicated batch option.

  1. Select all the archives.
  2. Right-click the selection.
  3. Choose Extract each archive to separate folder.

WinRAR also handles RAR and several other formats that Windows cannot open natively.

Using PowerShell

PowerShell is ideal when you want repeatable scriptable extraction. Expand-Archive is built into PowerShell 5.0 and later.

To send everything into a single destination folder:

PowerShellGet-ChildItem "C:\Users\YourName\Downloads\*.zip" | Expand-Archive -DestinationPath "C:\Users\YourName\Downloads\Extracted" -Force

To give each archive its own folder:

PowerShellGet-ChildItem "C:\Users\YourName\Downloads\*.zip" | ForEach-Object {
  Expand-Archive -Path $_.FullName -DestinationPath (Join-Path $_.DirectoryName $_.BaseName) -Force
}

Replace YourName with your actual user folder. The -Force switch overwrites existing files so remove it if you want to protect previous extractions.

Official command reference: Microsoft Learn — Expand-Archive

How to Extract Multiple Zip Files at Once on Mac

macOS makes this easier than Windows because Archive Utility already handles multiple selections.

Using Archive Utility

  1. Open Finder and go to the folder holding your archives.
  2. Select all the ZIP files. Hold Command and click each one or press Command + A.
  3. Control-click (right-click) any selected file.
  4. Choose Open With > Archive Utility.
  5. Each archive extracts into its own separate folder in the same location.

This is the default no-download way to extract multiple zip files at once on a Mac. Apple’s official reference on zipping and unzipping is here: Apple Support — Zip and unzip files and folders on Mac 

Using Terminal

Terminal gives you more control over the destination.

  1. Open Terminal from Applications > Utilities.
  2. Move into the folder:
Bashcd ~/Downloads
  1. Extract every archive into the current folder:
Bashunzip '*.zip'

The single quotes matter. Without them the shell expands the wildcard and unzip throws an error.

  1. To give each archive its own folder:
Bashfor f in *.zip; do unzip -d "${f%.zip}" "$f"; done

Using Keka

Keka is a popular macOS archive tool that supports formats Archive Utility cannot open such as RAR and 7z. Official site: https://www.keka.io/ — URL to verify. Drag your selected archives onto the Keka window or icon to extract them together.

How to Extract Multiple Zip Files at Once on Linux

Linux uses the same unzip syntax as macOS.

Install it first if needed on Debian or Ubuntu:

Bashsudo apt install unzip

Then extract everything in place:

Bashunzip '*.zip'

Or create one folder per archive:

Bashfor f in *.zip; do unzip -d "${f%.zip}" "$f"; done

Add -q for quiet mode if the terminal output is too noisy:

Bashunzip -q '*.zip'

Extract Each Archive Into Its Own Folder

This is the setting most people actually want so here it is in one place:

PlatformOption to use
Windows + 7-ZipRight-click > 7-Zip > Extract to “*\”
Windows + WinRARRight-click > Extract each archive to separate folder
Windows + PowerShellThe ForEach-Object loop shown above
MacSelect all > Open With > Archive Utility (default behavior)
Mac / Linux Terminalfor f in *.zip; do unzip -d "${f%.zip}" "$f"; done

Method Comparison at a Glance

MethodBest forSeparate foldersExtra software
File ExplorerOne or two archivesYes, manuallyNo
7-ZipLarge Windows batchesYes, one clickYes, free
WinRARMixed formats on WindowsYesYes
PowerShellRepeatable, scripted jobsYes, with a loopNo
Archive UtilityEveryday Mac useYes, by defaultNo
Terminal unzipPrecise destinationsYes, with a loopNo

Common Mistakes to Avoid

  • Choosing Extract Here when archives contain identically named files. Later files silently overwrite earlier ones.
  • Forgetting the quotes in unzip '*.zip' which produces a “filename not matched” style error.
  • Deleting the original archives before confirming the extracted contents are complete.
  • Extracting hundreds of archives into a synced cloud folder which can trigger long upload queues.
  • Assuming .rar.7z, or .tar.gz files behave like ZIP archives. They need a tool that supports the format.

Problems That Break Batch Extraction

Password-protected archives. A batch job stops or skips when it hits an encrypted archive. Extract those separately and enter the password manually.

Split or multi-part archives. Files named archive.zip.001.002, or part1.rar belong to one set. Select only the first part and extract that. Extracting each part individually will fail.

Nested archives. A ZIP inside a ZIP is not unpacked automatically. Run the batch process a second time on the newly extracted archives.

Not enough disk space. Compressed files can expand several times over. Check available storage before extracting a large batch.

Long file paths on Windows. Deeply nested folder structures can exceed path limits and cause errors. Extract to a short path such as C:\Temp and move the files afterward.

What to Do After Extracting Image-Heavy Archives

Batch extraction is common in e-commerce and design work. Suppliers, photographers, and marketplaces frequently deliver product photos as a set of ZIP files one per SKU or per shoot.

Once you extract multiple zip files at once you usually end up with dozens or hundreds of raw images that are not listing-ready. Typical cleanup tasks include:

  • Removing cluttered or inconsistent backgrounds
  • Creating a plain white or transparent background for marketplace requirements
  • Resizing images to a consistent dimension
  • Improving sharpness or resolution on low-quality supplier photos

Modern background removal is AI-based. The tool detects the subject edges automatically and separates the product from everything behind it so you do not need to trace outlines manually. Transparent PNG output keeps the cutout usable on any background color while a flat white background suits most product listings.

BGImageSnap covers these steps including background removal white or transparent backgrounds and image resizing for e-commerce photos.

Frequently Asked Questions

How do I extract multiple zip files at once on Windows without extra software?

Use PowerShell. Run Get-ChildItem "C:\Path\*.zip" | Expand-Archive -DestinationPath "C:\Path\Extracted" -Force. No installation is needed on PowerShell 5.0 or later.

Can Windows File Explorer batch extract archives?

File Explorer is designed to handle one archive at a time and multi-select results vary by Windows version. For batches use 7-Zip, WinRAR or PowerShell instead.

How do I extract multiple zip files at once into separate folders?

On Windows use 7-Zip’s Extract to “*\” option. On Mac or Linux run for f in *.zip; do unzip -d "${f%.zip}" "$f"; done.

Why does unzip *.zip fail on Mac or Linux?

The shell expands the wildcard before unzip sees it. Wrap it in quotes: unzip '*.zip', or escape it as unzip \*.zip.

Can I extract multiple RAR or 7z files at once?

Yes. 7-Zip and WinRAR on Windows and Keka or The Unarchiver on Mac support multi-select extraction for these formats. Check each tool’s official page for current format support.

What happens if two archives contain the same file name?

With “Extract Here” the later file overwrites the earlier one. Extract into separate folders to prevent data loss.

Is batch extracting archives safe?

It is as safe as the source. Only extract archives from senders you trust and scan unfamiliar downloads before opening the contents.

How do I extract multiple zip files at once on a phone?

Mobile file managers vary widely in batch support. Behavior differs by device and app version — needs verification for your specific file manager.

Conclusion

Once you know how to extract multiple zip files at once a folder of forty archives takes seconds instead of twenty minutes. On Windows 7-Zip’s “Extract to *\” option or a short PowerShell loop does the job. On Mac select everything and open it with Archive Utility. On Linux and Terminal, unzip '*.zip' handles the whole batch in one line.

The key decision is whether you want everything in one folder or each archive in its own. Choose separate folders whenever file names might repeat.

If your freshly extracted batch is full of product photos BGImageSnap can help you remove backgrounds add clean white or transparent backgrounds and resize the images for your store.

Ready to turn that pile of extracted photos into listing-ready images? Explore the BGImageSnap background remover and start with a single product shot.

How to Unlock a Word Document.

If you need to unlock a Word document the solution is usually simpler than it looks. A locked file can stop you from editing printing or copying content. The lock may come from password protection editing restrictions or a file marked as read-only. This guide shows how to unlock a Word document on Windows, Mac, and online using built-in tools and practical workarounds.

Table of Contents

  • Why a Word Document Becomes Locked
  • How to Unlock a Word Document Using Built-In Word Tools
  • Remove Editing Restrictions in Word
  • Remove Password Protection in Word
  • Use Save As to Create an Unlocked Copy
  • How to Unlock a Word Document on Mac
  • How to Unlock a Word Document Online
  • Common Mistakes to Avoid
  • What to Do After You Unlock a Word Document
  • Frequently Asked Questions
  • Conclusion

Why a Word Document Becomes Locked

A Word document may be locked for several reasons. Understanding the cause helps you choose the right method.

  • The author enabled password protection for opening or modifying the file.
  • The document is marked as final or read-only.
  • Editing restrictions are turned on in the Review tab.
  • The file is stored in a location that requires sign-in such as a company SharePoint site.
  • The document was opened from an email or browser in Protected View.

In most cases you can unlock the file without third-party software.

How to Unlock a Word Document Using Built-In Word Tools

Microsoft Word includes several built-in ways to remove restrictions. Use these methods first.

Remove Editing Restrictions in Word

If the document opens but you cannot type or select text editing restrictions are probably active.

  1. Open the locked document in Microsoft Word.
  2. Go to the Review tab.
  3. Look for the Restrict Editing panel. If it is not visible click Restrict Editing in the ribbon.
  4. In the panel click Stop Protection at the bottom.
  5. If prompted enter the password. If you do not have the password you cannot remove the restriction using this method.
  6. Save the document with a new name if needed.

Suggested image: screenshot of the Restrict Editing panel in Word with the Stop Protection button highlighted. Alt text: How to unlock a Word document by stopping protection in the Review tab.

Remove Password Protection in Word

If the file asks for a password when you open it you need the password. If you have it you can remove it permanently.

  1. Open the document and enter the password.
  2. Click File > Info.
  3. Select Protect Document.
  4. Choose Encrypt with Password.
  5. Delete the password from the field and click OK.
  6. Save the document. The password is now removed.

This works only if you already know the password. Microsoft does not provide a built-in password recovery tool. Microsoft Support Remove a password from a document

Use Save As to Create an Unlocked Copy

If the document opens read-only creating a new copy can sometimes remove the lock.

  1. Open the file.
  2. Click File > Save As.
  3. Choose a new location or new file name.
  4. Save.
  5. Open the new file and check if editing is allowed.

This method works for files marked as final or for temporary locks caused by Protected View.

How to unlock a word document

How to Unlock a Word Document on Mac

If you are using Microsoft Word for Mac the steps are similar but the menu looks slightly different.

  1. Open the locked document in Word for Mac.
  2. Go to the Review tab.
  3. Click Protect Document or Protect Form.
  4. Choose Remove Protection or turn off protection options.
  5. Enter the password if asked.
  6. Save the file.

On a Mac you can also check the file information. Select the file in Finder press Command + I and look for a Locked checkbox. If that box is checked uncheck it. This lock is separate from Word’s internal password protection.

Suggested video: short screen recording showing how to unlock a Word document on Mac using the Review tab and Finder file info.

How to Unlock a Word Document Online

If you do not have Microsoft Word installed you can use the free online version.

  1. Go to Office.com or your Microsoft 365 account.
  2. Upload the locked document.
  3. Open it in Word for the web.
  4. If editing is restricted go to the Review tab and check for protection options.
  5. Choose Stop Protection if available.
  6. Download a new copy.

Some advanced password features may not work in Word for the web. For these you need the desktop version.

Table: Quick Method Comparison

MethodBest ForRequires Password?Difficulty
Restrict Editing > Stop ProtectionEditing restrictionsYes, if setBeginner
Encrypt with Password > remove passwordOpening passwordYesBeginner
Save As new copyRead-only or final filesNoBeginner
Mac Finder Locked checkboxmacOS file lockNoBeginner
Word for the webNo desktop appYes, if restrictedBeginner

Common Mistakes to Avoid

When trying to unlock a Word document avoid these errors.

  • Trying to remove a password without knowing it is not possible in Word.
  • Ignoring the Finder or File Explorer read-only attribute.
  • Forgetting to save the file after removing protection.
  • Using unknown online password removers that may compromise your document.
  • Assuming every locked file is password-protected. Sometimes the issue is Protected View or a read-only recommendation.

Check the simple fixes first before looking for advanced tools.

What to Do After You Unlock a Word Document

Once the document is unlocked you may need to clean up the content. If the Word file contains product photos screenshots or e-commerce images you can extract them and prepare them for use.

For example you might unlock a document that includes product images with cluttered backgrounds. After you unlock a Word document you can save the images and use a background removal tool to create clean white or transparent backgrounds for a store or catalog. AI image-editing tools can remove backgrounds automatically but they still work best on images you extract from documents first.

BGImageSnap offers background removal image resizing and image quality improvements. If your unlocked document contains images that need editing this can save time.

relevant BGImageSnap background remover tool or article

Suggested image: before-and-after screenshot of a product photo extracted from a Word document and cleaned with BGImageSnap. Alt text: How to unlock a Word document and prepare product images with BGImageSnap.

Frequently Asked Questions

How do I unlock a Word document without the password?

You cannot unlock a password-protected Word document without the password using built-in tools. If you lost the password you may need a third-party recovery service but compatibility and safety vary. Needs verification.

Why can’t I edit a Word document even though it opens?

The document may have editing restrictions enabled. Go to the Review tab open Restrict Editing and click Stop Protection. If a password is required you need it.

How do I remove read-only from a Word document?

Right-click the file choose Properties and uncheck Read-only. Or go to File > Save As and create a new copy.

Can I unlock a Word document on Mac without Word?

Yes you can use Word for the web or check Finder’s Locked checkbox. For password-protected files you still need the password.

What is the difference between editing restrictions and password protection?

Password protection prevents opening or modifying the file. Editing restrictions allow opening but limit specific actions like formatting or editing.

How do I unlock a Word document in Google Docs?

Upload the file to Google Drive open with Google Docs and choose File > Download as Microsoft Word. This creates an unlocked copy but it may not work for encrypted files.

Why does Word open in Protected View?

Protected View opens files from potentially unsafe locations such as email attachments. You can click Enable Editing if you trust the source.

Is it safe to use online unlockers?

Many online unlockers claim to remove Word passwords. Some are unsafe or require uploading sensitive files. Use official Microsoft tools first.

Conclusion

You can usually unlock a Word document by removing editing restrictions deleting a known password or saving a new copy. The method depends on the type of lock and whether you have the password. Avoid unknown online tools and always check simple read-only or Protected View settings first.

Once your document is unlocked you may need to edit the images inside. BGImageSnap can help you remove backgrounds resize images and improve quality for professional documents or product listings.

Try BGImageSnap to clean up any images from your newly unlocked Word document.

Start Creating Now

How to Unzip a Folder on Mac: 5 Easy Ways That Always Work.

How to unzip a folder on Mac is one of those questions that seems simple until you actually need the answer usually right after downloading a compressed file full of documents product photos or design assets. The good news: macOS makes unzipping incredibly easy and in most cases you won’t need to install anything at all.

In this beginner-friendly guide you’ll learn every reliable method for how to unzip a folder on Mac from the classic double-click to Terminal commands plus fixes for the most common errors and what to do with your files afterward.

Table of Contents

Understanding ZIP Files on macOS

A ZIP file is a compressed archive a single container that holds one or more files and folders in a smaller package. People use ZIP files to:

  • Send multiple files as one email attachment
  • Reduce file size for faster downloads
  • Bundle product photos fonts or design assets
  • Keep related documents organized in one file

macOS includes a built-in tool called Archive Utility that handles ZIP files automatically. That means you don’t need extra software for standard .zip files it’s already part of your Mac.

Image suggestion: A screenshot of a ZIP file icon in Finder next to its extracted folder so beginners can visually recognize both.
Suggested alt text: “ZIP file and extracted folder shown side by side while learning how to unzip a folder on Mac”

How to unzip a folder on mac

How to Unzip a Folder on Mac by Double-Clicking

This is the fastest method and the one most people should use.

Steps:

  1. Open Finder and locate your ZIP file (check your Downloads folder if you just downloaded it).
  2. Double-click the ZIP file.
  3. Archive Utility automatically extracts the contents.
  4. A new folder appears in the same location with the same name as the ZIP file.

That’s it. The original ZIP file stays where it was macOS does not delete it after extraction so you can safely remove it manually once you’ve confirmed the extracted files are intact.

Practical tip: If you double-click and nothing seems to happen the extracted folder may have appeared lower in the file list. Sort your Finder window by Date Added to spot it instantly.

How to Unzip a Folder on Mac Using the Right-Click Menu

If double-clicking opens the wrong app (this can happen if a third-party archive tool changed your defaults) the right-click method gives you more control.

Steps:

  1. Right-click (or Control-click) the ZIP file in Finder.
  2. Hover over Open With.
  3. Select Archive Utility.
  4. The contents extract into a new folder in the same location.

To make Archive Utility the default again:

  1. Right-click the ZIP file and choose Get Info.
  2. Under Open with select Archive Utility.
  3. Click Change All so every ZIP file uses it going forward.

Unzipping Files with Terminal

Terminal is useful when you want more control for example extracting files to a specific location or handling a stubborn archive that Finder refuses to open.

Steps:

  1. Open Terminal (Applications → Utilities → Terminal or search with Spotlight using Cmd + Space).
  2. Type the following command replacing the path with your file’s location:
Bashunzip ~/Downloads/myfile.zip
  1. Press Return. The files extract into your current working directory.

To extract to a specific folder:

Bashunzip ~/Downloads/myfile.zip -d ~/Documents/ExtractedFiles

Quick shortcut: Instead of typing the file path type unzip (with a space) and then drag the ZIP file from Finder into the Terminal window. macOS fills in the path automatically.

Common mistake: If the file path contains spaces the command fails unless the path is wrapped in quotes or the spaces are escaped. Dragging the file into Terminal avoids this problem entirely.

Free Third-Party Apps for Other Archive Formats

Archive Utility handles ZIP well but it can’t open every compression format. If you receive .rar.7z, or other archive types, you’ll need a third-party app.

FormatOpens Natively on Mac?Recommended Free Tool
.zip✅ YesArchive Utility (built-in)
.rar❌ NoThe Unarchiver or Keka
.7z❌ NoThe Unarchiver or Keka
.tar / .gz✅ Yes (most cases)Archive Utility or Terminal

The Unarchiver is a popular free option available on the Mac App Store and Keka is a well-regarded alternative that supports a wide range of formats. Both are simple: install the app right-click the archive and choose the app under Open With.

Safety tip: Only download archive tools from the Mac App Store or the developer’s official website. Third-party download sites sometimes bundle unwanted software.

Common Unzipping Errors and How to Fix Them

Even with a simple task like this things can occasionally go wrong. Here are the most frequent problems and their fixes.

Error: “Unable to expand… (Error 1 – Operation not permitted)”

  • Cause: Usually a corrupted download or a permissions issue.
  • Fix: Re-download the ZIP file first. If the error persists try extracting via Terminal with the unzip command which often succeeds where Finder fails.

The ZIP file opens as a “cpgz” file in an endless loop

  • Cause: The archive is corrupted or was created incorrectly.
  • Fix: Delete both files re-download the original ZIP and try again. If you got the file from someone else ask them to re-compress and resend it.

Double-clicking opens the wrong app

  • Cause: A third-party tool hijacked the default file association.
  • Fix: Use Get Info → Open with → Archive Utility → Change All as described earlier.

The extracted folder appears empty

  • Cause: The files may be hidden or the archive was created with hidden system files only.
  • Fix: Press Cmd + Shift + . (period) in Finder to toggle hidden files and check again.

Password-protected ZIP won’t open

  • Cause: Archive Utility has limited support for encrypted archives.
  • Fix: Use Terminal (unzip will prompt for the password) or a tool like Keka.

What to Do After Unzipping Image Files

One of the most common reasons people unzip folders on a Mac is to access image files product photos from a supplier design assets from a client or stock images from a marketplace. Once extracted those images often need a little work before they’re ready to use.

Typical next steps include:

  • Removing backgrounds from product photos for e-commerce listings
  • Converting images to white or transparent backgrounds for a consistent storefront look
  • Resizing images to meet marketplace requirements (Amazon, Etsy, Shopify, and others each have their own specs)

If your extracted folder is full of product shots that need clean uniform backgrounds a browser-based tool like BGImageSnap can handle background removal without installing any software a handy follow-up once your files are out of the ZIP. BGImageSnap background remover tool

You may also find these guides useful after extracting your images:

How to Zip a Folder on Mac (Bonus)

Since you now know how to unzip a folder on Mac here’s the reverse compressing your own files takes just two clicks:

  1. Right-click the folder you want to compress.
  2. Select Compress “FolderName”.
  3. macOS creates a .zip file in the same location.

This is perfect for emailing a batch of edited product images or archiving finished projects to save disk space.

For Apple’s official documentation on both zipping and unzipping see the macOS User Guide: Zip and unzip files and folders on Mac – Apple Support 

FAQs

Do I need to install software to unzip files on a Mac?
No. macOS includes Archive Utility which opens standard ZIP files automatically when you double-click them. You only need extra software for formats like RAR or 7z.

Why won’t my ZIP file open on my Mac?
The most common causes are a corrupted download a non-ZIP format (like RAR) or a permissions issue. Re-download the file first then try Terminal’s unzip command or a free tool like The Unarchiver.

Where do unzipped files go on a Mac?
By default the extracted folder appears in the same location as the ZIP file with the same name.

Does unzipping delete the original ZIP file?
No. macOS keeps the original ZIP file after extraction. You can delete it manually once you’ve verified the contents.

How do I unzip a RAR file on Mac?
macOS can’t open RAR files natively. Install a free app like The Unarchiver (Mac App Store) or Keka then right-click the RAR file and open it with that app.

Can I unzip a password-protected ZIP on Mac?
Yes but Archive Utility has limited support for encrypted archives. Use Terminal’s unzip command which prompts for the password or a third-party tool like Keka.

How do I unzip multiple ZIP files at once on Mac?
Select all the ZIP files in Finder (Cmd-click each one or press Cmd + A) then double-click any of them. Archive Utility extracts them all in one pass.

Is it safe to unzip files from unknown sources?
Be cautious. ZIP files can contain malicious software. Only extract archives from senders and websites you trust and let macOS Gatekeeper warn you before opening unfamiliar apps inside them.

Conclusion

Learning how to unzip a folder on Mac takes about ten seconds: double-click the ZIP file and macOS handles the rest with the built-in Archive Utility. For unusual formats like RAR a free tool such as The Unarchiver fills the gap and Terminal gives you a reliable fallback when Finder misbehaves.

Once your files are extracted especially if they’re product photos or design assets the real work often begins. If your unzipped images need clean backgrounds consistent sizing or a professional e-commerce look try the BGImageSnap background remover to get them listing-ready in minutes or explore our other image-editing guides for your next step.

How to Unzip a Folder on Mac: A Beginner-Friendly Guide.

Learning how to unzip a folder on Mac is the fastest way to open ZIP files extract documents and manage compressed folders without extra headaches. Whether you’re new to macOS or switching from Windows the built-in Archive Utility handles most standard ZIP files automatically.

This guide explains how to unzip a folder on Mac using built-in tools Terminal and third-party apps when needed. You’ll also find common fixes mistakes to avoid and a practical workflow for product photos after extraction.

Table of Contents

  • What Does “Unzip a Folder” Mean on a Mac?
  • How to Unzip a Folder on Mac with the Built-in Archive Utility
  • How to Unzip a Folder on Mac Using Right-Click
  • How to Unzip a Folder on Mac with Finder’s Open With Menu
  • How to Open a ZIP Folder on Mac Using Terminal
  • How to Unzip Multiple ZIP Folders on Mac
  • Why Your Mac Won’t Unzip a Folder
  • Quick Mistakes to Avoid
  • Before You Unzip: Quick Security Check
  • How to Open a ZIP Folder on Mac with Third-Party Tools
  • After You Unzip: Managing Images and Product Photos
  • Frequently Asked Questions
  • Conclusion
How to unzip  folder in mac

What Does “Unzip a Folder” Mean on a Mac?

A ZIP folder is a compressed file container. It holds one or more files inside a single item with a .zip extension. When you unzip a folder on a Mac you extract the contents into a normal folder that you can open edit and share.

macOS includes a built-in tool called Archive Utility. In most cases you don’t need to download any extra software. Archive Utility creates ZIP archives and extracts standard ZIP files automatically.

The main problem beginners face is not knowing where the extracted folder appears or what to do when double-clicking doesn’t work. Once you understand the built-in options how to unzip a folder on Mac becomes a simple routine.

Apple’s official macOS guide explains the Archive Utility in more detail. Zip and unzip files and folders on Mac DoFollow status: verify in CMS

How to Unzip a Folder on Mac with the Built-in Archive Utility

This is the fastest method for most people. It works on macOS Ventura, Monterey, Sonoma, and earlier versions that support Archive Utility.

  1. Open Finder and go to the location where your ZIP folder is saved. This is often the Downloads folder.
  2. Find the ZIP file. It will have a .zip extension and may look like a zipper folder icon.
  3. Double-click the ZIP file.
  4. Wait a few seconds. Archive Utility creates a new folder in the same location with the same name but without the .zip extension.
  5. Open the new folder to see the extracted files.

If double-clicking opens a different app such as a third-party unzip tool or a preview utility use the right-click method below.

How to Unzip a Folder on Mac Using Right-Click

Right-click gives you more control when your Mac is not using Archive Utility as the default opener.

  1. Control-click the ZIP file. If you have a trackpad use a two-finger click. If you use a mouse right-click.
  2. Select Open With.
  3. Choose Archive Utility from the list.
  4. If Archive Utility is not listed click Other then select Archive Utility from the Applications Utilities folder.
  5. Wait for the extraction to finish. The unzipped folder appears next to the original ZIP file.

This method is especially useful when a third-party app has changed your default opener or when double-clicking does nothing.

How to Unzip a Folder on Mac with Finder’s Open With Menu

Finder’s menu bar is another reliable option.

  1. Click the ZIP file once to select it.
  2. Go to the top menu bar and click File.
  3. Select Open With.
  4. Choose Archive Utility.
  5. Check the same location for the extracted folder.

This produces the same result as double-clicking or right-clicking. It’s a good backup method if your trackpad right-click is not working or if you prefer using menus.

How to Open a ZIP Folder on Mac Using Terminal

If you prefer a command-line approach or need to extract into a specific folder Terminal works well.

  1. Open Terminal. You can find it in Applications > Utilities > Terminal or by searching Spotlight with Command + Space.
  2. Type the following command:
textunzip ~/Downloads/example.zip -d ~/Documents/Unzipped
  1. Replace example.zip with the exact name of your ZIP file.
  2. Replace ~/Documents/Unzipped with your preferred destination folder.
  3. Press Return.
  4. If the command succeeds the extracted files appear in the destination folder.

If your file path contains spaces wrap the path in quotes. For example:

textunzip "~/Downloads/My File.zip" -d "~/Documents/My Folder"

Use the Tab key to autocomplete file and folder names. If you see an error such as unzip: cannot find or open double-check the file name and location.

How to Unzip Multiple ZIP Folders on Mac

If you have several ZIP archives macOS can process them in one batch.

  1. In Finder select all the ZIP files you want to extract. Hold Command while clicking each file.
  2. Control-click or right-click one of the selected files.
  3. Choose Open With  Archive Utility.
  4. Archive Utility extracts each ZIP file into its own separate folder in the same location.

This saves time when you’ve downloaded multiple folders from a client course or image pack.

MethodBest forDifficultyRequires extra apps
Double-clickOne quick ZIP fileBeginnerNo
Right-click > Open WithFixing default app issuesBeginnerNo
Finder File menuMenu-bar usersBeginnerNo
Terminal unzipSpecific destination, batch controlIntermediateNo
Third-party appRAR, 7z, encrypted ZIPsBeginner to intermediateYes

Why Your Mac Won’t Unzip a Folder

Sometimes the extraction fails or the folder appears empty. Here are common reasons and quick fixes.

Corrupted download
If the ZIP file didn’t fully download it may be corrupted. Delete it and download it again from the original source.

Password-protected ZIP
Some encrypted ZIP files may not open in Archive Utility. You may need a dedicated unzip tool that supports the encryption format. Compatibility varies by app and ZIP encryption type. Needs verification for exact app support.

Unsupported compression format
.rar or .7z file is not a standard ZIP. macOS Archive Utility does not handle all compression formats. You may need a tool like The Unarchiver or Keka.

Not enough disk space
If your Mac is low on storage extraction can fail. Free up space and try again.

Blocked file from quarantine
Files downloaded from the internet may carry a quarantine attribute. If macOS blocks the file right-click it and choose Open. This can trigger a warning that lets you confirm.

Strange file names
Very long names or special characters can occasionally cause extraction issues. Rename the ZIP file to something short and simple before unzipping.

Quick Mistakes to Avoid

  • Double-clicking a .rar file as if it were a .zip
  • Expecting the extracted folder to appear on the desktop when the original file is in Downloads
  • Using a third-party app without checking if Archive Utility can already do the job
  • Deleting the original ZIP before confirming the extracted files are complete
  • Ignoring macOS security warnings on downloaded files

Avoiding these mistakes makes how to unzip a folder on Mac much smoother.

Before You Unzip: Quick Security Check

ZIP folders can come from email messaging apps or the web. A few quick checks can prevent clutter or security problems.

  • Check the sender or source. If you don’t recognize it don’t open the archive.
  • Select the ZIP file and press Space to preview its contents on many Macs.
  • If a very small ZIP file expands into an unusually large folder stop and delete it.
  • After extraction scan the new files with your preferred malware tool if you downloaded them from an untrusted site.

These steps don’t replace antivirus software but they reduce common risks.

How to Open a ZIP Folder on Mac with Third-Party Tools

Most standard ZIP files don’t need a third-party app. However some formats and advanced archives need more power.

The Unarchiver and Keka are two popular options. They can open formats like RAR, 7z, and some older compression types. They’re useful when Archive Utility fails.

General steps:

  1. Download the app from the official website.
  2. Install it and open it once.
  3. Right-click the archive file.
  4. Choose Open With and select the third-party app.
  5. Wait for extraction to finish.

Always check the official website for current compatibility and safety information. https://support.apple.com/en-gb/guide/mac-help/mchlp2528/mac

After You Unzip: Managing Images and Product Photos

If your unzipped folder contains product photos stock images, or e-commerce assets, you may need to edit them before use.

For example: sellers often receive ZIP folders full of product shots with messy backgrounds. After you unzip a folder on Mac, you can open those images and clean them up.

BGImageSnap is useful here. It offers background removal white or transparent backgrounds image resizing and quality improvements for product photos. If you run an online store this can save time when preparing images for marketplaces or catalogs.

relevant BGImageSnap background remover tool or article

Suggested image: before-and-after product photo with a clean white background. Alt text: How to unzip a folder on Mac and prepare product images with BGImageSnap.

Frequently Asked Questions

How do I unzip a folder on Mac without extra software?

Use the built-in Archive Utility. Double-click the ZIP file in Finder or right-click and choose Open With > Archive Utility.

What is the keyboard shortcut to unzip a folder on Mac?

There is no single built-in keyboard shortcut for unzipping. You can select the file and press Command + O but the result depends on the default app. Right-click is usually more reliable.

Why can’t I unzip a folder on Mac?

The file may be corrupted password-protected or in a format such as RAR that Archive Utility doesn’t support. Try downloading the file again or use a compatible third-party tool.

Can I unzip a password-protected ZIP folder on Mac?

Some password-protected ZIP files open in Archive Utility and prompt for a password. Others use encryption formats that require a third-party app. Test with the built-in method first.

How do I unzip a RAR folder on Mac?

Archive Utility does not natively handle most RAR files. Use a reputable third-party tool like The Unarchiver or Keka. Check the official website for the current version and compatibility.

Where do unzipped files go on a Mac?

By default Archive Utility places the extracted folder in the same location as the original ZIP file. If you unzip a file in Downloads the new folder appears in Downloads.

How do I create a ZIP folder on Mac?

Select the files or folders in Finder, right-click, and choose Compress. macOS creates a new ZIP archive in the same location.

Does unzipping a folder on Mac delete the original ZIP?

No. Unzipping creates a new extracted folder and leaves the original ZIP file untouched. You can delete the ZIP later after verifying the extracted files.

Conclusion

Knowing how to unzip a folder on Mac gives you control over downloaded files compressed archives and shared project folders. The built-in Archive Utility is fast and reliable for standard ZIP files. Use double-click for speed right-click when the default app is wrong, and Terminal when you need a specific destination.

If your newly unzipped folder contains product photos or e-commerce images BGImageSnap can help you remove backgrounds resize images, and prepare clean visuals for your store.

Ready to clean up those extracted product photos? Try a BGImageSnap background removal tool today.

Veo AI Video Generator: 7 Essential Tips for Stunning AI Videos.

Veo AI video generator is Google’s tool for turning a text prompt or still image into a short realistic video clip complete with camera movement natural motion and in the newer versions synced audio and dialogue. If you’ve already used an AI image generator to create visuals the veo ai video generator is Google’s answer to the next step: bringing those visuals to life.

This guide covers what the Veo AI video generator actually is where to log in safely how to write prompts that get better results and what to do with your Veo clips once they’re ready to publish.

What Is the Veo AI Video Generator

The Veo AI video generator is Google DeepMind’s AI model for creating video from text descriptions or images. Instead of filming or animating a scene by hand you describe what should happen the subject the action the camera movement the mood and the Veo AI video generator produces a short clip that matches it.

You can also upload a still image and ask the Veo AI video generator to animate it turning a static product photo or illustration into motion. The current version Veo 3.1 is known for realistic physics natural human movement and cinematic camera work.

Veo AI Video Generator vs Gemini’s Image Tools

If you’ve used Gemini’s AI image generator the Veo AI video generator will feel familiar in spirit but different in output. The image generator creates a single still frame from a prompt. The Veo AI video generator creates a short moving clip typically a few seconds long often with matching audio built in.

Many creators use both together: generate a still image first to lock in a look then feed that image into the Veo AI video generator as the starting frame for a video.

Tip One: Log In to the Veo AI Video Generator the Safe Way

There’s no separate “Veo account” to create. You access the Veo AI video generator through your existing Google account via one of a few official routes:

  • Gemini app sign in at gemini.google.com or in the mobile app then select the video creation tool if it’s available on your plan.
  • Google Flow Google’s dedicated AI filmmaking tool built specifically around Veo for longer multi shot projects.
  • Vertex AI Media Studio the developer and enterprise route for teams generating video through Google Cloud.

For the technical details on accessing Veo through Google’s developer tools see Google’s official Veo documentation and for the creative, filmmaking focused version, see Google’s official announcement of Flow.

Tip Two: Understand What You’re Paying For

Some free rate limited access to the Veo AI video generator is available directly through your Google account. Full features higher resolution longer clips and more generations per month are gated behind a paid Google AI subscription.

Exact pricing tiers change fairly often so verify current numbers on Google’s own pricing page rather than relying on older articles before you budget a project around it.

Tip Three: Write Prompts Like a Shot List

Prompts for the Veo AI video generator work best when they read like a shot description rather than a vague idea. A strong prompt usually includes the subject and action the setting the camera movement and the mood or lighting.

  • Describe the subject and what it’s doing not just what it is.
  • Specify the camera behavior a slow push in a tracking shot a static wide shot.
  • Set the scene indoor or outdoor time of day weather.
  • Add a style or mood word cinematic documentary handheld dreamlike.
  • If you want dialogue or sound describe it directly in the prompt.

For example, rather than “a dog running” a stronger prompt for the Veo AI video generator would describe a golden retriever sprinting across a sunlit beach at sunset camera tracking alongside at ground level waves crashing softly in the background.

Tip Four: Plan for Short Clips Not Long Videos

A single generation from the Veo AI video generator typically produces a clip only a few seconds long. Longer videos are built by generating multiple clips and stitching them together which means budgeting more time and credits than a single take suggests.

Tip Five: Avoid the Most Common Veo Mistakes

  • Writing prompts that only describe the subject and skip the camera and setting.
  • Expecting one generation to produce a long video instead of chaining several together.
  • Not budgeting credits or minutes before a project then running out mid way through a campaign.
  • Publishing a raw Veo clip without pulling a clean still frame or thumbnail for use elsewhere on the page.
  • Signing into unofficial third party “free Veo” sites instead of Google’s own tools.

Tip Six: Turn Veo Stills Into Web Ready Images

Video isn’t always the final format you need. A lot of creators use the Veo AI video generator to build a scene then pull a still frame from it to use as a thumbnail a blog header or a product visual. That still frame usually needs the same cleanup any AI generated image does before it’s ready to publish.

If your Veo still frame has a busy or distracting background BGImageSnap’s free background remover can strip it out in seconds leaving a clean or transparent background suited for product listings and marketing graphics.

From there BGImageSnap’s image resizer and image compressor get the frame down to a web friendly file size without losing visible quality and the format converter can save it as WebP for faster page loads.

Tip Seven: Match the Tool to the Job

The Veo AI video generator is genuinely powerful but it isn’t always the right tool. For a single static product photo a still image AI generator paired with a background remover is faster and cheaper. Save the Veo AI video generator for moments that specifically benefit from motion a product in use a scene with atmosphere or social content built for video first platforms.

Frequently Asked Questions About the Veo AI Video Generator

Is the Veo AI video generator free to use

Google offers limited rate limited access to the Veo AI video generator through a free Google account. Higher resolution longer clips and more monthly generations require a paid Google AI subscription.

How do I log in to the Veo AI video generator

There’s no separate Veo account you sign in with your existing Google account through the Gemini app Google Flow or Vertex AI Media Studio.

How long can a video from the Veo AI video generator be

A single generation typically produces a clip a few seconds long. Longer videos are made by generating multiple clips and stitching them together.

Does the Veo AI video generator create audio and dialogue

Yes. Veo 3.1 can generate synchronized audio sound effects and spoken dialogue directly in the clip not just silent video.

Can I turn a still image into a video with the Veo AI video generator

Yes. You can upload an existing image and use it as the starting frame and the Veo AI video generator will animate it based on your prompt.

What’s the difference between the Veo AI video generator and Google’s image generator

The image generator produces a single still image from a prompt while the Veo AI video generator produces a short moving video clip optionally with audio.

Are the free Veo login sites that show up in search safe to use

Be cautious with third party sites promising free unlimited access to the Veo AI video generator. They aren’t run by Google and signing in with your Google account on an unfamiliar site carries real risk. Stick to Google’s official tools.

How do I get a clean image from a Veo AI video generator frame

Export or screenshot the frame you want then run it through a background remover and image resizer to get a clean web ready still image.

Conclusion

The Veo AI video generator makes short cinematic AI video accessible without a camera crew or editing suite you describe the shot and it builds the scene. Just remember to access it only through Google’s official tools and if you pull a still frame for your website or store clean it up first.

Run your Veo AI video generator stills through BGImageSnap’s free background remover, resizer, and compressor to turn them into polished publish ready images in a few clicks.

1920×1080 White Solid Background: The Complete Guide to Getting the Perfect Plain White Image.

A plain white background sounds simple until you actually need one that is the exact size the exact shade of white and free of the faint gray tint or JPEG noise that shows up the moment you zoom in. Search “1920×1080 white solid” and you’ll find a mix of stock photo sites forum threads and tools that don’t quite give you a clean ready-to-use file.

This guide covers what a 1920×1080 white solid background actually is why that resolution is the default for so many screens and templates and the different ways to get one whether you want to download a ready-made file create one from scratch in design software or turn an existing photo into a clean white-background image.

You’ll also find a comparison of white versus off-white versus transparent backgrounds the most common mistakes people make when creating them and a short FAQ covering the questions that come up most often.

Table of Contents

  1. What Is a 1920×1080 White Solid Background?
  2. Why 1920×1080 Is the Standard Resolution
  3. Common Uses for White Solid Backgrounds
  4. How to Create a 1920×1080 White Solid Background
  5. White vs. Off-White vs. Transparent Backgrounds
  6. Common Mistakes to Avoid
  7. Best Practices for a Clean White Background
  8. Frequently Asked Questions

Quick Answer: Key Takeaways

  • 1920×1080 is a 16:9 widescreen resolution (Full HD) the same aspect ratio used by most laptop screens YouTube videos and presentation templates.
  • A “white solid” background means every pixel in the image is the same pure white value (typically hex #FFFFFF) with no gradient, texture, or shadow.
  • The fastest way to get one is to generate it directly in an image editor or online tool rather than searching stock sites since a generated file has no compression artifacts.
  • For product photos or portraits it’s usually easier to remove the existi
  • ng background and replace it with solid white than to start from a blank canvas.
  • Pure white (#FFFFFF) can look harsh in photography; many professionals use an off-white (#F8F8F8 or similar) that still reads as “white” but is gentler on the eyes.
  • File format matters: PNG preserves a perfectly flat white with no compression noise while JPEG can introduce faint blotches at high compression.
  • For print use check whether you need RGB or CMYK color mode a screen-perfect white can shift slightly when printed.

What Is a 1920×1080 White Solid Background?

A 1920×1080 white solid background is an image exactly 1,920 pixels wide by 1,080 pixels tall filled entirely with a single uniform white color. There’s no gradient no vignette no texture just one flat color across every pixel. It’s the digital equivalent of a blank sheet of white paper sized to match a standard widescreen display.

The “1920×1080” part refers to the resolution commonly called Full HD or 1080p. The “white solid” part refers to the content: a single flat color rather than a photo pattern or gradient. Together the two describe one of the most requested background specs online used everywhere from video editing to online forms.

Why 1920×1080 Is the Standard Resolution

1920×1080 became the default resolution for a simple reason: it matches the 16:9 aspect ratio that most laptop screens monitors, TVs, and video platforms settled on over a decade ago. Because so much hardware and software is built around this ratio, a background sized to 1920×1080 will fit cleanly as a desktop wallpaper a Zoom or Teams virtual background a YouTube thumbnail canvas or a slide in PowerPoint and Google Slides without cropping or stretching.

Using a different resolution isn’t wrong but it usually means the image gets automatically resized or cropped by whatever platform you’re uploading it to which can introduce blur or cut off content near the edges. Starting at 1920×1080 avoids that problem for most common uses.

Common Uses for White Solid Backgrounds

A plain white background is one of the most versatile assets in digital work. Here are the situations where it comes up most often.

Product Photography and E-Commerce Listings

Most online marketplaces including Amazon and Etsy require or strongly recommend a pure white background for the main product image. It keeps the focus entirely on the product and creates visual consistency across a whole catalog.

ID Photos, Passport Photos, and Official Documents

Passport, visa, and ID photo requirements almost always specify a plain white or off-white background so the applicant’s face and outline are clearly separated from the surroundings. This is one of the strictest use cases even a light shadow behind the subject can cause a photo to be rejected.

Video Calls and Virtual Backgrounds

A solid white background works well as a virtual background for Zoom, Google Meet, or Teams calls when someone wants a clean distraction-free look without a busy room behind them.

YouTube Thumbnails, Presentations, and Templates

Designers frequently start a thumbnail or slide with a flat white canvas at 1920×1080 because it’s easy to layer text icons and graphics on top without background clutter competing for attention.

Print Materials

Flyers, business cards, and posters often use white as the base layer before print-ready color adjustments are applied since most printed materials start from a white substrate anyway.

How to Create a 1920×1080 White Solid Background

There are three practical ways to get this file depending on whether you’re starting from scratch or working with an existing photo.

Method 1: Generate a Blank Canvas with an Online Tool

This is the fastest option if you just need an empty white rectangle at the right size.

  • Open a browser-based image tool that lets you set a custom canvas size.
  • Enter 1920 for width and 1080 for height in pixels.
  • Set the fill or background color to pure white (#FFFFFF) or an off-white shade if you prefer a softer tone.
  • Export as PNG to avoid compression artifacts or JPEG at maximum quality if file size matters more.

Method 2: Create It in Design Software

If you’re already working in Photoshop, Canva, GIMP, or a similar tool:

  1. Create a new document and set the dimensions to 1920 x 1080 px.
  2. Set the resolution to 72 DPI for screen use or 300 DPI if the file will be printed.
  3. Fill the entire background layer with white then flatten the image before exporting.
  4. Double-check there’s no drop shadow, border, or subtle gradient left over from a template.

Method 3: Remove the Background from an Existing Photo

If you already have a photo of a product, person, or object and want it isolated on solid white rather than starting from a blank canvas the quicker route is to remove the existing background from the photo and replace it with solid white. This is the standard workflow for product listings and ID photos since it keeps the subject but swaps out whatever was originally behind them.

White vs. Off-White vs. Transparent Backgrounds

“White” isn’t always the right choice. Depending on where the image will be used an off-white tone or a transparent background may work better.

Background TypeBest ForWatch Out For
Pure white (#FFFFFF)E-commerce listings, passport photos, presentation slidesCan look harsh or clinical in photography; shows dust and lens flare easily
Off-white (#F5F5F5–#FAFAFA)Professional photography, portraits, brand imageryMay be rejected by platforms that require exact pure white
Transparent (PNG with alpha)Layering over other designs, logos, overlaysNot accepted for ID photos or most marketplace listings; needs a PNG or WebP file not JPEG

Common Mistakes to Avoid

Using a JPEG at low quality: Heavy JPEG compression introduces faint gray blotches on flat white areas that are invisible until you zoom in use PNG for a perfectly flat background or JPEG at maximum quality only.

Leaving a soft shadow or vignette: Many photo templates add a subtle drop shadow around the edges by default. On a true “solid” background this needs to be removed or flattened out.

Mismatched color mode: A background that looks pure white in RGB on screen can print with a faint tint if it isn’t converted to CMYK correctly for physical materials.

Wrong aspect ratio for the platform: 1920×1080 fits 16:9 uses well but a passport photo or Instagram post has its own required dimensions always check the exact spec before exporting.

Skipping a final zoom-in check: Compression artifacts and stray pixels are often only visible at 100% zoom or higher so it’s worth checking before publishing or submitting the file.

Best Practices for a Clean White Background

  • Export as PNG whenever the background needs to stay perfectly flat with no compression noise.
  • Use pure white (#FFFFFF) for official/ID uses and a slightly off-white tone for photography that will be viewed on screen for long periods.
  • Keep a master file at 1920×1080 and resize down for smaller platforms rather than resizing up which causes blur.
  • If you’re isolating a subject from a photo check the edges closely stray pixels of the old background are the most common giveaway of a rushed edit.
  • Save a transparent PNG version alongside the solid white version if you might need to place the subject on a different background later.

Frequently Asked Questions

What size is 1920×1080 in inches?

At 72 DPI (standard screen resolution) 1920×1080 pixels works out to roughly 26.7 x 15 inches. For print it’s typically scaled down and reworked at 300 DPI instead since 1920×1080 alone is too low-resolution for large-format printing.

Is #FFFFFF the only correct white for a background?

No. #FFFFFF is pure white and is often required for ID photos and marketplace listings but many designers use a very light off-white (around #F8F8F8) for photography and branding because it’s softer on the eyes while still reading as “white” to most viewers.

Can I use a 1920×1080 white background as a Zoom virtual background?

Yes. Most video call platforms accept a plain image at this resolution as a custom virtual background and 1920×1080 matches the aspect ratio most webcams and screens use by default.

What’s the difference between a solid white and a transparent background?

A solid white background fills every pixel with white and works in any file format including JPEG. A transparent background has no fill at all in the empty areas and requires a format that supports transparency such as PNG or WebP it’s used when you plan to place the subject over a different background later.

Do I need special software to create a white background, or can I use a free online tool?

A free browser-based tool is usually enough for a plain white canvas or for removing a background from an existing photo. Design software like Photoshop or GIMP is more useful when you need finer control such as custom color modes for print.

Why does my white background look gray or blotchy after saving?

This is almost always JPEG compression. Flat colors like solid white are especially prone to visible compression artifacts at lower quality settings. Re-exporting as PNG or as JPEG at maximum quality usually fixes it.

Conclusion

A 1920×1080 white solid background is a simple asset with a specific set of requirements: the right pixel dimensions a truly flat and uniform color and a file format that won’t introduce compression noise. Whether you’re building one from a blank canvas for a presentation or stripping the background out of an existing product photo the fastest path is usually a purpose-built online tool rather than manually editing pixel by pixel.

Don’t Stop Here! Discover More Expert Tips & Guides

How to Fix Grainy Photos: The Complete 2026 Fix-It Guide.

LinkedIn Profile Photo Size and Tips: Complete 2025 Guide.

How to Convert WEBP to JPG Free Online (Fast, No Software)