YouTube PFP Downloader 5 Ultimate Free Tools to Download HD Profile Pictures

Step-by-step comparison using a YouTube PFP Downloader to extract HD avatar images

If you have ever tried to save a creator’s profile image from YouTube you already know the platform does not offer a direct “Save Image” button for avatars. That is exactly where a YouTube PFP Downloader becomes useful. Whether you want a high-quality wallpaper need to reference a channel’s branding or are curating visual assets for a creative project knowing how to download YouTube profile pictures in full resolution saves time and frustration.

In this guide you will learn exactly how a YouTube PFP Downloader works which methods actually deliver HD results and how to stay safe while doing it. We cover manual techniques web-based extractors and practical steps you can use today.


Quick Answer / Key Takeaways

  • A YouTube PFP Downloader extracts the high resolution source file of a channel avatar not just a compressed thumbnail.
  • Most reliable methods are browser based and do not require software installation.
  • You can often recover images from 200px up to 800px+ by using the correct URL parameters inside a YouTube PFP Downloader.
  • Always respect copyright and do not use downloaded avatars for commercial merchandise or ads without permission.

What Is a YouTube PFP Downloader?

A YouTube PFP Downloader is a tool or technique that lets you retrieve the original image file behind a YouTube channel’s profile picture. YouTube serves these avatars through Google’s content delivery network which means the image exists at a direct URL. A downloader either automates that retrieval or guides you to manipulate the URL to request a larger version.

This is different from taking a screenshot. A screenshot captures your screen resolution and adds compression artifacts. A proper YouTube PFP Downloader targets the source file which is why it can deliver sharp high definition results faster.

Can You Download YouTube Profile Pictures Without Tools?

Yes. Experienced users can locate the image URL within the page source or browser developer tools. Once you have the direct link you can sometimes change size parameters to request a larger format. However this requires comfort with web browsers and is not always intuitive for beginners.


Why Use a YouTube PFP Downloader for HD Images?

People seek HD YouTube profile pictures for several legitimate reasons. Content creators may need reference material for design mood boards. Marketers might collect brand assets for competitive analysis. Fans sometimes want a clearer version of a favorite creator’s avatar for personal wallpapers.

The key point is quality. YouTube compresses images for fast loading. If you rely on the small thumbnail shown on the channel page you miss detail. A YouTube PFP Downloader aims at the underlying file to recover that detail.


How to Use a YouTube PFP Downloader: Step-by-Step

If you prefer a direct approach follow these steps. They work for most web based extractors and manual methods.

  1. Open YouTube and navigate to the channel whose profile picture you need.
  2. Copy the channel URL from the address bar (for example, youtube.com/@ChannelName).
  3. Open your chosen YouTube PFP Downloader or image extraction service.
  4. Paste the channel URL into the input field.
  5. Wait for the tool to scan the page and locate the avatar source file.
  6. Select the highest available resolution (usually labeled HD 400×400 or Max).
  7. Right click the result and choose “Save Image As” or use the download button.

This process takes under 30 seconds once you know the steps. If a YouTube PFP Downloader asks for unnecessary permissions asks you to install unknown software or requires account creation treat it as a red flag.


5 Best Free Methods to Download YouTube Profile Pictures

Because needs vary here are five practical approaches rather than one size fits all software.

  1. Web Based URL Extractors: These are the simplest option. You paste a YouTube link and the service returns the image file. Look for sites that do not require installation and clearly state they do not store files.
  2. Browser Inspector Method: Right click the profile picture select “Inspect,” find the img tag URL and open it in a new tab. You can often request a larger size by adjusting URL parameters.
  3. Direct URL Adjustment: Some avatars use parameters like /s32-c/ or similar CDN sizing tags. Changing those identifiers to larger values (for example, /s128-c/ or /s256-c/) can yield a bigger file. Results vary by source.
  4. Trusted Browser Extensions: Some reputable extensions for Chrome or Firefox can capture media elements on a page. Use only extensions with high review counts and transparent privacy policies.
  5. Archive Services: Platforms like the Wayback Machine sometimes store older versions of profile pictures at higher resolutions if they were previously indexed.

Remember a YouTube PFP Downloader does not mean you need a dedicated app. Often the easiest path is a clean web tool with no ads.


Safety depends on your source. Avoid suspicious downloaders that prompt you to install unknown executables or grant camera access.

From a legal standpoint profile pictures are usually copyrighted by the creator. Downloading for personal use typically falls under fair use in many jurisdictions but distributing altering for merch or using in commercial campaigns requires permission. YouTube’s Terms of Service also prohibit scraping content at scale.

For individual non commercial retrieval the risk is generally low but always credit creators when appropriate. If you need legal high resolution visuals for backgrounds or design work explore our HD Background Collection at BG Image Snap for ready to use assets.


Common Mistakes to Avoid

  • Trusting pop up ads: Many “free downloader” pages push malware through fake download buttons. Close unexpected pop ups.
  • Assuming private profiles are accessible: If a channel is private or unlisted the avatar URL may be inaccessible to public extractors.
  • Ignoring resolution limits: Some profiles are uploaded at low resolution by design. No YouTube PFP Downloader can invent pixels that do not exist.
  • Skipping copyright checks: Always verify whether your intended use requires a license.
High definition YouTube profile pictures downloaded with a YouTube PFP Downloader

Frequently Asked Questions About YouTube PFP Downloader

Q1: Is a YouTube PFP Downloader free?

Most web-based tools are free for single downloads. Some offer batch features or faster speeds through paid tiers.

Q2: What is the best resolution I can get?

It depends on what the creator uploaded. Common results range from 200px to 800px, though some high-quality uploads can exceed 1000px.

Q3: Do I need to install software?

No. Many reliable methods work entirely in your browser.

Q4: Can I download a YouTube profile picture for commercial use?

Only if you have permission from the rights holder. Downloading is not the same as licensing.

Q5: Why is the image blurry after download?

The source file may be small, or the site you used delivered a compressed copy. Use a YouTube PFP Downloader that explicitly offers a full-resolution option.

Q6: How do I find the direct profile picture URL?

Use your browser’s inspect tool on the avatar image element or paste the channel link into a reputable extractor.

Q7: Are these downloaders legal?

Using them for personal, non-commercial retrieval is generally acceptable. Systematic scraping or redistribution violates YouTube’s terms.

Q8: Can I use this for background images?

Yes, many users save YouTube avatars to use as phone or desktop backgrounds though you should ensure personal-use compliance.

Final Thoughts

A YouTube PFP Downloader is a practical way to preserve high quality profile images when YouTube’s interface limits direct saving. By combining browser based extractors with a basic understanding of image URLs you can get sharp results without risking your device.

If you are looking for more high quality visuals to pair with your download visit BG Image Snap for curated HD backgrounds wallpapers and digital assets designed for creators and enthusiasts.

Create Better Images in Seconds → Try BGImageSnap

Looking for more helpful image editing tips? Explore our latest guides and learn how to resize, convert, remove backgrounds and improve your photos. → click here

MP4 to PNG The Ultimate Guide to Convert Video Frames into PNG Images

mp4 to png step-by-step diagram showing video container transforming into PNG through resolution and transparency steps

Quick Answer: How to Convert MP4 to PNG?

MP4 to PNG means extracting a still image from a video file. Instead of keeping motion you capture a specific second and save it as a lossless PNG.

  • Best for: Web backgrounds thumbnails graphic overlays and print assets.
  • Key benefit: PNG supports transparency and sharp edges unlike JPEG.
  • Time required: Seconds for one frame; minutes for bulk extraction.
  • Cost: Most reliable tools are free.

If you already know your frame timestamp skip ahead to the step by step section. If you need to compare methods first review the comparison table below.

MP4 to PNG: What It Actually Means

MP4 is a digital container format that holds video streams, audio tracks, subtitles and metadata. PNG is a raster image format that uses lossless compression and supports alpha channel transparency.

When you perform an MP4 to PNG conversion you are not “changing” the video format. You are pulling a still image from the video stream at a precise timecode. This matters for designers: a 4K MP4 might contain a perfect frame at 00:00:08 but if you export at 1080p or apply heavy compression the PNG will not recover lost detail.

For teams in the USA, UK, and CA working on background image projects the critical rule is simple: start with the highest source resolution then export the PNG at the exact pixel dimensions your layout requires.

The Difference Between Video and Frame Formats

FeatureMP4 (Video)PNG (Image)
Contains motionYesNo
Transparency supportNo (in final frame unless alpha source)Yes
Best for backgroundsOnly after frame extractionDirect use
File sizeLargeModerate (lossless)
Color profileOften Rec. 709Usually sRGB for web

5 Ultimate Best Methods to Convert MP4 to PNG

Not every tool fits every workflow. Here is a direct comparison of the most effective methods for MP4 to PNG tasks.

MethodBest ForQualitySpeedCost
Desktop Editor (Premiere / DaVinci)Color correction + cropHighMediumPaid / Free tier
Frame Grab SoftwarePrecise timestamp picksHighFastFree / Paid
FFmpeg Command LineBulk / automatedHighVery fastFree
Online MP4 to PNG ConverterOne off quick tasksMediumFastFree / Premium
Mobile AppsSocial / quick referencesMediumFastFree / Paid

Method 1: Desktop Video Editors (Adobe Premiere Pro, DaVinci Resolve)

Import the MP4 scrub to the exact frame and export a still. Choose PNG as the format and set resolution to match your source. This is the best path when you need color grading or framing adjustments before extraction.

Method 2: Dedicated Frame Grab Tools

VLC offers a snapshot feature; LosslessCut allows frame accurate cutting without a timeline. These are excellent for quick MP4 to PNG tasks when you do not need full editing power.

Method 3: FFmpeg (Command Line)

FFmpeg is the open source standard for video processing. It extracts frames without loading a visual timeline making it ideal for bulk tasks or automated workflows.

Method 4: Browser Based Online Converters

Platforms like CloudConvert or Online Convert accept an MP4 upload and return PNG files. They work well for single frame needs but review privacy policies before uploading proprietary footage.

Method 5: Mobile Apps

Apps such as Video to Photo (iOS) or FrameGrab (Android) allow quick exports from your camera roll. Use these for rapid reference shots rather than high precision design work.

Step-by-Step: How to Convert MP4 to PNG Using FFmpeg

If you want precise repeatable results follow this process.

Step 1: Download FFmpeg from the official repository and install it on your system.

Step 2: Open a terminal or command prompt and navigate to the folder containing your video.

Step 3: Extract a single frame at a specific timestamp.

textffmpeg -ss 00:00:05 -i input.mp4 -vframes 1 output.png

This command grabs the frame at 5 seconds.

Step 4: Verify the output file dimensions. If your source is 1920×1080 your PNG should match unless you specify a scale.

Step 5: Open the PNG in an image editor to confirm transparency. If your original video does not include an alpha channel transparency will not appear automatically.

This method delivers identical results across USA, UK, and CA operating environments because it relies on command line processing rather than localized software licenses.

Quality Tips for Background Images

When you convert video frames into PNG images for web backgrounds protect the asset quality with these practices:

  • Match pixel dimensions to layout. A full width hero banner may need 1920 px or 2560 px width; do not export small and upscale.
  • Preserve transparency. Choose PNG (not JPEG) if the frame includes logos cutouts or overlay ready elements.
  • Check color profiles. Many MP4 files use Rec. 709. Export your PNG in sRGB if it will live on the web.
  • Avoid double compression. Export once at high quality then scale down for thumbnails rather than re exporting from a compressed file.

If you are sourcing backgrounds for a site like bgimagesnap.com consider whether your extracted frame needs retouching before it becomes a final background asset.

Common MP4 to PNG Mistakes to Avoid

Mistake 1: Exporting as JPEG by accident. You lose transparency and introduce compression artifacts.

Mistake 2: Choosing a low resolution source. A PNG cannot invent detail that was never in the original video.

Mistake 3: Selecting the wrong timestamp. One second can mean the difference between a sharp face and a motion blur.

Mistake 4: Over compressing the PNG. Use lossless or near lossless settings for graphics; only compress if file size is a critical bottleneck.

MP4 to PNG vs. Other Image Formats

PNG is not the only option but it is usually correct for design work.

FormatTransparencyLosslessBest Use After MP4 to PNG
PNGYesYesWeb backgrounds logos graphics
JPEGNoNoPhotographs where file size is critical
GIFYes (1-bit)YesSimple animations not high quality frames
TIFFYesYesPrint workflows requiring print ready data

For most MP4 to PNG workflows PNG strikes the best balance between clarity and versatility.

Frequently Asked Questions

What does MP4 to PNG mean?

It means extracting a still frame from an MP4 video file and saving it as a PNG image.

How do I convert MP4 to PNG without losing quality?

Start with a high-resolution source use a lossless export setting and avoid recompressing the PNG afterward.

Can I convert MP4 to PNG online for free?

Yes. Many online converters support this but check file-size limits and privacy terms before uploading.

Is PNG better than JPG for video frames?

For backgrounds and graphics yes. PNG supports transparency and preserves sharp edges; JPG does not.

How do I pick the best frame from a video?

Scrub slowly avoid motion blur and select frames with clean negative space or clear focal points.

What is the best MP4 to PNG tool for professionals?

FFmpeg for speed and bulk work; Adobe Premiere or DaVinci Resolve for color-controlled extractions.

Does MP4 to PNG support transparency?

The PNG format supports transparency but the source frame must contain it—such as via a green-screen or alpha-channel source.

How long does MP4 to PNG conversion take?

A single frame takes seconds. Bulk extraction depends on video length and your hardware.

Conclusion

Mastering MP4 to PNG conversion gives you a direct pipeline from video source to polished graphic. Whether you use a desktop editor for color precision or FFmpeg for rapid extraction the rules remain constant: respect the source resolution export at the correct size and choose PNG when transparency and clarity matter.

If you need high quality PNG background images to pair with your extracted frames browse our curated collection at bgimagesnap.com. From web hero backgrounds to print ready assets we provide the visual foundation your next project needs.

Pixel to Inches 7 Easy Tips to Convert Image Size Perfectly

Introduction

Pixel to inches conversion is simple once you know one key detail: the image’s PPI also called pixels per inch. If you have ever tried to print a photo design a flyer upload a product image or resize a graphic for social media you may have noticed that pixels and inches do not automatically mean the same thing.

A photo that is 3000 pixels wide can print at 10 inches wide at 300 PPI but the same photo can print at 20 inches wide at 150 PPI. The pixel count stays the same but the print size changes.

In this guide from BGImageSnap, you’ll learn how to convert pixels to inches how PPI affects image quality which resolution to use for print or web and how to avoid common resizing mistakes.

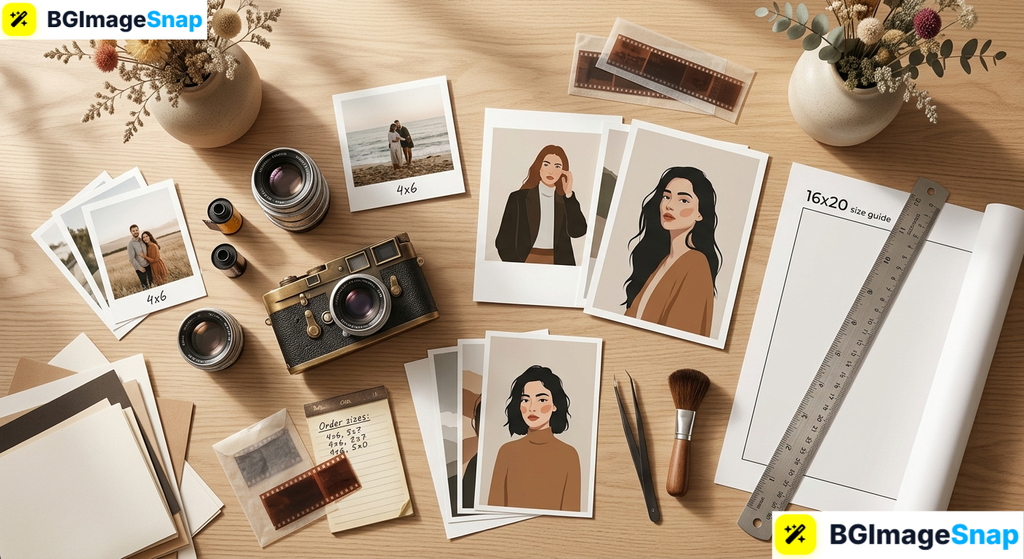
Pixel to inches comparison showing how 3000 pixels prints at different sizes depending on DPI

Key Takeaways

  • Pixel to inches formula: pixels ÷ PPI = inches
  • Inches to pixels formula: inches × PPI = pixels
  • 300 PPI is commonly used for high-quality prints.
  • 72 or 96 PPI is often discussed for screens but web display depends mostly on pixel dimensions.
  • A higher PPI creates a smaller but sharper print.
  • A lower PPI creates a larger print but may reduce sharpness.

What Does Pixel to Inches Mean?

Pixel to inches means converting a digital image’s pixel dimensions into a physical size usually for printing.

A pixel is a tiny square of color in a digital image. An inch is a physical measurement. To connect the two you need PPI which tells you how many pixels will fit into one printed inch.

For example:

  • 1200 pixels at 300 PPI = 4 inches
  • 1200 pixels at 150 PPI = 8 inches
  • 1200 pixels at 100 PPI = 12 inches

The number of pixels did not change. Only the density changed.

This is why a photo can look large on a screen but print smaller than expected. Screens show pixels; printers need pixels distributed across physical space.

For deeper technical background Adobe has a helpful explanation of image size and resolution.

Pixel to Inches Formula Explained

The basic pixel to inches formula is:

Pixels ÷ PPI = Inches

You apply the formula separately to width and height.

Example: Convert 2400 × 3000 Pixels to Inches

If the image resolution is 300 PPI:

  • Width: 2400 ÷ 300 = 8 inches
  • Height: 3000 ÷ 300 = 10 inches

So, the image prints as 8 × 10 inches at 300 PPI.

What if the PPI is 150?

  • Width: 2400 ÷ 150 = 16 inches
  • Height: 3000 ÷ 150 = 20 inches

So, the same image prints as 16 × 20 inches at 150 PPI.

Practical Advice

Use 300 PPI when you want sharp prints especially for photos brochures invitations product inserts and framed images. Use a lower PPI only when the image will be viewed from farther away such as posters or banners.

Pixel to Inches Conversion Chart

Here is a quick pixel to inches reference chart using common PPI values.

Pixel DimensionsAt 300 PPIAt 150 PPICommon Use
600 × 600 px2 × 2 in4 × 4 inSmall icon or label
1200 × 1800 px4 × 6 in8 × 12 inStandard photo print
1500 × 2100 px5 × 7 in10 × 14 inPhoto print
2400 × 3000 px8 × 10 in16 × 20 inPortrait print
3000 × 3600 px10 × 12 in20 × 24 inWall print
3600 × 5400 px12 × 18 in24 × 36 inPoster print

This chart shows why PPI matters. The same image can create different physical sizes depending on resolution.

Best PPI Settings for Print and Web

Choosing the right PPI depends on where the image will appear.

For High-Quality Prints

Use 300 PPI for:

  • Photo prints
  • Invitations
  • Business cards
  • Product packaging
  • Brochures
  • Art prints

This setting gives you strong detail when the viewer sees the image up close.

For Posters and Large Prints

Use 150–200 PPI when:

  • The print is large
  • The viewer stands farther away
  • File size needs to stay manageable

Large prints do not always need 300 PPI because people usually view them from a distance.

For Websites and Social Media

For websites pixel dimensions matter more than physical inches. A browser displays images based on screen pixels CSS and layout rules.

For web use focus on:

  • Correct width and height in pixels
  • Fast loading
  • Compression
  • Responsive display
  • Proper format such as JPG, PNG, WebP, or SVG

The W3C explains how CSS uses absolute units including how CSS pixels relate to inches in its CSS Values and Units specification.

If you need to resize or prepare images for online use you can use a tool like the BGImageSnap image editor to make quick adjustments.

Pixel to inches comparison showing how 3000 pixels prints at different sizes depending on DPI

How to Convert Pixel to Inches Step by Step

Follow this simple process to convert pixel to inches correctly.

Step 1: Find the Pixel Dimensions

Check your image size first. You might see something like:

3000 × 2400 pixels

The first number is usually the width. The second number is the height.

Step 2: Choose the PPI

Pick the resolution based on your use case:

  • 300 PPI for sharp photo prints
  • 150–200 PPI for larger posters
  • 72 or 96 PPI for basic screen reference only

Step 3: Divide Pixels by PPI

Use the formula:

Pixels ÷ PPI = Inches

Example:

  • Width: 3000 ÷ 300 = 10 inches
  • Height: 2400 ÷ 300 = 8 inches

So, the final print size is 10 × 8 inches.

Step 4: Check the Aspect Ratio

Make sure the shape of the image fits your desired output.

For example, an 8 × 10 print has a different shape than a 4 × 6 print. If the aspect ratio does not match you may need to crop the image.

Step 5: Resize Without Stretching

Never stretch an image to force it into a size. Stretching can make people products or text look distorted.

Instead:

  • Crop to the correct shape
  • Resize proportionally
  • Use a clean background if needed
  • Export a copy not the original

For product photos or profile images try removing distractions with BGImageSnap’s background tools before resizing.

Pixel to Inches Example for Common Print Sizes

Here are common print sizes and the pixel dimensions needed at 300 PPI.

Print SizePixel Size at 300 PPI
4 × 6 in1200 × 1800 px
5 × 7 in1500 × 2100 px
8 × 10 in2400 × 3000 px
8.5 × 11 in2550 × 3300 px
11 × 14 in3300 × 4200 px
12 × 18 in3600 × 5400 px

If your image has fewer pixels than the recommended size it may still print but it may not look as sharp up close.

Common Mistakes to Avoid

1. Confusing PPI and DPI

PPI means pixels per inch and refers to digital image resolution. DPI means dots per inch and usually relates to printer output. People often use the terms interchangeably but they are not exactly the same.

2. Assuming Pixels Have a Fixed Inch Size

Pixels do not have one fixed physical size. A 1000-pixel image can be small or large depending on the PPI.

3. Enlarging Low-Resolution Images Too Much

If you enlarge a small image too far it can become blurry or pixelated. It is better to start with a larger original image.

4. Ignoring Cropping

A photo may have enough pixels but the wrong shape. Always check the aspect ratio before printing.

5. Exporting Over the Original File

Always save a copy. Keep the original image untouched in case you need another size later.

Use BGImageSnap to convert pixel to inches and resize images for perfect print quality

FAQ

1. How do I convert pixel to inches?

Use this formula: inches = pixels ÷ PPI. For example 1800 pixels divided by 300 PPI equals 6 inches.

2. How many pixels are in one inch?

It depends on the PPI. At 300 PPI one inch contains 300 pixels. At 150 PPI one inch contains 150 pixels.

3. What is 1920 pixels in inches?

At 300 PPI 1920 pixels equals 6.4 inches. At 96 PPI 1920 pixels equals 20 inches.

4. Is 300 PPI always required?

No. 300 PPI is ideal for high-quality close-up prints. Large posters may look fine at 150–200 PPI because they are usually viewed from farther away.

5. Does changing PPI change image quality?

Changing PPI alone does not add new detail. It changes how densely pixels are printed. If you resample the image then the software may add or remove pixels.

6. What pixel size do I need for an 8 × 10 print?

For a sharp 8 × 10 print at 300 PPI use 2400 × 3000 pixels.

7. Does pixel to inches matter for Instagram or websites?

Not as much as pixel dimensions. For web and social media focus on the image’s width, height, file size and format.

Conclusion

Understanding pixel to inches conversion helps you print sharper photos design better graphics and avoid blurry results. For high-quality prints use 300 PPI when possible. For web images focus more on pixel dimensions compression and responsive display.

If you want to prepare images faster visit BGImageSnap to edit clean up and resize your visuals for print, web and social platforms.

1920×1080 Image 5 Ultimate Ways to Get Direct Links Fast

A 1920×1080 image is the standard resolution for full HD backgrounds and finding a direct image link for this format is one of the most common frustrations for designers developers and content creators. Many sites wrap images in preview pages temporary session IDs or compressed thumbnails that never load properly.

This guide answers exactly how to get a direct image link for a 1920×1080 image whether you need it for a website hero section a video backdrop or a desktop wallpaper. You will learn practical methods that work today plus how to avoid broken links after you publish.

What you will learn:

  • The exact steps to grab direct URLs for 1920×1080 images
  • Why some “direct links” break after a few hours
  • How to self host so your link never dies
  • Where BGImageSnap fits into your workflow for dependable direct links
Direct 1920x1080 image link versus cluttered web preview page comparison 1920×1080 Image

Quick Answer / Key Takeaways

  • A 1920×1080 image is Full HD at a 16:9 ratio.
  • Use “Copy image address” in your browser for quick direct links.
  • Source URL parameters (like ?w=1920) can unlock a direct 1920×1080 image file.
  • Self hosting after download prevents broken links.
  • BGImageSnap offers direct download URLs for its 1920×1080 image library.

What Is a 1920×1080 image?

A 1920×1080 image has a width of 1920 pixels and a height of 1080 pixels. That makes it the standard resolution for 1080p displays projectors and most modern desktop screens. The aspect ratio is 16:9.

Because of its size a 1920×1080 image delivers enough detail for full screen backgrounds without forcing users to wait for massive file transfers. If you are building a website hero banner a YouTube thumbnail or a presentation slide this resolution is usually the sweet spot.

Common Use Cases

Web design backgrounds video overlays digital signage presentation slides and desktop wallpapers all rely on this format. When you link directly to a 1920×1080 image file the browser loads only that asset not an entire gallery page.

This is the core question. Below are five practical methods to grab a working direct URL.

Answer first: Most direct links come from either the browser’s native image copy function a modified source URL or a direct download library like BGImageSnap. The best method depends on whether you need the image for a single project or ongoing use.

Method 1 Right Click and Copy Image Address

Open the page with the image. Right click the photo and select “Copy image address” (Chrome/Edge) or “Copy Image Location” (Firefox). Paste the URL into your code or CMS.

If the URL ends in .jpg.png, or .webp, it is likely direct. If it points to an HTML page or a CDN with query strings that block hotlinking test it in a new tab first.

Method 2 Modify the Source URL for Direct Access

Many platforms store originals at different resolutions. For example Unsplash allows you to adjust width parameters in the URL. Instead of a generic preview link add ?w=1920&q=80 to the source path. This can return a direct 1920×1080 image file instead of a compressed preview.

Always verify by opening the URL in an incognito window. You can also check the “Open image in new tab” option on platforms like Pexels and Pixabay. If the new tab shows only the image with no text you have a direct link.

For more on open source image resources see the Unsplash Source API and Pexels direct URLs.

At BGImageSnap the 1920×1080 image collection is built for direct use. Each file includes a clean URL that serves the image directly to your site or project. You skip the preview page avoid temporary session IDs and get consistent dimensions.

If you need a reliable source for backgrounds this approach removes the guesswork. Browse our full library of direct background images for more options.

Method 4 Browser Developer Tools

For tricky sites open the browser’s developer tools (F12) go to the Network tab and filter by Img. Reload the page. Find the image request that returns the largest file size often the 1920×1080 original. Right click the request URL and copy it.

This is especially useful when the visible thumbnail links to a different asset or when the site uses a lazy load script.

Method 5 Download and Self Host

Download the 1920×1080 image to your computer then upload it to your own server or content delivery network (CDN). This gives you a permanent direct link you control.

For commercial projects this is the most professional option because it eliminates dependency on third party hosts that can change or remove files.

For help with file hosting see our guide to direct image hosting tips.

A direct link ends in an image file extension and renders only the image. A preview page loads HTML, navigation, ads, and scripts around the photo.

If you embed a preview URL into your website users see broken layout or unwanted branding. If you use a direct 1920×1080 image link the asset loads cleanly in your design.

Before publishing open your URL in a private window to confirm it produces nothing but the image. If you see a page with menus and text you are not using a direct link.

Mistakes to Avoid with 1920×1080 Images

  • Using a thumbnail link instead of the full size file. Check pixel dimensions before embedding.
  • Hotlinking without checking terms. Some sites block direct embedding; others require attribution.
  • Relying on temporary CDN URLs that expire after a session. Always test after 24 hours.
  • Ignoring file size. A 1920×1080 image JPEG can range from 300 KB to 3 MB. Optimize with tools like TinyPNG or Squoosh if speed is critical.

Direct links work best for website backgrounds video production templates, e-learning modules digital presentations and social media ads. Because the format is standard a direct URL will scale correctly across desktop and tablet layouts if applied with responsive CSS.

If you are looking for quick high resolution assets explore our free HD wallpaper downloads to supplement your project.

Abstract high-definition grid symbolizing seamless 1920x1080 image access and direct links

FAQs

What does 1920×1080 mean?

It is Full HD resolution: 1920 pixels wide by 1080 pixels tall displayed in a 16:9 widescreen ratio.

How do I know if a link is direct?

Open it in a new tab. If you see only the image and a URL ending in .jpg/.png/.webp, it is direct.

Can I use a direct 1920×1080 image link for commercial work?

Only if the source allows commercial use. Always verify the license. Self hosted downloads from your own library are safest.

Why does my direct link break?

Third party hosts may change paths delete source files or block hotlinking. Self hosting prevents this.

Is 1920×1080 the same as 1080p?

Yes. 1080p describes progressive scan; 1920×1080 describes the pixel grid.

How do I get a direct image link for a 1920×1080 image from Unsplash?

Add ?w=1920&q=80 to the source URL or use the “Download” button and host the file yourself for guaranteed access.

What is the best format for a direct 1920×1080 image?

JPEG offers the smallest file size for photos. PNG is better for graphics with sharp text. WebP is ideal for web speed.

Does BGImageSnap provide direct links?

Yes. Our 1920×1080 image library includes direct download URLs designed for embedding and background use.

Conclusion

Getting a direct link for a 1920×1080 image does not require advanced technical skills just the right steps. Whether you use browser tools, URL tricks, or a dedicated library like BGImageSnap the goal is the same: a reliable image URL that loads fast and stays available.

If you want a curated library of direct 1920×1080 image files for your next project browse BGImageSnap today.

The 10 Best Instagram Picture Editing Apps to Transform Your Feed in 2026

Comparison of the 10 best Instagram picture editing apps for 2025 with edited photo examples

Quick Answer / Key Takeaways 

  • Best overall: VSCO – professional grade edits with a vast filter library
  • Best for beginners: Snapseed – intuitive easy to use and free
  • Best for stories: PicsArt – creative stickers, text and animated effects
  • Best for batch editing: Lightroom – edit multiple photos quickly
  • Best for vintage aesthetics: Radiant – retro filters and film grain effects

Why Use Instagram Picture Editing Apps? 

The Power of a Polished Feed

Instagram is a platform where first impressions matter. A well curated aesthetically pleasing feed can:

  • Increase engagement (likes, comments, saves)
  • Attract brand collaborations
  • Build a strong personal brand
  • Grow your follower base organically

But here’s the truth: not every photo will be perfect. That’s where Instagram picture editing apps come in. These apps offer everything from basic adjustments (like brightness and contrast) to advanced tools (like selective color editing and AI powered enhancements).

Whether you’re a travel blogger food photographer or lifestyle influencer the right app can turn a good photo into a standout post.

The 10 Best Instagram Picture Editing Apps in 2026

Below is a curated list of the top Instagram picture editing apps that dominate the market in 2026 and why they’re worth your attention.

1. VSCO (Best Overall)

Best For: Professional grade edits moody filters and cinematic looks
Platform: iOS, Android
Price: Free with premium features ($19.99/month)

Why It’s Great:

  • Massive library of handcrafted filters
  • Advanced tools like curves selective color and grain effects
  • Smooth intuitive interface for both beginners and pros

Best Use Case:
If you want your photos to look like they were shot on film or edited in a professional studio VSCO is your go to.

2. Snapseed (Best for Beginners)

Best For: Easy to use drag and drop editing
Platform: iOS, Android
Price: Free

Why It’s Great:

  • Simple visual sliders for brightness, contrast, saturation, and more
  • Selective editing to tweak specific areas of a photo
  • Built in filter presets for quick transformations

Best Use Case:
Perfect for anyone new to photo editing who wants fast beautiful results without a steep learning curve.

3. Lightroom (Best for Batch Editing)

Best For: Editing multiple photos in one go
Platform: iOS, Android
Price: Free with optional Adobe Creative Cloud subscription

Why It’s Great:

  • Batch editing – apply the same adjustments to a group of photos
  • Powerful RAW editing capabilities
  • Syncs across devices if you use Lightroom on your desktop

Best Use Case:
Ideal for influencers or creators who post daily and need to edit large volumes of photos quickly.

4. PicsArt (Best for Stories & Creative Effects)

Best For: Adding stickers text and animated effects to stories
Platform: iOS, Android
Price: Free with premium content ($29.99/year)

Why It’s Great:

  • Massive library of stickers GIFs and text templates
  • Collage maker and background remover
  • Fun animated effects for Instagram Reels and Stories

Best Use Case:
Best for lifestyle influencers meme creators or anyone who wants to add a playful engaging touch to their stories.

5. Radiant (Best for Vintage Aesthetics)

Best For: Retro film style filters and grain effects
Platform: iOS
Price: Free with in app purchases

Why It’s Great:

  • Unique vintage filters inspired by old film cameras
  • Film grain overlay and light leaks for a nostalgic feel
  • Easy to use interface with smooth transitions

Best Use Case:
If your feed has a retro or minimalist aesthetic Radiant will help you maintain that vibe.

6. AIDA (Best AI-Powered App)

Best For: AI enhanced photo editing
Platform: iOS, Android
Price: Free with premium features ($9.99/month)

Why It’s Great:

  • AI powered background remover
  • Smart subject selection for portraits
  • One tap enhancements that adjust lighting color, and clarity

Best Use Case:
Great for influencers who post a lot of portraits or product photos and want quick polished edits.

7. Facetune (Best for Portraits)

Best For: Enhancing facial features in portraits
Platform: iOS, Android
Price: $139.99/year

Why It’s Great:

  • Skin smoothing, blemish removal and eye brightening
  • Facial contouring and nose slimming tools
  • Portrait lighting adjustments for studio quality photos

Best Use Case:
Perfect for fashion influencers beauty bloggers and anyone who frequently shares portraits or selfies.

8. Colorcinch (Best One Tap Filters)

Best For: Quick stylish filters with minimal effort
Platform: iOS, Android
Price: Free with premium filters ($4.99/month)

Why It’s Great:

  • One tap filters that instantly elevate your photos
  • Color matching to ensure consistency across your feed
  • Light editing tools for fine tuning

Best Use Case:
If you want a consistent stylish look across your feed without spending hours editing Colorcinch is perfect.

9. UNUM (Best for Mood and Atmosphere)

Best For: Enhancing the mood and atmosphere of photos
Platform: iOS
Price: $4.99/month

Why It’s Great:

  • Atmospheric filters that add depth and emotion
  • Lighting enhancements for dramatic cinematic shots
  • Color grading tools for creators who love storytelling through visuals

Best Use Case:
Ideal for travel photographers landscape lovers and creators who want their photos to tell a story.

10. BGImageSnap (Best for Background Editing)

Best For: Quick background removals and replacements
Platform: Web, iOS, Android
Price: Free with premium features

Why It’s Great:

  • One click background remover
  • Custom background library
  • Easy to use for e-commerce, portraits and product photos

Best Use Case:
If you’re selling products on Instagram Shop or need clean distraction free portraits BGImageSnap is a must have.

instagram picture editing apps transforming photos for a polished feed in 2026

How to Choose the Right App for Your Style 

Ask Yourself These Questions

  1. What’s your editing skill level?
    • Beginner? Try Snapseed or Colorcinch
    • Advanced? Go with VSCO or Lightroom
  2. What type of content do you post?
    • Portraits? Use Facetune or AIDA
    • Landscapes? Try UNUM or Radiant
    • Stories? Pick PicsArt
  3. How much time do you have?
    • Quick edits? Use Colorcinch or BGImageSnap
    • In-depth editing? Choose VSCO or Lightroom
  4. Do you need batch editing?
    • If you post daily Lightroom is your best bet.

Step-by-Step: Editing Your First Photo 

Using Snapseed (Beginner Friendly)

Step 1: Open the App & Import Your Photo
Tap “+” to select a photo from your gallery.

Step 2: Choose a Filter
Start with a filter that matches your aesthetic try “Drama” or “Classic”.

Step 3: Adjust Sliders
Tweak brightness, contrast saturation and sharpening to your liking.

Step 4: Use Selective Editing
Tap “Selective” to adjust specific areas brighten the sky or darken the shadows.

Step 5: Save & Export
Save the edited photo and upload it directly to Instagram.

AppProsCons
VSCOProfessional tools huge filter libraryPremium features cost money
SnapseedEasy to use, freeLimited batch editing
LightroomBatch editing RAW supportRequires Adobe subscription
PicsArtGreat for stories fun stickersCan be overwhelming for beginners
BGImageSnapOne-click background removerLimited advanced tools

Common Mistakes to Avoid 

  1. Over-editing  Don’t fall in love with every slider. Subtlety is key.
  2. Inconsistent editing  Use the same filters and adjustments across posts for a cohesive feed.
  3. Ignoring mobile screen sizes  Make sure your edits look good on small screens.
  4. Using low quality images  Even the best app can’t fix a blurry or pixelated photo.
  5. Neglecting metadata  Some apps compress images and reduce quality always check before posting.

FAQs

1. Are free Instagram picture editing apps good enough?

Yes! Apps like Snapseed Colorcinch and BGImageSnap offer powerful tools at no cost.

2. Can I use the same app for all my Instagram content?

It depends on your needs. For example use VSCO for feed posts and PicsArt for stories.

3. Do these apps support Instagram Reels editing?

Yes many apps like PicsArt and AIDA allow you to edit videos for Reels.

4. How do I keep my Instagram feed consistent?

Use the same filter or color grading across all your photos apps like Colorcinch help with this.

5. Which app is best for removing backgrounds from product photos?

BGImageSnap offers a one-click background remover perfect for e-commerce.

6. Is Lightroom better than VSCO?

It depends  Lightroom is better for batch editing and RAW files while VSCO offers more stylized filters.

7. Can I edit Instagram carousel posts with these apps?

Yes all these apps allow you to edit multiple photos perfect for carousels.

8. How often are these apps updated?

Most top apps update monthly or biweekly to add new features and improve performance.

Conclusion

Choosing the right Instagram picture editing apps can transform your feed from ordinary to extraordinary. Whether you’re a beginner looking for quick edits or a pro aiming for cinematic visuals there’s an app for every style and need. From VSCO’s professional grade filters to BGImageSnap’s one click background remover the tools are out there all you need is a little creativity.

The Ultimate Guide to Normal Photo Size: Everything You Need to Know

Comparison of standard normal photo sizes for Instagram, YouTube, and print

Quick Answer / Key Takeaways

  • Normal photo size refers to the standard dimensions used for digital images and print photos such as 4×6 inches or 1080×1920 pixels.
  • The most common normal photo size for digital use is 1080px wide while 4×6 inches is standard for print.
  • Choosing the right normal photo size depends on where you’re using the image social media print or websites.
  • Always match your image dimensions to the platform’s requirements to ensure optimal display.

What Is Normal Photo Size?

Understanding Normal Photo Size

When we talk about normal photo size we’re referring to the default or most commonly accepted dimensions for photographs both in digital and print formats. These sizes are designed to work seamlessly across devices, printers, and platforms.

For digital images normal photo size often means 1080px in width (full HD) while for printed photos it typically refers to 4×6 inches  the most popular size for home printers and photo labs.

But why are these sizes considered “normal”

They’ve become standard because they balance quality file size and compatibility across most devices and platforms. Whether you’re posting on Instagram, printing for a family album or designing a website banner using the correct normal photo size ensures your images look sharp and professional.

Why Normal Photo Size Matters

Using the correct normal photo size isn’t just about aesthetics it’s about functionality performance and user experience.

Benefits of Using the Right Normal Photo Size

  • Optimal Display: Images appear crisp and clear without distortion or pixelation.
  • Faster Load Times: Properly sized images improve website performance and SEO.
  • Platform Compatibility: Social media platforms and printers are optimized for specific sizes.
  • Professional Look: Correct sizing shows attention to detail and enhances brand credibility.

💡 Pro Tip: Always check the recommended image dimensions for the platform or print service you’re using before uploading or printing.

Common Normal Photo Sizes Explained 

Let’s break down the most common normal photo sizes used today and when to use each one.

1. 4×6 Inches (Print)

  • Use Case: Standard photo prints greeting cards photo albums
  • Pixel Dimensions: 2048×3072 pixels (at 300 DPI)
  • Why It Works: This is the most popular print size and fits perfectly in standard photo frames.

2. 1080×1920 Pixels (Digital – Full HD)

  • Use Case: Instagram Stories Facebook Stories mobile banners
  • Aspect Ratio: 9:16 (vertical)
  • Why It Works: Matches the screen ratio of most smartphones and social media story formats.

3. 1080×1080 Pixels (Digital – Square)

  • Use Case: Instagram posts, Pinterest pins Facebook cover photos (with cropping)
  • Aspect Ratio: 1:1 (square)
  • Why It Works: Ideal for feeds and platforms that favor square formats.

4. 1920×1080 Pixels (Digital – Landscape)

  • Use Case: YouTube thumbnails, website headers desktop banners
  • Aspect Ratio: 16:9 (widescreen)
  • Why It Works: Fits most modern screens and video platforms.

5. 3×4 Inches (Print)

  • Use Case: Passport photos, ID cards small prints
  • Pixel Dimensions: 1536×2048 pixels (at 300 DPI)
  • Why It Works: Meets official requirements for identification documents.

How to Choose the Right Normal Photo Size 

Step 1: Identify Your Purpose

Ask yourself:

  • Where will the image be used? (e.g., website, print, social media)
  • What device will display it? (e.g., mobile, desktop, printer)
  • Is there a specific aspect ratio required?

Step 2: Check Platform Requirements

Most platforms publish their image specifications. For example:

  • Instagram Post: 1080×1080 pixels (square)
  • Facebook Cover Photo: 820×312 pixels (desktop) 640×360 (mobile)
  • Twitter Header: 1500×500 pixels

🔗 Need help finding specs? Visit the official help centers of InstagramFacebook, and Twitter.

Step 3: Match the Resolution

  • Web & Social Media: 72 DPI is sufficient
  • Print: Use 300 DPI for high-quality prints

Step 4: Resize or Crop Accordingly

Use tools like Adobe Photoshop, Canva or BGImageSnap’s free photo resizer to adjust your images without losing quality.

Normal Photo Size for Different Platforms

Below is a quick reference table for the most popular platforms:

PlatformRecommended SizeAspect RatioUse Case
Instagram Post1080×1080 px1:1Feed posts
Instagram Story1080×1920 px9:16Stories
Facebook Post1200×630 px1.91:1Link shares
Facebook Cover820×312 px (desktop)2.6:1Profile header
Twitter Header1500×500 px3:1Profile header
YouTube Thumbnail1280×720 px16:9Video thumbnails
Pinterest Pin1000×1500 px2:3Vertical pins
Print (4×6)2048×3072 px @ 300 DPI4:6Photo prints

1080×1080 px (Square)

Pros:

  • Universally accepted on social media
  • Easy to design for
  • Looks great on mobile feeds

Cons:

  • Not ideal for storytelling or vertical content
  • May require cropping for some platforms

1080×1920 px (Vertical)

Pros:

  • Perfect for stories and reels
  • Fills the entire screen on mobile
  • High engagement on Instagram and Snapchat

Cons:

  • Wastes space on desktop
  • Not suitable for print

1920×1080 px (Landscape)

Pros:

  • Great for banners and thumbnails
  • Works well on widescreen displays
  • Ideal for YouTube and website headers

Cons:

  • Too wide for mobile feeds
  • May need cropping for square formats

Step-by-Step: Resizing Your Photos to Normal Photo Size 

Tools You Can Use

  • BGImageSnap Free, fast, and easy to use
  • Canva  Great for beginners with templates
  • Adobe Photoshop  Professional-grade control

Step 1: Open Your Image

Upload your photo into your chosen tool.

Step 2: Select the Target Size

Choose from preset sizes or manually enter dimensions.

Step 3: Resize or Crop

  • Resize if you want to keep the entire image
  • Crop if you need to adjust the aspect ratio

Step 4: Export with the Right Settings

  • Web: JPEG, 72 DPI, max 1MB
  • Print: PNG or JPEG, 300 DPI

Step 5: Test on Target Platform

Upload the image to see how it looks in the final environment.

Common Mistakes to Avoid

  1. Using a low-resolution image Causes pixelation and looks unprofessional.
  2. Ignoring aspect ratio Can stretch or crop your image unintentionally.
  3. Uploading oversized images Slows down websites and increases load time.
  4. Not checking platform requirements Leads to misaligned or truncated images.
  5. Forgetting to backup originals You may need to edit again later.
BGImageSnap photo resizer tool in action resize photos to normal photo size for social media and print

1. What is the most common normal photo size for printing?

The standard 4×6 inch size is the most commonly used for home printing and photo albums.

2. Is 1080px width considered normal photo size for websites?

Yes, 1080px wide is a standard width for responsive website images and banners.

3. Can I use a 1920×1080 image for Instagram posts?

It will get cropped to fit the 1:1 or 4:5 ratio, so it’s best to resize it first.

4. What’s the difference between normal photo size and resolution?

Size refers to the dimensions (width x height), while resolution refers to the number of pixels per inch (DPI or PPI).

5. How do I know if my image is high enough quality after resizing?

If the image looks sharp and clear without pixelation it’s high enough quality.

6. What file format should I use for normal photo size images?

Use JPEG for photos and PNG for images with transparency.

7. Can I use the same normal photo size for all platforms?

While you can each platform has optimal dimensions it’s best to tailor your images accordingly.

8. How can I batch resize multiple photos to normal photo size?

Tools like BGImageSnap, Canva, or Adobe Lightroom offer batch resizing features.

Conclusion

Understanding normal photo size is essential for creating visuals that look great everywhere whether you’re posting on social media printing photos or designing a website. By choosing the right dimensions and resolution for your purpose you’ll avoid distortion improve performance and present your content professionally. Remember: the “normal” size depends on your use case platform and audience. Always double-check requirements and test your images before final use.

Ready to perfect your photo sizing? Try BGImageSnap’s free photo resizing tool to quickly adjust your images to the perfect normal photo size no signup required.

Can You Smile in a Passport Photo Ultimate Rules for a Perfect Submission

**Can You Smile in a Passport Photo?** Accepted neutral expression with a green checkmark vs. rejected smiling photo showing teeth with a red X.

Quick Answer / Key Takeaways

  • USA: No. The US Department of State requires a neutral expression with mouth closed. No smiling even a slight smile.
  • UK: A natural slight smile is allowed as long as the mouth is closed and teeth are not showing.
  • Canada: No. Canada requires a neutral expression with mouth closed and no smiling.
  • The expression must be consistent for facial recognition systems and to prevent misidentification.
  • If you are unsure take a neutral photo. It is accepted everywhere.
  • Use a plain white or off white background correct dimensions and good lighting to avoid rejection.

Can You Smile in a Passport Photo? The Short Answer by Country

Rules are set by the issuing authority not by photo booth operators.

USA Passport Photo Smile Rules

The US Department of State is the strictest. The official photo requirements state the facial expression must be neutral mouth closed both eyes open and visible. Smiling is not permitted even if teeth are not showing. The goal is consistency for identity verification.

A neutral expression is the safest choice for US passport visa and Global Entry photos.

UK Passport Photo Smile Rules

UKVI and HM Passport Office allow a natural expression. A slight smile is acceptable provided the mouth remains closed and no teeth are visible. The eyes must be open and the face must be unobstructed.

Canada Passport Photo Smile Rules

Canada requires a neutral expression. The mouth must be closed and no smiling is permitted. The head must be upright and the face fully visible against a plain background.

Why Passport Photo Expressions Are Strictly Regulated

Passport photos are not for social media. They are biometric identifiers. A consistent neutral expression makes automated facial recognition more reliable and ensures a person can be identified over many years. Smiling changes the shape of the cheeks the position of the eyes and the distance between facial features. That variation can cause mismatches at border control. For that reason all three countries prioritize a closed mouth neutral look as the default standard.

What a Compliant Smile Actually Looks Like

There is a difference between a smile and a natural expression.

Acceptable: Lips together, relaxed face, no teeth showing eyes open and natural. This is what the UK accepts as a natural expression.

Not acceptable: Upturned corners of the mouth visible teeth squinted eyes or a broad smile. This will be rejected in the USA and Canada and may be rejected in the UK.

When in doubt think “neutral”. You can look calm and pleasant without smiling.

How to Take a Passport Photo That Will Be Accepted

  1. Choose the right background. Use plain white off white or light grey. BGImageSnap offers a passport background remover and replacement tool to ensure compliance.
  2. Set up even lighting. Avoid shadows on the face and background. Natural window light facing you works well.
  3. Position your face correctly. Head upright full face forward shoulders visible. Keep a neutral expression with mouth closed.
  4. Check technical specs. USA: 2×2 inches 600×600 pixels minimum. UK: 45mm x 35mm. Canada: 50mm x 70mm. No red eyes no filters.
  5. Review before submitting. Check eyes open mouth closed no smile no headwear unless for religious reasons no glasses unless medically required.

If you already have a photo with a slight smile you can use a tool to check compliance before printing. This saves time and postage.

Common Mistakes That Get Photos Rejected

  • Smiling with teeth showing or mouth open
  • Squinting or closing one eye
  • Wearing expressions like frowning or raising eyebrows
  • Shadows across face or background
  • Incorrect background color or pattern
  • Photo too old over 6 months for USA
  • Head tilted or rotated

Avoiding these issues is easier when you follow the neutral expression rule.

Passport Photo Smile Rules: US vs UK vs Canada Comparison

RequirementUSAUKCanada
Smile allowedNo. Neutral onlyYes, slight natural smile mouth closedNo. Neutral only
MouthClosedClosedClosed
Teeth visibleNoNoNo
ExpressionNeutralNatural neutralNeutral
BackgroundWhite or off whiteLight coloured plainWhite or light coloured, plain
can you smile in a passport photo

Can you smile in a passport photo in the USA?

No. The US Department of State requires a neutral expression with mouth closed. Any smile will lead to rejection.

Can you smile in a UK passport photo?

A slight natural smile is allowed as long as the mouth stays closed and teeth are not visible. A broad smile is not allowed.

Is a closed mouth smile okay for Canada?

No. Canada requires a neutral expression with no smiling.

Will a small smile get my passport rejected?

In the USA and Canada, yes. In the UK, a very slight smile is usually accepted if the mouth is closed.

How long is a passport photo valid?

The USA recommends photos be less than 6 months old. The UK and Canada also prefer recent photos that reflect your current appearance.

Conclusion

Can you smile in a passport photo? It depends on where you’re applying. For USA and Canada, the answer is no. For the UK, a very slight natural smile is permitted. The safest approach for all three countries is a neutral, closed mouth expression with even lighting and a plain background. Getting the expression right the first time prevents delays and resubmissions.

Black and White Photos 7 Powerful Reasons They Still Captivate Us in 2026

How to create black and white photos using a simple five-step editing process

Table of Contents

Quick Answer / Key Takeaways

Black and white photos remain one of the most powerful forms of visual storytelling in 2026. They strip away color distractions to reveal emotion texture and composition in their purest form. Whether you’re a professional photographer or someone looking to convert personal images understanding monochrome photography can transform how you see and capture the world.

Key takeaways:

  • Black and white photography emphasizes light, shadow, texture, and emotion over color
  • Modern tools make it easy to convert any color image to stunning monochrome
  • The best black and white photos start with intentional composition and lighting
  • Monochrome images create stronger emotional connections with viewers
  • Professional conversion requires understanding tonal range and contrast

Why Black and White Photos Still Matter

In an era of vibrant 4K displays and HDR photography black and white photos continue to captivate audiences worldwide. But why does this century-old medium still resonate so deeply?

The answer lies in simplicity. When you remove color from an image you’re left with the essential elements of visual storytelling: light, shadow, form and texture. These elements speak directly to human emotion in ways that color sometimes cannot.

The Timeless Appeal of Monochrome

Black and white photography has a unique ability to transcend time. A well-crafted monochrome image from 1920 can feel just as relevant and powerful today as it did a century ago. This timeless quality makes black and white photos particularly valuable for:

  • Portraits that reveal character and emotion
  • Street photography that captures authentic moments
  • Landscapes that emphasize natural drama
  • Architecture that highlights structural beauty
  • Fine art that explores abstract concepts

According to photography experts at Digital Photography School black and white images force viewers to engage more deeply with the subject creating a more contemplative viewing experience.

The Psychology Behind Monochrome Photography

Understanding why black and white photos affect us psychologically can help you create more impactful images.

How the Brain Processes Monochrome Images

When viewing black and white photography the human brain shifts from automatic color processing to more interpretive analysis. This change creates several psychological effects:

  1. Increased attention span – Viewers spend more time examining details
  2. Stronger emotional response – Without color cues emotions feel more direct
  3. Enhanced memory retention – Monochrome images are often remembered more vividly
  4. Universal appeal – Removes cultural color associations

Research from visual psychology experts suggests that black and white photos activate different neural pathways than color images leading to deeper engagement and more personal interpretation.

Emotional Impact

The absence of color amplifies emotional content. A portrait in black and white can convey:

  • Nostalgia and timelessness
  • Drama and intensity
  • Intimacy and vulnerability
  • Mystery and intrigue
  • Elegance and sophistication

This emotional depth is why many professional photographers still choose monochrome for important projects from wedding photography to documentary work.

How to Turn Color Images Into Black and White Photos

Converting color images to black and white photos is both an art and a science. Here’s a step-by-step guide to achieving professional results.

Method 1: Professional Software Conversion

Adobe Photoshop remains the gold standard for black and white conversion:

  1. Open your color image in Photoshop
  2. Go to Layer > New Adjustment Layer > Black & White
  3. Use the color sliders to control how each color converts to gray
  4. Adjust the red slider to brighten or darken skin tones
  5. Use the blue slider to control sky brightness
  6. Fine-tune with Curves or Levels for perfect contrast

Pro tip: Always work on a duplicate layer to preserve your original color image.

Method 2: Lightroom’s Black & White Panel

For photographers using Adobe Lightroom:

  1. Import your image and switch to the Develop module
  2. Click Black & White in the Basic panel
  3. Use the B&W Mix panel to adjust individual color channels
  4. Add contrast with the Tone Curve
  5. Use Clarity to enhance texture
  6. Apply Sharpening selectively to key areas

Method 3: Free Online Tools

Several free tools can convert images to black and white photos:

  • Canva – One-click Mono filters with intensity control
  • ResizePixel – Simple online converter
  • Cloudinary – Developer-friendly with API access

Method 4: Mobile Apps

For on-the-go conversion:

  • Snapseed (Free) – Google’s powerful mobile editor
  • VSCO – Professional-grade filters
  • Lightroom Mobile – Full desktop functionality

Best Tools for Black and White Photo Conversion

Choosing the right tool depends on your needs skill level and budget.

Professional-Grade Software

ToolBest ForPriceKey Features
Adobe PhotoshopProfessional photographers$20.99/monthAdvanced channel mixing, layer-based editing
Adobe LightroomBatch processing$9.99/monthNon-destructive editing, presets
Capture OneStudio photographers$299 one-timeSuperior color science, tethering
DxO PhotoLabNoise reduction$129 one-timeAI-powered conversions

Free and Budget Options

ToolBest ForPriceKey Features
GIMPOpen-source enthusiastsFreeFull-featured Photoshop alternative
DarktableRAW processingFreeLightroom alternative
SnapseedMobile usersFreeProfessional mobile editing
CanvaQuick social media editsFree tier availableOne-click filters

Specialized Black & White Tools

  • Silver Efex Pro (Part of Nik Collection) – Film emulation presets
  • Alien Skin Exposure – Vintage film looks
  • VSCO Film – Authentic analog aesthetics

7 Powerful Techniques for Stunning Black and White Photos

Master these techniques to elevate your black and white photos from ordinary to extraordinary.

1. See in Tones Not Colors

Train your eye to visualize scenes in grayscale before shooting. Look for:

  • Strong contrast between light and shadow
  • Interesting textures and patterns
  • Clear geometric shapes
  • Leading lines and visual flow

Practice exercise: Set your camera to monochrome mode and shoot for a week. This trains your brain to “see” in black and white.

2. Master the Histogram

Your histogram is your best friend in monochrome photography:

  • Zone 0-3: Deep shadows (pure black to dark gray)
  • Zone 4-6: Midtones (medium gray)
  • Zone 7-10: Highlights (light gray to pure white)

Aim for a full tonal range without clipping at either end.

3. Use Directional Lighting

Light direction dramatically affects black and white images:

  • Side lighting creates dramatic shadows and reveals texture
  • Backlighting produces silhouettes and rim lighting
  • Front lighting minimizes shadows for flat even tones
  • Rembrandt lighting creates classic portrait drama

4. Emphasize Texture

Without color texture becomes a primary visual element:

  • Rough surfaces like stone wood or fabric
  • Skin details in portraits
  • Natural patterns in landscapes
  • Architectural details and materials

5. Control Contrast in Post-Processing

Contrast is the soul of black and white photography:

  • High contrast creates drama and impact
  • Low contrast produces soft dreamy effects
  • Local contrast (clarity) enhances texture
  • Tonal contrast separates different gray values

6. Dodge and Burn Strategically

This classic darkroom technique remains powerful in digital editing:

  • Dodge (lighten) areas you want viewers to notice
  • Burn (darken) distracting elements
  • Guide the viewer’s eye through the composition
  • Create depth and dimension

7. Choose Your Subjects Wisely

Some subjects naturally excel in black and white:

Works well:

  • Strong shadows and light patterns
  • Textured surfaces
  • Emotional portraits
  • Architectural details
  • Stormy skies

Often better in color:

  • Sunset landscapes (unless emphasizing clouds)
  • Colorful flowers or foliage
  • Food photography
  • Fashion with important color details

Common Mistakes to Avoid

Even experienced photographers make these errors with black and white photos:

1. Simply Desaturating Color Images

The mistake: Removing all color saturation without adjusting tones.

The fix: Use proper conversion tools that let you control how each color translates to gray.

2. Ignoring Composition

The mistake: Assuming black and white will “fix” a poorly composed image.

The fix: Compose intentionally. Without color composition becomes even more critical.

3. Over-Processing

The mistake: Pushing contrast clarity and sharpening too far.

The fix: Subtlety is key. Aim for natural-looking tonal transitions.

4. Neglecting the Histogram

The mistake: Not checking for clipped highlights or shadows.

The fix: Always review your histogram. Recoverable shadows are better than blown highlights.

5. Converting Every Image

The mistake: Assuming all images look better in black and white.

The fix: Choose images that benefit from monochrome. Some scenes need color.

Black and White vs. Color: When to Choose Which

Understanding when to use black and white photos versus color is crucial for visual storytelling.

Choose Black and White When:

  • The scene has strong contrast and interesting light
  • You want to emphasize texture and form
  • Color is distracting or unimportant
  • You’re aiming for a timeless classic feel
  • The emotional content is more important than literal representation
  • You’re working with mixed or unflattering lighting

Choose Color When:

  • Color is essential to the story or subject
  • You’re shooting vibrant saturated scenes
  • The image relies on color contrast for impact
  • You need accurate documentation
  • The subject is naturally colorful (flowers, food, fashion)

Hybrid Approach

Many photographers shoot in RAW with a monochrome preview allowing them to decide later. This approach gives you maximum flexibility.

1. What makes a good black and white photo?

A strong black and white photo has clear tonal range from deep blacks to bright whites interesting texture good composition and emotional impact. The best monochrome images use light and shadow to tell a story that color would only distract from.

2. Should I shoot in black and white mode or convert later?

Always shoot in RAW format even if you preview in monochrome. RAW files retain all color data giving you maximum control during conversion. Set your camera’s picture style to monochrome for a black and white preview on your LCD.

3. How do I convert color photos to black and white professionally?

Use professional software like Adobe Photoshop or Lightroom with the Black & White adjustment layer. This lets you control how each color converts to gray rather than simply removing saturation. Adjust individual color channels to fine-tune skin tones skies and other elements.

4. What’s the best free tool for black and white conversion?

Snapseed (mobile) and GIMP (desktop) are excellent free options. For quick online conversion Canva and ResizePixel work well. However professional software offers more control over the conversion process.

5. Why do black and white photos often look more emotional?

Without color the brain focuses on facial expressions body language, light, and shadow. This creates a more direct emotional connection. Monochrome also evokes nostalgia and timelessness which can intensify emotional responses.

6. Can I print black and white photos at home?

Yes but use high-quality photo paper and ensure your printer has separate black and gray ink cartridges. For professional results consider using a dedicated photo printing service that specializes in fine art prints.

7. How do I avoid muddy-looking black and white photos?

Ensure you have true blacks and true whites in your image. Use the Levels or Curves adjustment to set black and white points. Add local contrast with the Clarity slider and consider selective sharpening on key details.

8. What camera settings work best for black and white photography?

Shoot in RAW at the lowest ISO possible for clean images. Use aperture priority mode: f/8-f/11 for landscapes f/1.8-f/2.8 for portraits. Protect your highlights slightly underexposed images are easier to recover than blown-out ones.

Conclusion

Black and white photos remain one of photography’s most powerful forms of expression. In 2026 they continue to captivate viewers by stripping away the distractions of color and revealing the essential elements of visual storytelling: light, shadow, texture and emotion.

Whether you’re a professional photographer seeking to master monochrome techniques or someone looking to convert cherished family photos understanding the principles of black and white photography will transform how you see and capture the world. The tools available today from professional software to free mobile apps make it easier than ever to create stunning monochrome images. But remember: the best black and white photos start with intentional composition, thoughtful lighting and a clear vision of what you want to communicate. Ready to explore the timeless art of monochrome photography? Start by converting one of your favorite color images to black and white and see how it transforms the emotional impact. You might be surprised at what you discover.

Photo Passport Studio vs. OnlineMaker How to Choose the Best Option for Your Passport Application.

Photo Passport Studio vs Online Maker Discover 8 key differences between professional studios and online makers passport applications in 2026

Quick Answer / Key Takeaways

  • A photo passport studio offers the highest acceptance rate because staff control lighting background and framing in real time.
  • Online makers work best only when you already understand official sizing, background rules and high quality printing.
  • The USA requires a 2×2 inch image; the UK requires 35×45 mm; Canada requires 50×70 mm.
  • Background shadows, wrong head sizing, and outdated photos are the leading causes of rejection.
  • For babies first time applicants or urgent deadlines a professional studio is usually the safer investment.
Photo Passport Studio vs. Online Maker Split-screen comparison of a poorly lit home passport photo with shadows versus a crisp studio passport photo with even lighting and a white background, featuring BGImageSnap branding.

What Is a Photo Passport Studio?

A photo passport studio is a dedicated physical location often inside a pharmacy chain photography shop or independent portrait studio where trained staff capture identification images using professional cameras standardized backdrops and uniform lighting. Unlike casual selfies these studios understand country specific framing head size ratios and background requirements. Photo Passport Studio vs. Online Maker. If you search for a photo passport studio near you prioritize providers that explicitly list government compliant passport services. A reliable location will ask which country you are applying to and confirm whether you need the USA’s 2×2 inch format the UK’s biometric size or Canada’s 50×70 mm standard. They should also provide printed copies on photo grade paper within minutes reducing the risk of home printing errors.

Photo Passport Studio vs Online Passport Photo Maker: Which Is Better?

This is the central decision for modern applicants. Both options can produce valid images but the risk profile, speed and quality control differ significantly.

FactorPhoto Passport StudioOnline Passport Photo Maker
Typical Cost (USA)Usually $10–$25 for a printed setOften free to $10 for digital files
TurnaroundImmediate prints in minutesMinutes to hours for digital delivery
Background ControlPhysical white/off white backdrop; shadow free by designDepends on user environment and editing accuracy
LightingProfessional, even illumination across the faceNatural or room light; high risk of uneven shadows
Sizing AccuracyPrecise country specs verified by staffAutomated crop; requires manual verification
Print QualityProfessional photo paper correct finishHome printer or mail service; color variance possible
Rejection RiskLow, when staff are experiencedModerate to high without expert guidance
Best ForFirst-time applicants, children urgent travelTech comfortable users with quality cameras and perfect lighting

A photo passport studio removes guesswork. The photographer positions your head within the required frame checks that your background image is pure white or off white with zero shadows and prints on correct paper stock. Online makers rely on algorithms. While some platforms automatically crop and adjust backgrounds they cannot always detect a faint wall texture uneven lighting behind your ears or a subtle gray tint. For applicants in the USA where non compliant photos remain one of the more common processing delays the studio option often pays for itself by avoiding resubmission fees and rushed travel adjustments.

Passport Photo Requirements in the USA, UK, and CA

Rules vary by country and a reputable photo passport studio should maintain current knowledge of each format.

USA (U.S. Department of State)

  • Size: 2×2 inches (51 × 51 mm)
  • Head Size: Between 1 and 1 3/8 inches (25–35 mm) from bottom of chin to top of head
  • Background: Plain white or off white; no shadows, textures or patterns
  • Expression: Neutral; mouth closed; both eyes open
  • Validity: Taken within the last 6 months
  • Glasses: Generally prohibited unless accompanied by a signed medical statement

Official specifications: travel.state.gov

UK (HM Passport Office)

  • Size: 35 × 45 mm
  • Background: Plain cream or light gray
  • Expression: Neutral; mouth closed; no smiling
  • Other: No hair across the eyes; no head coverings except for religious or medical reasons

Official specifications: gov.uk

Canada (Government of Canada)

  • Size: 50 × 70 mm
  • Background: Plain white or light colored
  • Other: Neutral expression; photo must be taken by a commercial photographer who stamps the back with the date and studio name

Official specifications: canada.ca

Because these dimensions and background rules are not interchangeable confirming that your photo passport studio serves your specific destination is essential before the shutter clicks.

Why Your Background Image Is the Hidden Risk Factor

Your passport photo background is not decorative it is a regulatory requirement. In the USA the background must be white or off-white with no shadows, textures or visible objects. The UK allows light cream or light gray but patterns and gradients still fail. Canada requires a plain white or light colored surface.

A photo passport studio achieves compliance with physical backdrops and diffused studio strobes. If you choose an online route you must manage your own background image environment. Even high quality background removal software can leave artifacts faint halos, uneven edges or gray spots that automated government checks flag. Before submitting any digitally edited photo inspect the background image at 100% zoom. The surface should be completely uniform with no gradient.

If you need help cleaning up a background image, checking purity or understanding editing limits for official documents resources like BG Image Snap provide practical guidance on creating compliant background images for identification.

Learn more about passport photo background requirements and why shadow removal is critical for approval.

How to Prepare for a Photo Passport Studio Visit

Preparation takes less than five minutes and significantly improves results.

  • Wear dark solid colored clothing. Avoid white shirts that blend into the background.
  • Remove glasses, large earrings and headphones. Most countries restrict eyewear.
  • Keep hair away from your face and eyes. No strands across eyebrows or cheeks.
  • Maintain a neutral expression. Mouth closed, eyes open facing the camera directly.
  • Skip filters and digital smoothing. Studios capture raw accurate images for government verification.

Arriving prepared allows the photographer to focus entirely on framing, lighting and background uniformity reducing the chance of a costly retake.

Common Mistakes That Cause Rejection

Even at a professional photo passport studio errors happen if communication fails.

  • Wrong country format: Requesting a US 2×2 image when you actually need UK 35×45 mm.
  • Shadow on the background: Usually caused by standing too close to the backdrop.
  • Incorrect head size: Too much space above the crown or cropping too tightly at the chin.
  • Outdated photo: Most countries reject images older than six months.
  • Incorrect paper or finish: Some applications require matte paper; others need gloss.
  • White clothing on white background: Creates a “floating head” effect that fails automated checks.

When using an online maker risk increases further. Home printers may apply incorrect color profiles and automated cropping can misalign your head within the frame.

Step-by-Step: How to Get a Compliant Passport Photo

Choose your path based on experience, equipment and deadline pressure.

Path A: Visiting a Photo Passport Studio

  1. Search for local providers and confirm they offer services for your destination country.
  2. Confirm pricing includes the correct size, background color and print finish.
  3. Dress in dark solids and follow the preparation checklist above.
  4. Review the printed proof for background uniformity, head sizing and shadow absence before leaving.
  5. Request extra copies if submitting by mail.

Path B: Using an Online Passport Photo Maker

  1. Set up near a large window with indirect even daylight; avoid overhead bulbs that cast shadows downward.
  2. Hang a plain white or off-white sheet with no wrinkles behind you.
  3. Use a high-resolution camera or smartphone mounted on a tripod at eye level.
  4. Frame the shot with space above your head and both shoulders visible.
  5. Apply background editing only if it produces a pure shadow free result without gray halos.
  6. Print on high quality photo paper at the exact millimeter dimensions required do not rely on automatic “fit to page” settings.

If you need to verify or edit your background image before printing visit BG Image Snap for practical tools designed for official photo compliance.

When Should You Skip the Studio?

An online maker makes sense if you already understand framing rules own quality lighting and need only digital files for an electronic application. However consider visiting a photo passport studio if:

  • You are applying for a baby or young child who must keep eyes open with no parent hands visible.
  • Your travel deadline is within days and you cannot risk resubmission.
  • You are unsure which country’s rules apply.
  • Your home environment has poor natural light or textured walls.

In these cases the cost of a studio session is usually lower than the cost of delaying your application.

Anchor TextSuggested URLWhy Link
passport photo background requirementshttps://bgimagesnap.com/passport-photo-background/Helps readers understand exact background rules that cause rejection
background image verification toolshttps://bgimagesnap.com/Brand resource for checking and cleaning background images
USA passport photo size guidehttps://bgimagesnap.com/usa-passport-photo-guide/Supports USA-targeted readers with precise specifications
Photo Passport Studio vs. Online Maker Printed passport photo sheets beside a passport application envelope on a wooden desk, featuring BGImageSnap branding and logo.

Frequently Asked Questions

Q: How much does a photo passport studio charge in the USA?

A: Prices typically range from about $10 to $25 for a standard printed set though costs vary by city and whether digital files are included. Confirm that the price includes country-specific formatting.

Q: Can I wear glasses at a photo passport studio?

A: The USA generally prohibits glasses unless you provide a signed medical statement. The UK and Canada also restrict eyewear that obscures the eyes. Most studios will ask you to remove them.

Q: What background image color is correct?

A: The USA accepts white or off-white. The UK prefers cream or light gray. Canada requires white or light-colored backgrounds. A professional studio keeps all compliant options available.

Q: Why do online passport photos fail?

A: Common failures include background shadows incorrect head sizing poor print resolution outdated images and using filters. Automated tools do not always catch these errors before submission.

Q: Is a photo passport studio necessary for babies?

A: Parents can take baby photos at home but many find a studio easier because staff understand infant positioning manage lighting without startling the child and capture an alert expression with open eyes.

Q: How recent must my passport photo be?

A: The USA, UK, and Canada generally require images taken within the last six months. A studio can confirm the session date on the print or receipt.

Q: Can I use my phone instead of visiting a studio?

A: Yes but only if your camera is high resolution your background is perfectly uniform and you print at exact dimensions with correct color balance. Many applicants prefer a studio to avoid these variables.

Q: Does my background image need editing?

A: If taken in a studio editing is usually unnecessary. If taken at home you may need precise background removal and color correction to meet official standards.

Conclusion

Choosing between a photo passport studio and an online maker comes down to risk tolerance experience and urgency. A studio provides controlled lighting accurate framing and immediate verification critical for first-time applicants, families and anyone with a tight deadline. Online makers offer flexibility but require you to manage lighting background images and printing with precision. No matter which route you choose verify that your final image matches your destination country exactly: correct dimensions neutral expression uniform background and a recent capture date. Inspect your background image closely before submission uniformity is not optional; it is required.

Pixel Sizes in Inches: The Ultimate 2026 Guide to Easy Image Dimensions.

Introduction

Understanding pixel sizes in inches can be confusing because pixels and inches measure different things. Pixels describe the digital dimensions of an image while inches describe its physical size when printed or displayed at a specific resolution. The good news is that converting between them is straightforward once you understand PPI (pixels per inch). Whether you are preparing a passport photo printing a family picture designing marketing material or resizing an image for a professional project knowing the relationship between pixels and inches helps you avoid blurry or incorrectly sized results.

In this guide you will learn how pixel sizes in inches are calculated see common conversion examples understand PPI and learn how to choose the right dimensions for digital and print projects.

Table of Contents

  1. What Are Pixel Sizes in Inches?
  2. How to Convert Pixels to Inches
  3. Pixel Sizes in Inches Conversion Table
  4. Why PPI Matters
  5. Common Pixel to Inch Examples
  6. Pixels vs. Inches: Which Measurement Should You Use?
  7. How to Check and Change Image Size
  8. Common Mistakes to Avoid
  9. FAQ
  10. Conclusion
how to convert pixel sizes in inches using PPI formula

Quick Answer: How Do Pixel Sizes in Inches Work?

To calculate inches from pixels use this formula:

Inches = Pixels ÷ PPI

For example, an image that is 1200 pixels wide at 300 PPI has a physical width of:

1200 ÷ 300 = 4 inches

This means the same 1200 pixel image could represent different physical sizes depending on its PPI setting. For example:

PixelsAt 72 PPIAt 150 PPIAt 300 PPI
300 px4.17 in2 in1 in
600 px8.33 in4 in2 in
900 px12.5 in6 in3 in
1200 px16.67 in8 in4 in
1500 px20.83 in10 in5 in
1800 px25 in12 in6 in
2400 px33.33 in16 in8 in
3000 px41.67 in20 in10 in

The important point is that pixels alone do not determine physical size. You also need the PPI value.

What Are Pixel Sizes in Inches?

Pixel sizes in inches describe the physical dimensions an image will have when a specific pixel count is printed or rendered at a certain resolution. A pixel is a tiny unit used to represent digital images. An inch is a physical measurement. They become directly related through PPI.

For example:

  • 600 pixels at 300 PPI = 2 inches
  • 1200 pixels at 300 PPI = 4 inches
  • 1800 pixels at 300 PPI = 6 inches
  • 2400 pixels at 300 PPI = 8 inches

This is especially important for printing because an image can have plenty of pixels but still be printed at different physical sizes.

How to Convert Pixel Sizes in Inches

The basic formula is simple:

Pixel width ÷ PPI = width in inches

And for height:

Pixel height ÷ PPI = height in inches

Example: 1200 × 1800 Pixels

Suppose you have a portrait image measuring 1200 × 1800 pixels and want to print it at 300 PPI.

Width:

1200 ÷ 300 = 4 inches

Height:

1800 ÷ 300 = 6 inches

So the physical print size is:

4 × 6 inches

This is a common example of how a digital image can be translated into a real world print dimension.

Pixel Sizes in Inches Conversion Chart

Here are more examples to make conversions easier:

Digital Image150 PPI200 PPI300 PPI
300 × 300 px2 × 2 in1.5 × 1.5 in1 × 1 in
600 × 600 px4 × 4 in3 × 3 in2 × 2 in
900 × 1200 px6 × 8 in4.5 × 6 in3 × 4 in
1200 × 1800 px8 × 12 in6 × 9 in4 × 6 in
1500 × 2100 px10 × 14 in7.5 × 10.5 in5 × 7 in
2400 × 3000 px16 × 20 in12 × 15 in8 × 10 in

These are mathematical conversions based on the stated PPI. Your actual print quality can also depend on the printer, image quality paper and viewing distance.

Why Does PPI Matter?

PPI stands for pixels per inch. It indicates how many pixels are assigned to each inch of physical output. A higher PPI generally places more image detail into a smaller physical area. A lower PPI spreads the same number of pixels over a larger physical area.

For example, a 2400 pixel wide image can be:

  • 8 inches wide at 300 PPI
  • 12 inches wide at 200 PPI
  • 16 inches wide at 150 PPI

The pixel count stays the same but the physical size changes. This is why simply saying that an image is “2400 pixels” is incomplete when discussing printing.

Common Pixel to Inch Examples

600 Pixels in Inches

At 300 PPI:

600 ÷ 300 = 2 inches

At 150 PPI:

600 ÷ 150 = 4 inches

1200 Pixels in Inches

At 300 PPI:

1200 ÷ 300 = 4 inches

At 200 PPI:

1200 ÷ 200 = 6 inches

At 150 PPI:

1200 ÷ 150 = 8 inches

2400 Pixels in Inches

At 300 PPI:

2400 ÷ 300 = 8 inches

At 200 PPI:

2400 ÷ 200 = 12 inches

At 150 PPI:

2400 ÷ 150 = 16 inches

These examples show why the PPI value should always be included when someone asks for pixel sizes in inches.

Pixels vs. Inches: Which Measurement Should You Use?

The right measurement depends on what you are doing.

Use CaseBest Measurement
Website imagesPixels
Social media graphicsPixels
Mobile and desktop graphicsPixels
Photo printingInches + PPI
PostersInches + PPI
Physical marketing materialsInches + PPI
Digital screen layoutsPixels

For online content designers normally work with pixel dimensions because screens display digital pixels directly. For printed materials physical measurements such as inches become more useful together with a suitable resolution.

How to Check and Change Image Size

You can usually check image dimensions through your image editor or operating system.

Step 1: Check the pixel dimensions

Look for the image’s width and height such as:

1920 × 1080 pixels

Step 2: Check the PPI or resolution setting

Depending on the software this may appear under image size properties, resize, or print settings.

Step 3: Calculate the physical dimensions

Use:

Width in inches = pixel width ÷ PPI

Height in inches = pixel height ÷ PPI

Step 4: Decide whether you need resizing

If your physical dimensions are not suitable you may need to resize the image. Avoid enlarging a low resolution photo more than necessary because increasing dimensions cannot automatically recreate missing original detail. For quick image adjustments you can also use BGImageSnap to work with your images before preparing them for your final use.

Common Mistakes When Converting Pixels to Inches

1. Assuming Pixels Always Equal a Fixed Number of Inches

They do not. The conversion depends on PPI.

2. Ignoring the Image’s Aspect Ratio

Changing width and height independently can stretch or distort a photo.

3. Confusing DPI and PPI

PPI describes image pixels per inch while DPI is commonly associated with printer output. The terms are often used interchangeably in everyday image discussions but they are not technically identical.

4. Enlarging Small Images Too Much

Making a small image much larger can reduce visible quality. Starting with sufficient original resolution is usually better.

5. Using Print Measurements for Web Images

A website generally cares about pixel dimensions rather than a physical inch measurement.

Visual Opportunities

A useful visual for this article would be a pixel to inch infographic showing:

Pixels → PPI → Inches

A second graphic could show the same image at 150, 200 and 300 PPI to demonstrate how physical dimensions change. A short screen recording video showing how to check image dimensions in a common image editor would also improve usability.

FAQs

How many pixels are in 1 inch?

There is no single answer because it depends on PPI. At 300 PPI 1 inch corresponds to 300 pixels.

What is 3000 pixels in inches?

At 300 PPI 3000 pixels equals 10 inches. At 150 PPI it equals 20 inches.

Is 1 inch always 96 pixels?

No. A 96 pixel per inch value may be used in certain digital or software contexts but image to inch conversion for printing depends on the PPI you specify.

What pixel size is 4 × 6 inches?

No. A 96 pixel per inch value may be used in certain digital or software contexts but image to inch conversion for printing depends on the PPI you specify.

Does changing PPI increase image quality?

Changing the PPI metadata alone does not create new image detail. Image quality depends heavily on the actual pixel dimensions and original image information.

Should I use pixels or inches for a website image?

Use pixels for most web images because digital layouts are defined by pixel dimensions and responsive display behavior.

Can I convert pixels to inches without PPI?

Not accurately. You need a PPI value to calculate a physical size in inches.

Conclusion

Understanding pixel sizes in inches becomes much easier once you remember one formula:

Inches = Pixels ÷ PPI

The same image can have different physical dimensions depending on its resolution setting. For digital content pixel dimensions are usually the most practical measurement. For printing combine the pixel dimensions with the required physical size and PPI. Before printing or resizing an important image check its width, height, aspect ratio and resolution. That simple step can help you avoid unexpected sizing and quality problems. For convenient image preparation and editing visit BGImageSnap and prepare your image before using it in your next digital or print project.